


Cypress is a tool that contains all necessary components for website testing in one package, created to make tests writing easy and fast.
Objectives of this guide
This guide will:
Present an example how to use Cypress locally
Show you how to automate Cypress tasks in Buddy
To perform the following steps you will need:
Node.js in version 8 or higher
Git repository
IDE/text editor
Downloading an example project
Begin with cloning the example React project: github.com/ahfarmer/emoji-search.
Next, install the required dependencies:
$ npm install
To check if the project works, we will use the command:
$ npm start
Our site should now be available at the address localhost:3000:
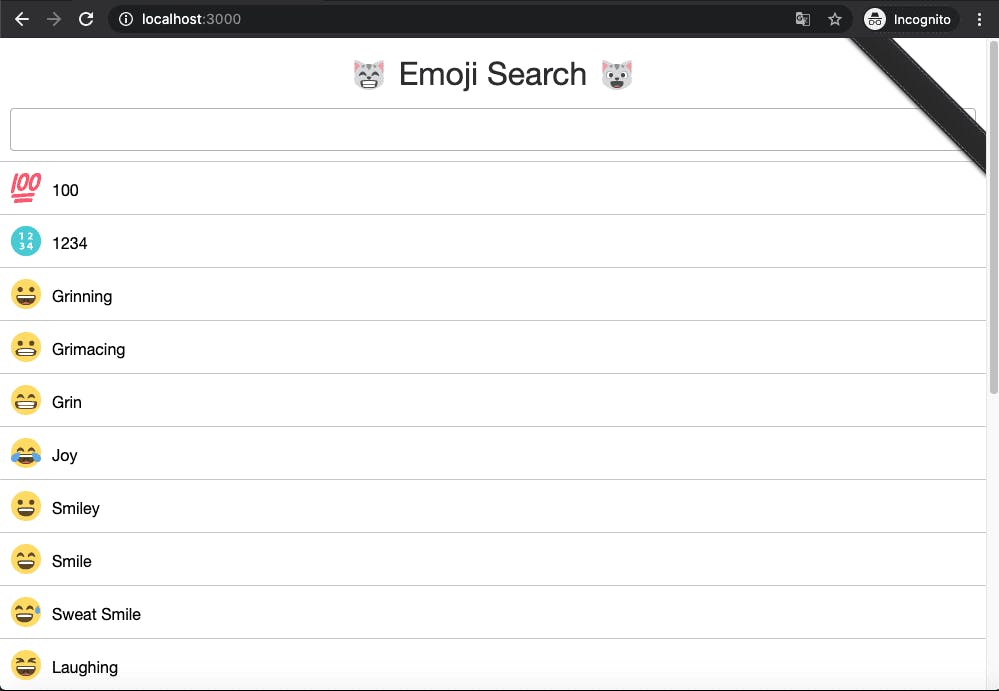 Example website
Cypress installation
Once you have the project to test, it’s time to install Cypress:
$ npm install cypress —save-dev
Now we need to launch it. If you have npm in version >v5.2, run:
$ npx cypress open
Otherwise, use a full path:
$ ./node_modules/.bin/cypress open
You can also use a shortcut:
$ $(npm bin)/cypress open
The command will create a folder named cypress in your project. You should also see a window like this:
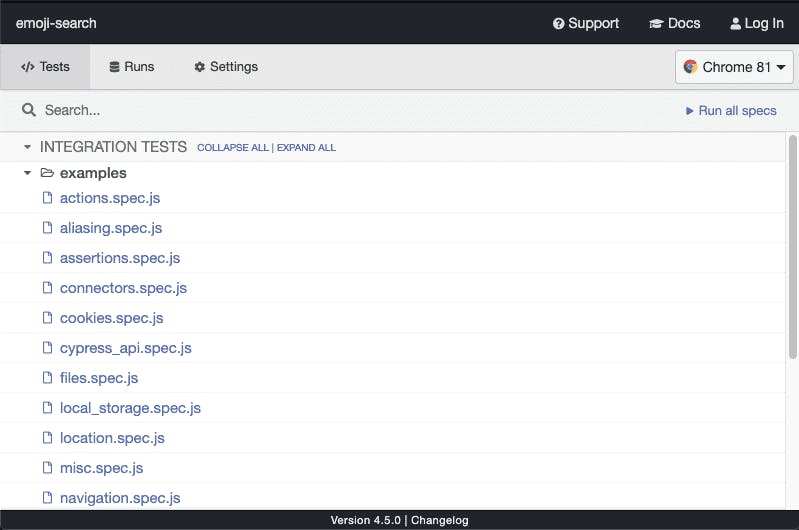 Cypress window
Creating an exemplary test
By default, all tests are stored in the cypress/integration folder which is automatically created on the first Cypress launch. In this example, we'll write a test that will:
check if entering the word “lollipop” will display only one result on the page
check if the tag with the title class contains the appropriate text
Begin with creating a sample_spec.js file in the cypress/integration directory:
The file shall contain the code below:
describe('Sample test', () => {
    it('Search lollipop emoji', () => {
        cy.visit('http://localhost:3000/') // launch project website
        cy.get('input').type('lollipop') // enter 'lollipop' in search
        cy.get('.component-emoji-result-row').should('have.length', 1) // check if only 1 result is returned
        cy.contains('Lollipop').should('have.class', 'title') // check if returned element contains 'title' class
    })
})
You should be able to see the test in the Cypress window:
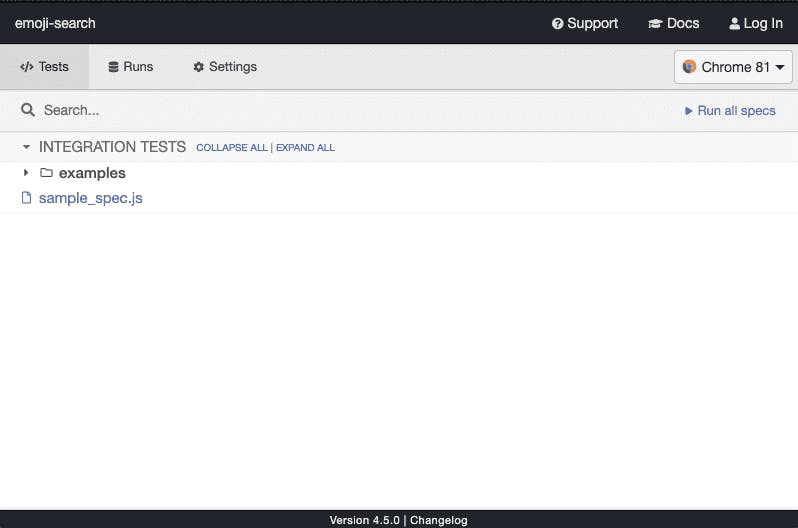 Cypress window with new test
Once you click it, a window with a search engine instance will be opened in which you can preview the performed test live. The result should look as follows (keep in mind that the project with your exemplary website should be running):
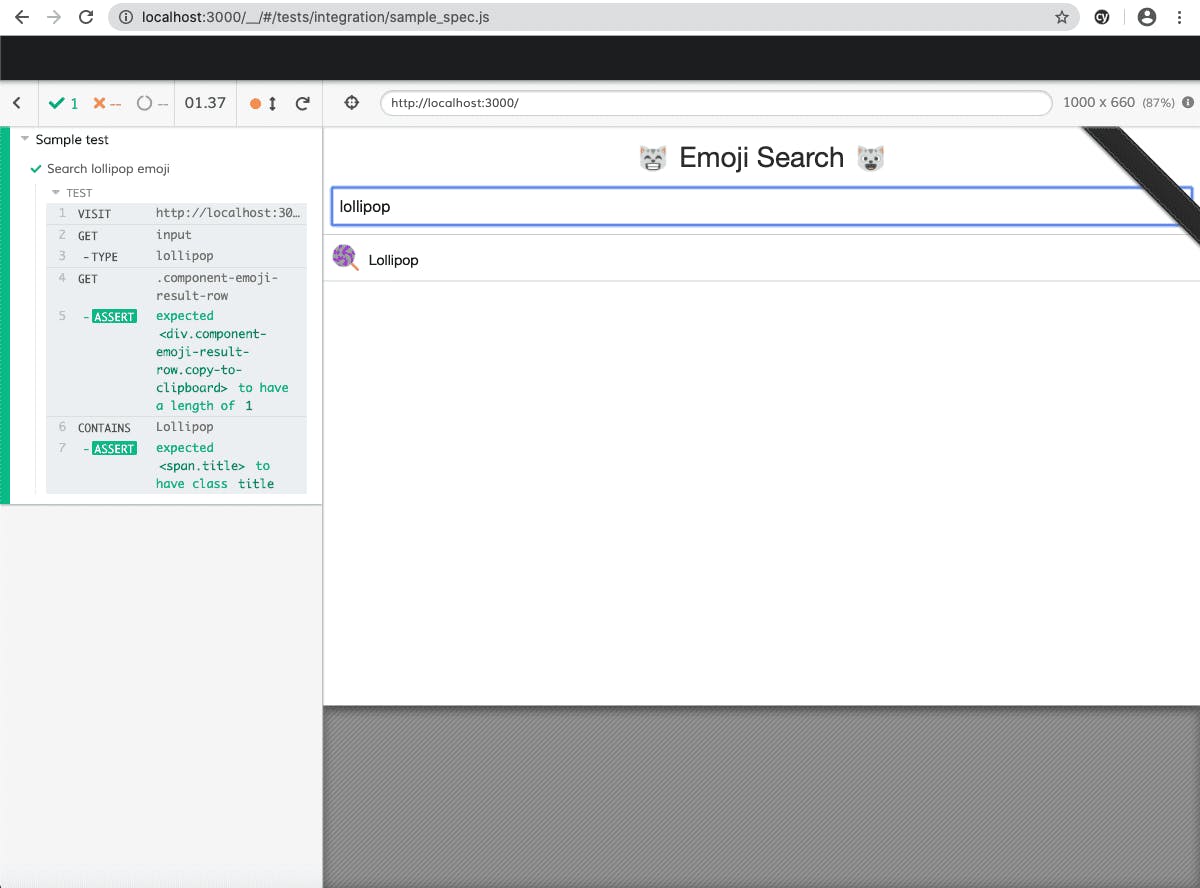 Cypress test after execution
To see other possibilities that Cypress offers and learn how to group a higher number of tests, we recommend to take a look at other example tests in the
cypress/integration/examplesfolder.
Tests automation with Buddy
Buddy is a Continuous Integration and Delivery tool that lets you optimize your testing and deployment process. Contrary to other tools, it’s very easy to use and requires no DevOps experience as the whole process is reproduced into GUI with pipelines and actions. It also sports a dedicated action for Cypress which is basically an isolated container in which you can run your tests.
Preparation
For the purposes of this guide, we’ll use the project above. Make sure to do the following things first, however:
Delete the folder with the example tests:
cypress/integration/examplesInstall
start-server-and-test:
$ npm install start-server-and-test --save-dev
- Add three scripts in the package.json file at the end of the scripts object:
"scripts": {
         ...
         "start-server": "npm start",
         "cy:run": "cypress run",
         "cy:ci": "start-server-and-test start-server http://localhost:3000 cy:run"
     }
- Upload the project to a Git repository, for example, GitHub.
Pipeline configuration
With everything ready, log in to your Buddy account and create a new project:
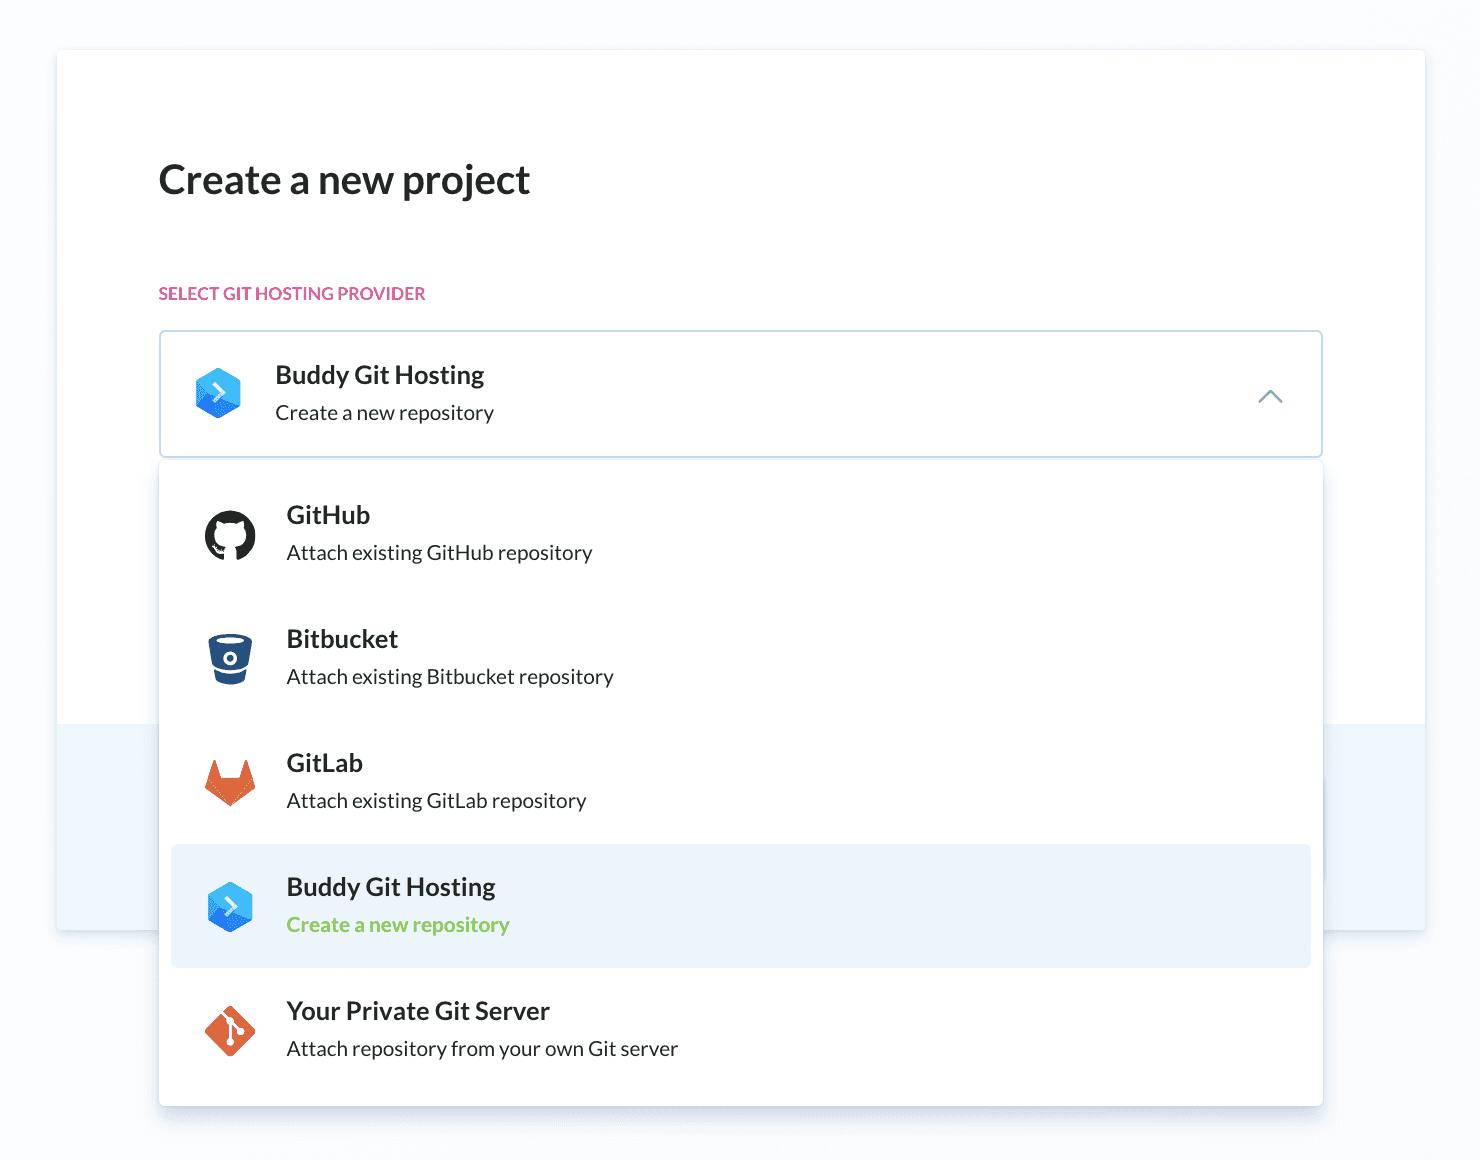 Selecting Git provider
Next, add a new pipeline. You can set the pipeline to run on every push to the repository, manually on click, or recurrently on the selected time interval. In this case, we’ll set it to automatic mode:
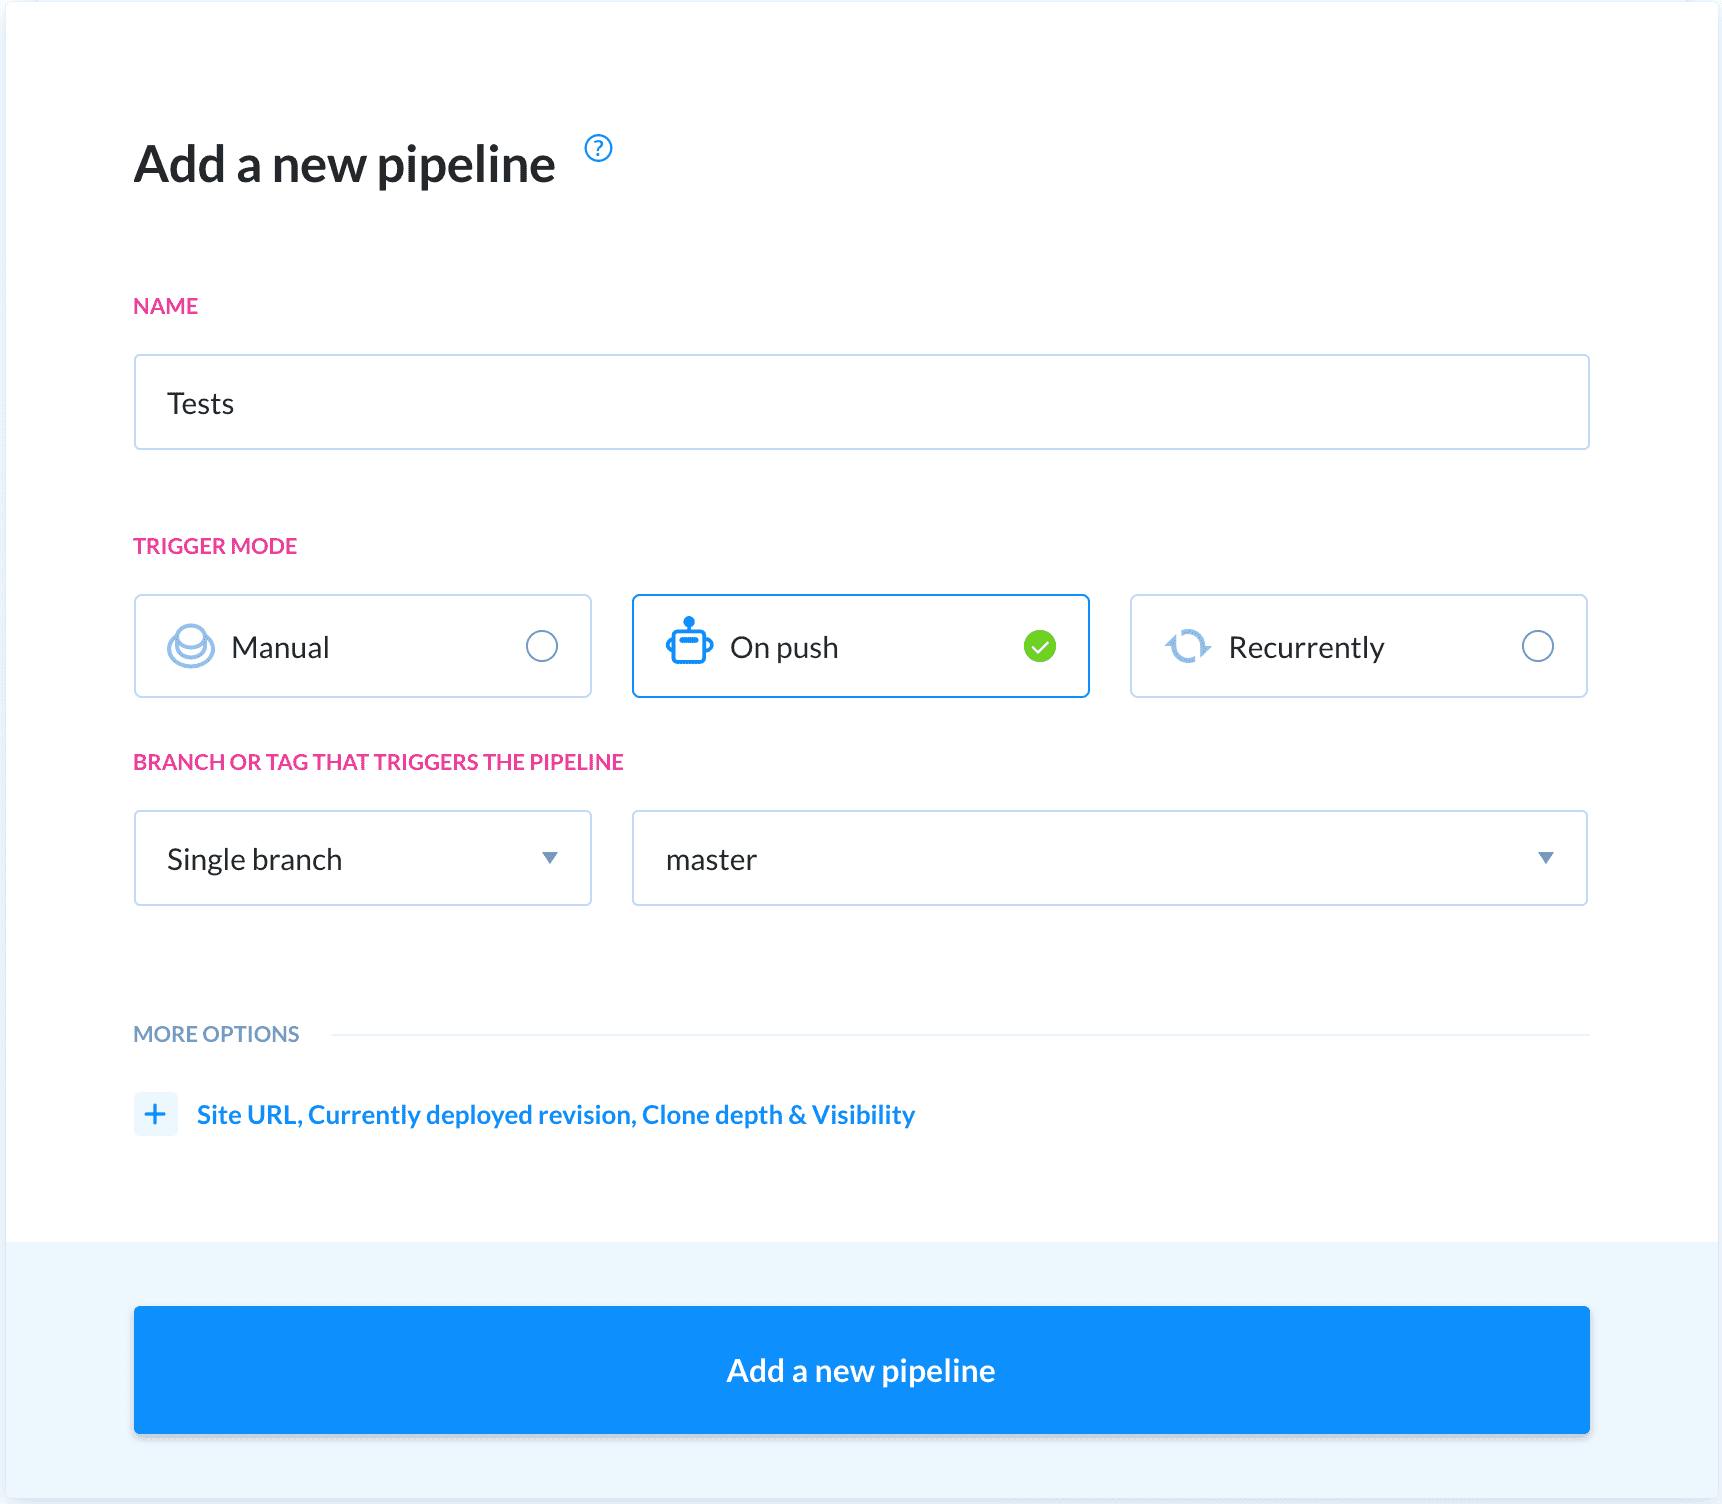 Pipeline creator
With the pipeline in place, you can add the Cypress action:
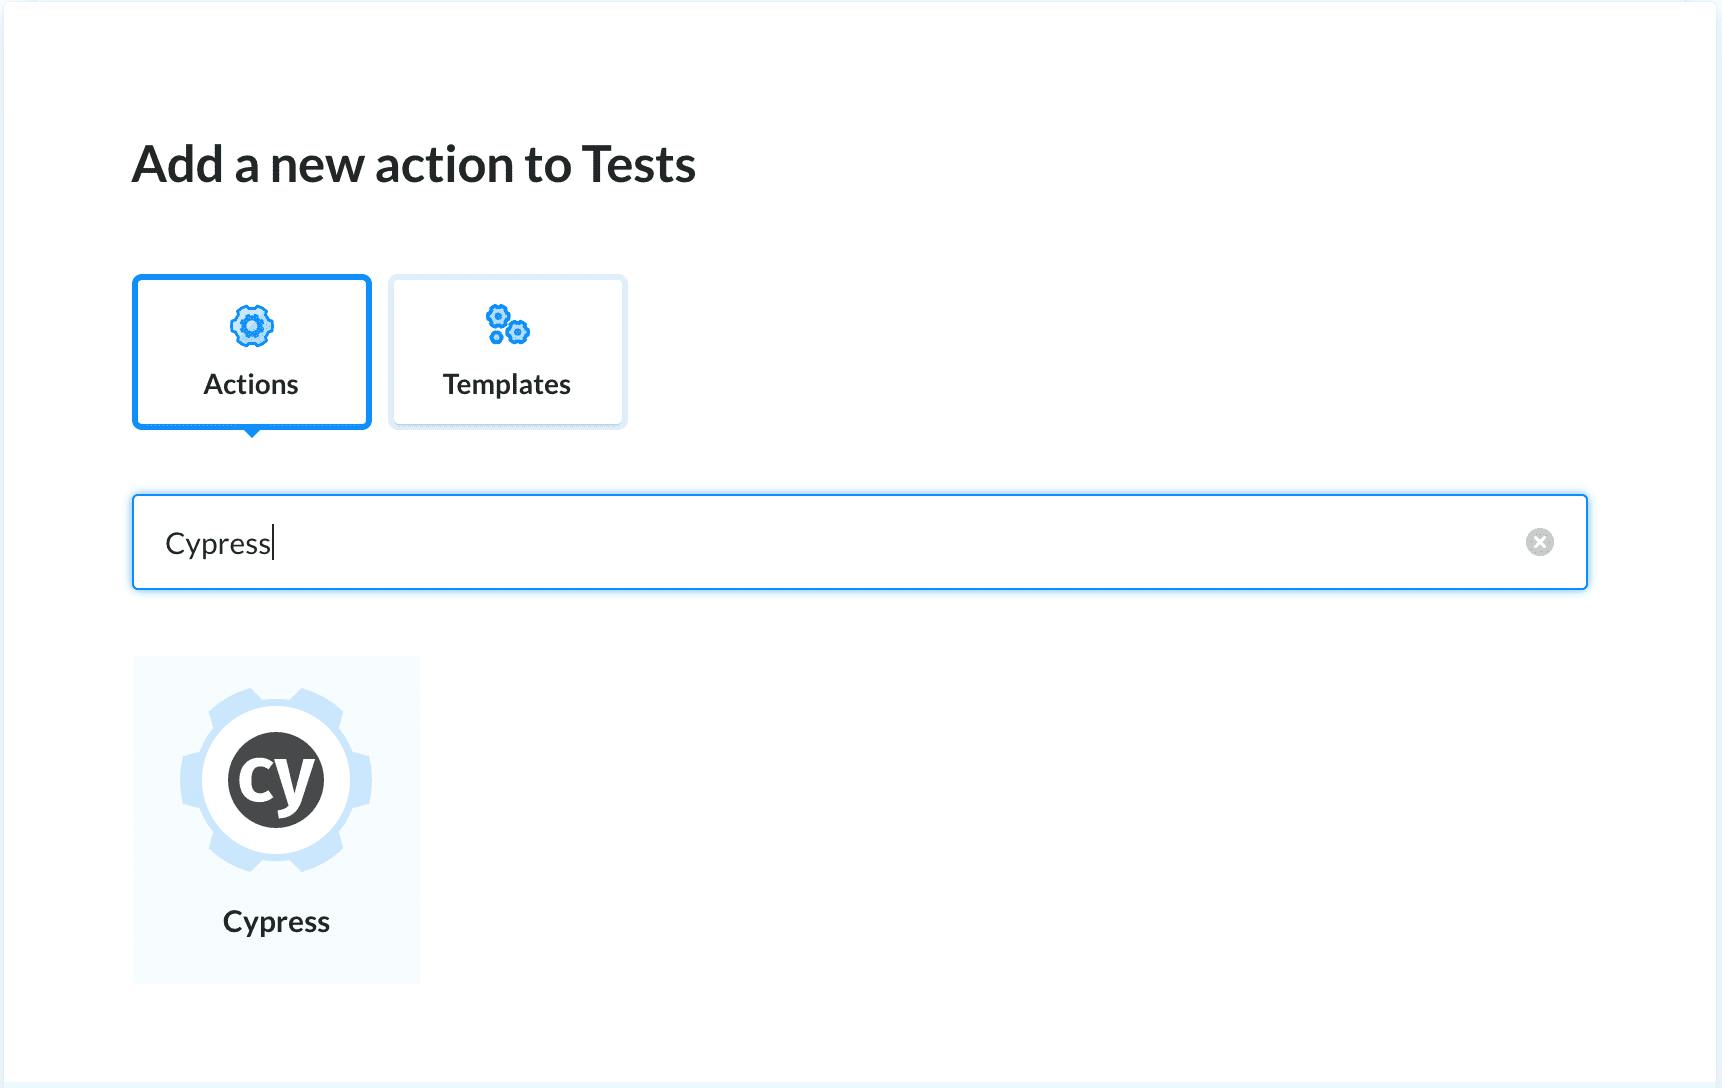 Pipeline browser
In the commands tab, enter:
npm install --force
npm run cy:ci
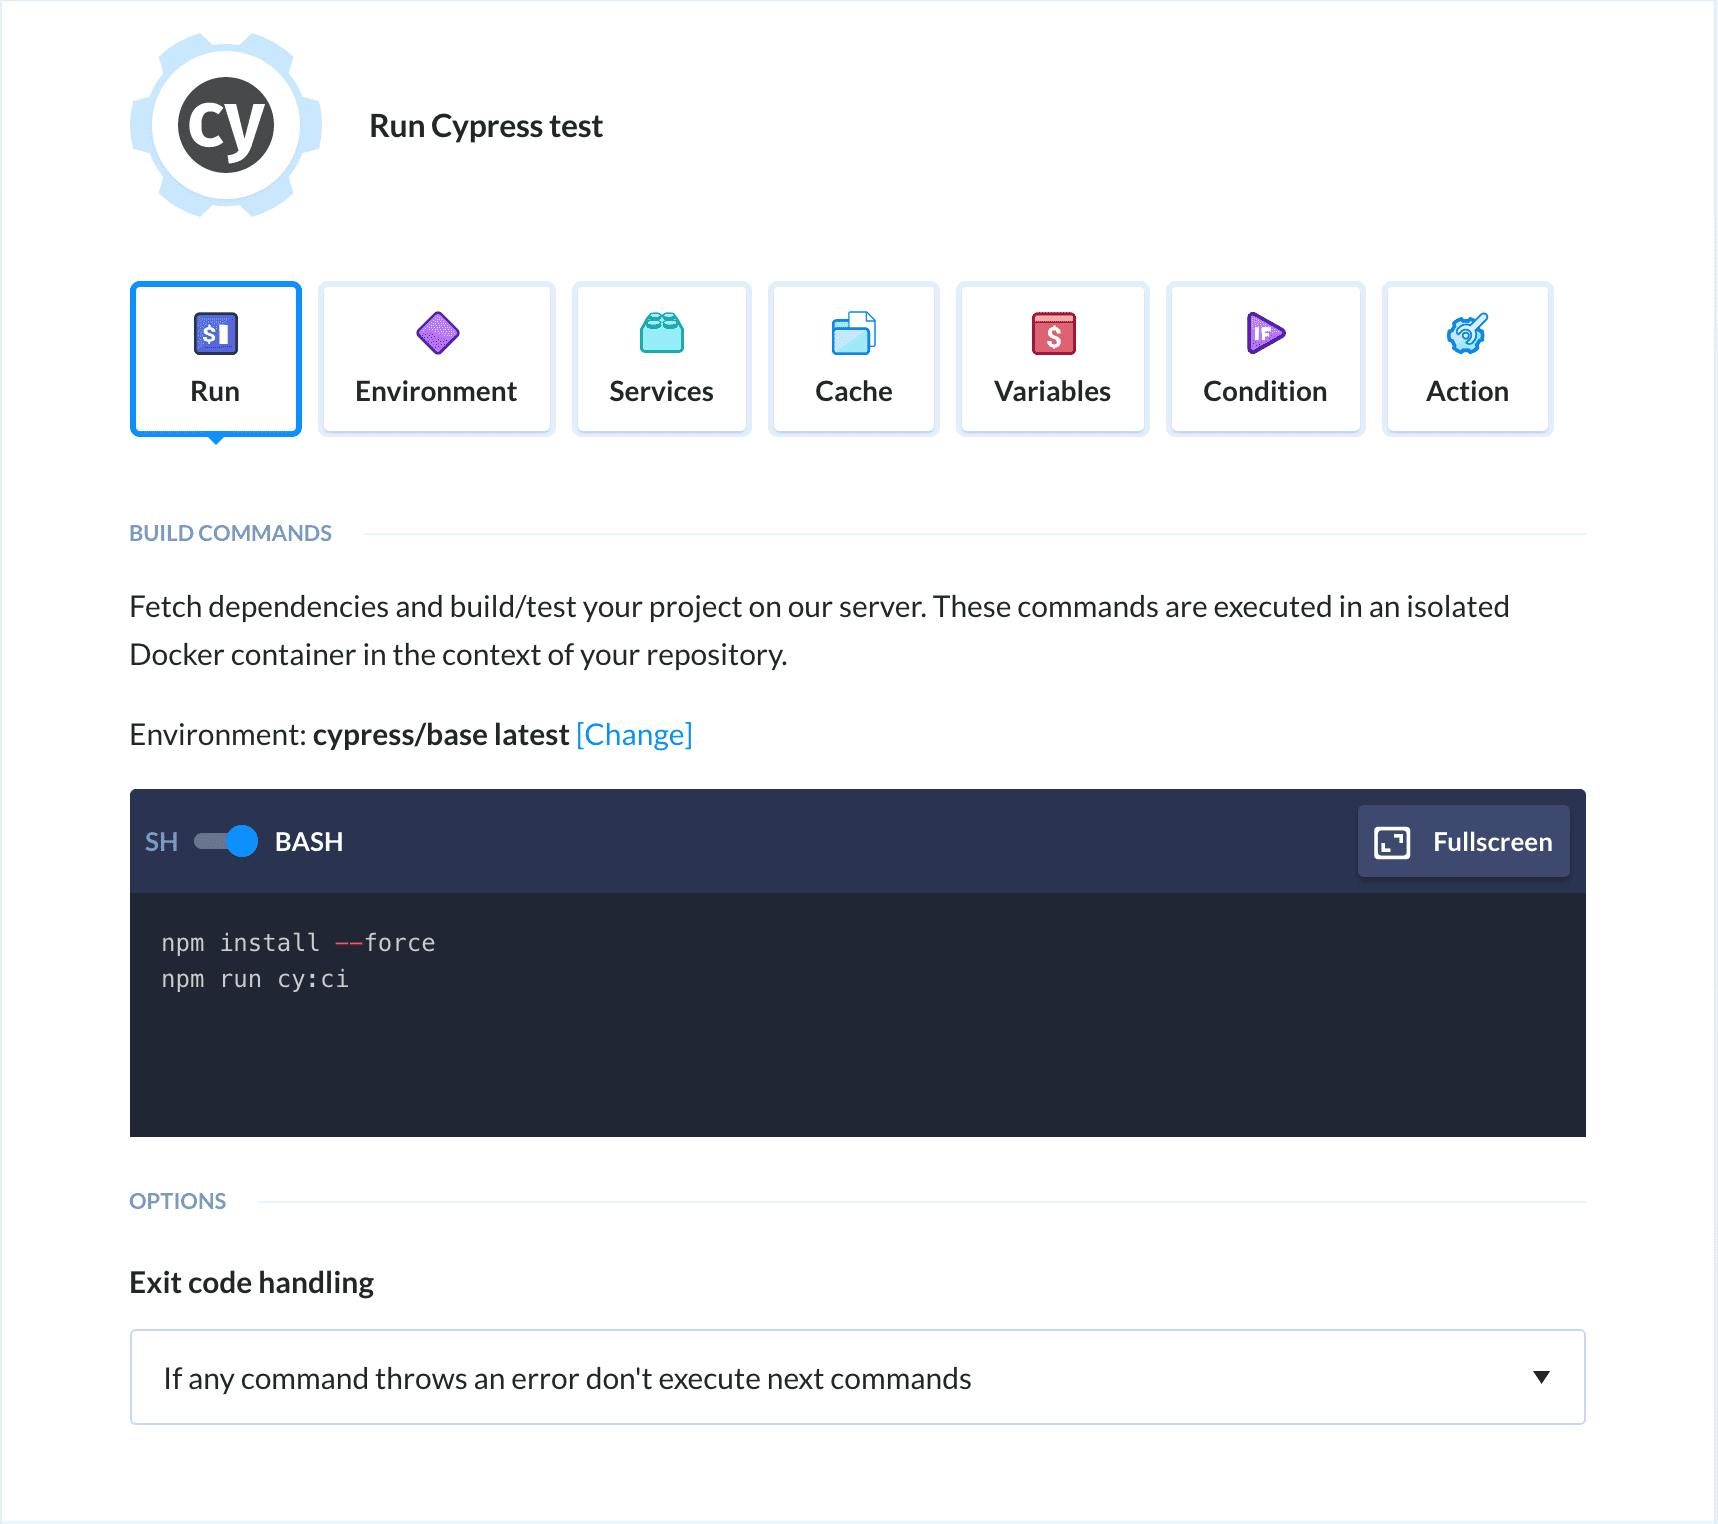 Cypress action creator
That’s it! From now on, Buddy will run your tests whenever a new commit appears in the selected branch.
Summary
This guide is a very straightforward introduction to Cypress and test automation. However, with Buddy you can do much more: upload files to the server, attach MySQL, Redis, and other services required by your tests, manage AWS applications, or release your application to a wide range of cloud services. Make sure to check the related read below to learn how to expand automation in your workflow so you can spend more time coding, and ultimately become a better developer. 😎💪
Related read
Deployments — learn how to configure a pipeline that will deliver your application to the server.
Services and databases — learn how to attach microservices and use them in your builds and tests.
Daily integration tests — learn how to define a pipeline that will automatically run integration, E2E, and browser tests on a specific date and time.