


In the following guide, we’ll show you how to configure a pipeline that will build, test, and deploy a React.js application with zero-downtime. Zero-downtime is a deployment technique that lets you update websites by making them fully available to the end-user during the process.
This guide is based on one of our webinars and has embedded videos with timestamps to particular configuration steps. Click the video under the corresponding step to watch configuration in real-time. Make sure you have SSH installed on your server as we’ll need to run some commands to modify the deployment.
Creating new project
📺 Video Timestamp: 03:10
For the purpose of this guide, we’ll use a simple static React website. If you wish, you can fork the repository from our GitHub profile here.
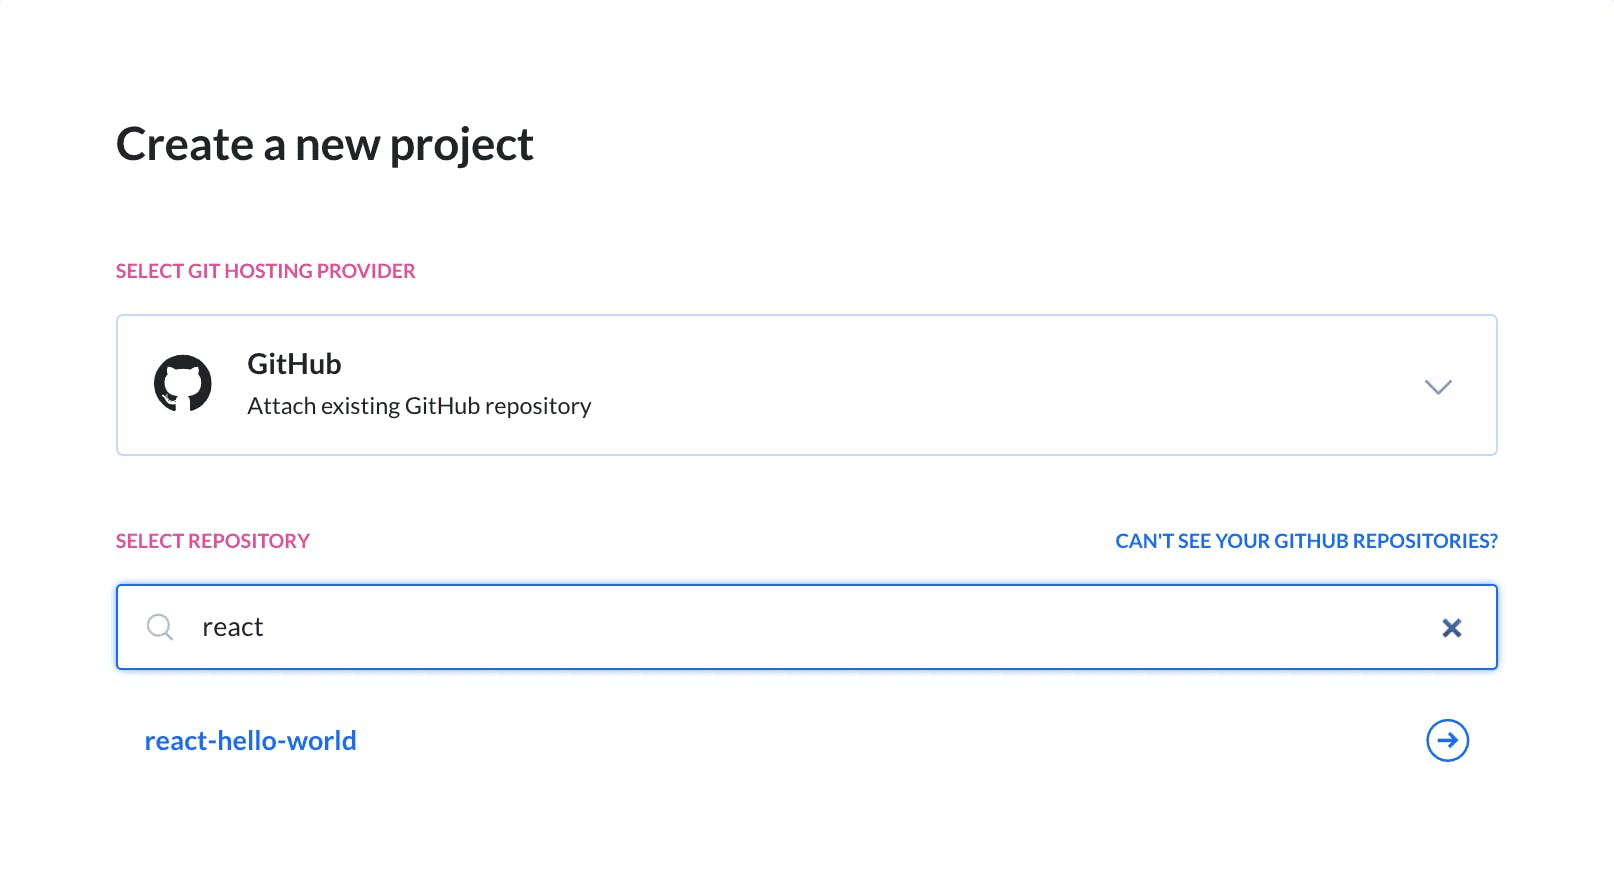
Fire up Buddy and create a new project. Select your Git provider and choose the project with the React application:
Buddy will synchronize with your repository and fetch essential data, including branch structure and tech used. In this case, you’ll see it detected React:
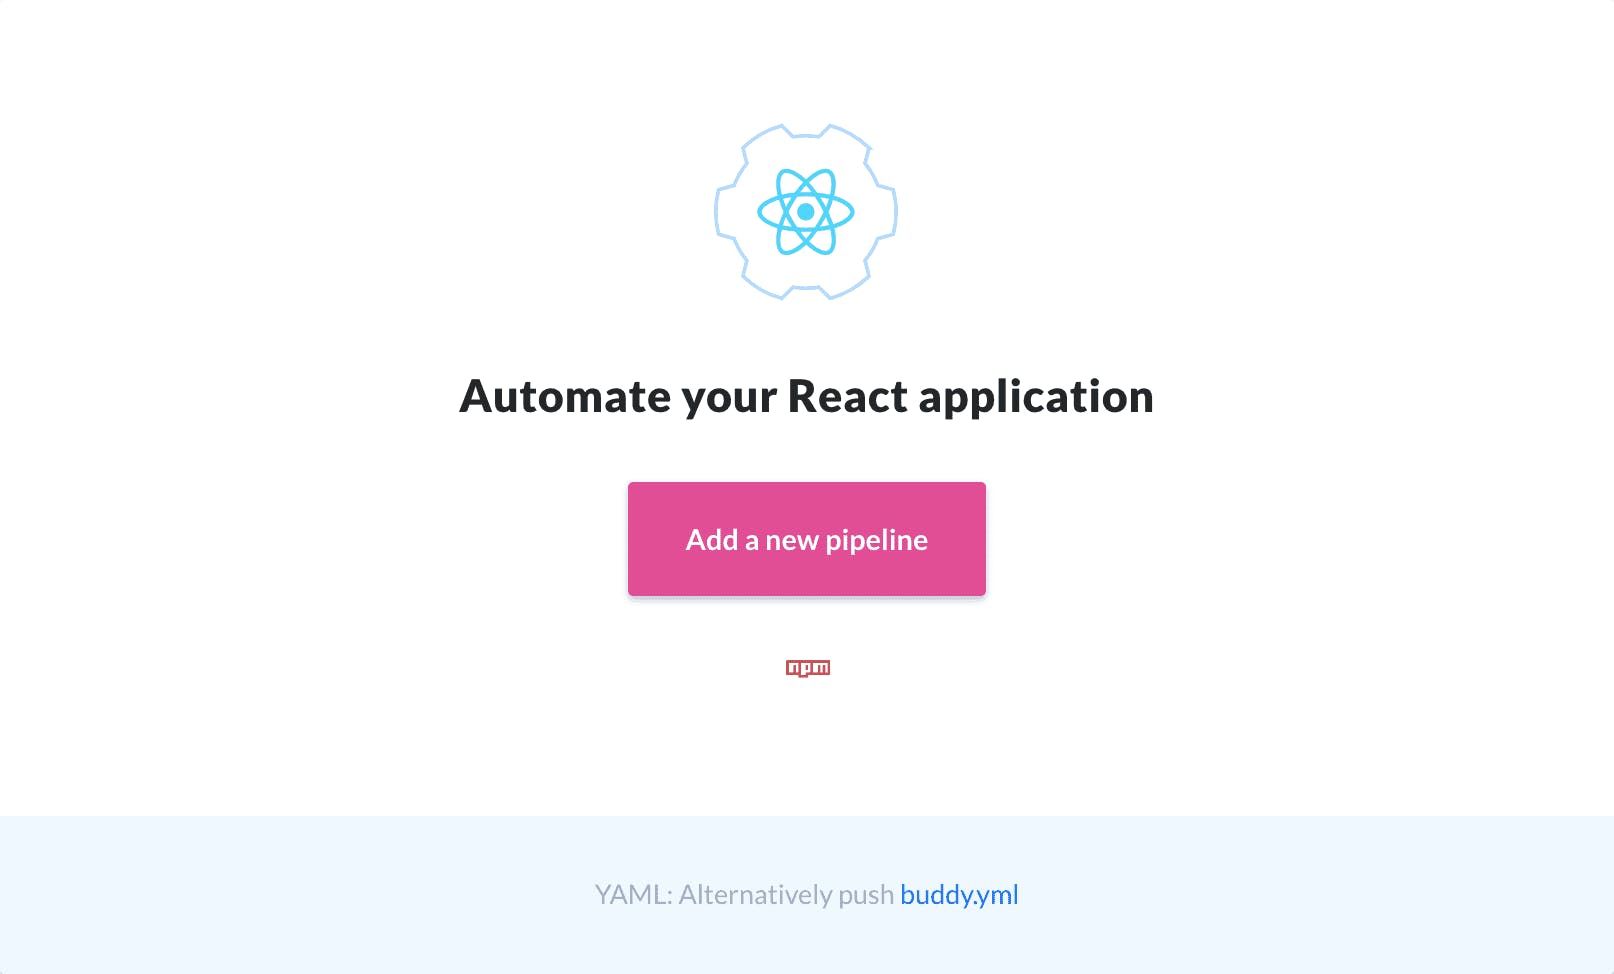
Click the button to begin pipeline configuration.
Pipeline configuration
A pipeline is a set of actions (e.g. builds, tests, or deployments) run in the context of your repository code and triggered on specific conditions.
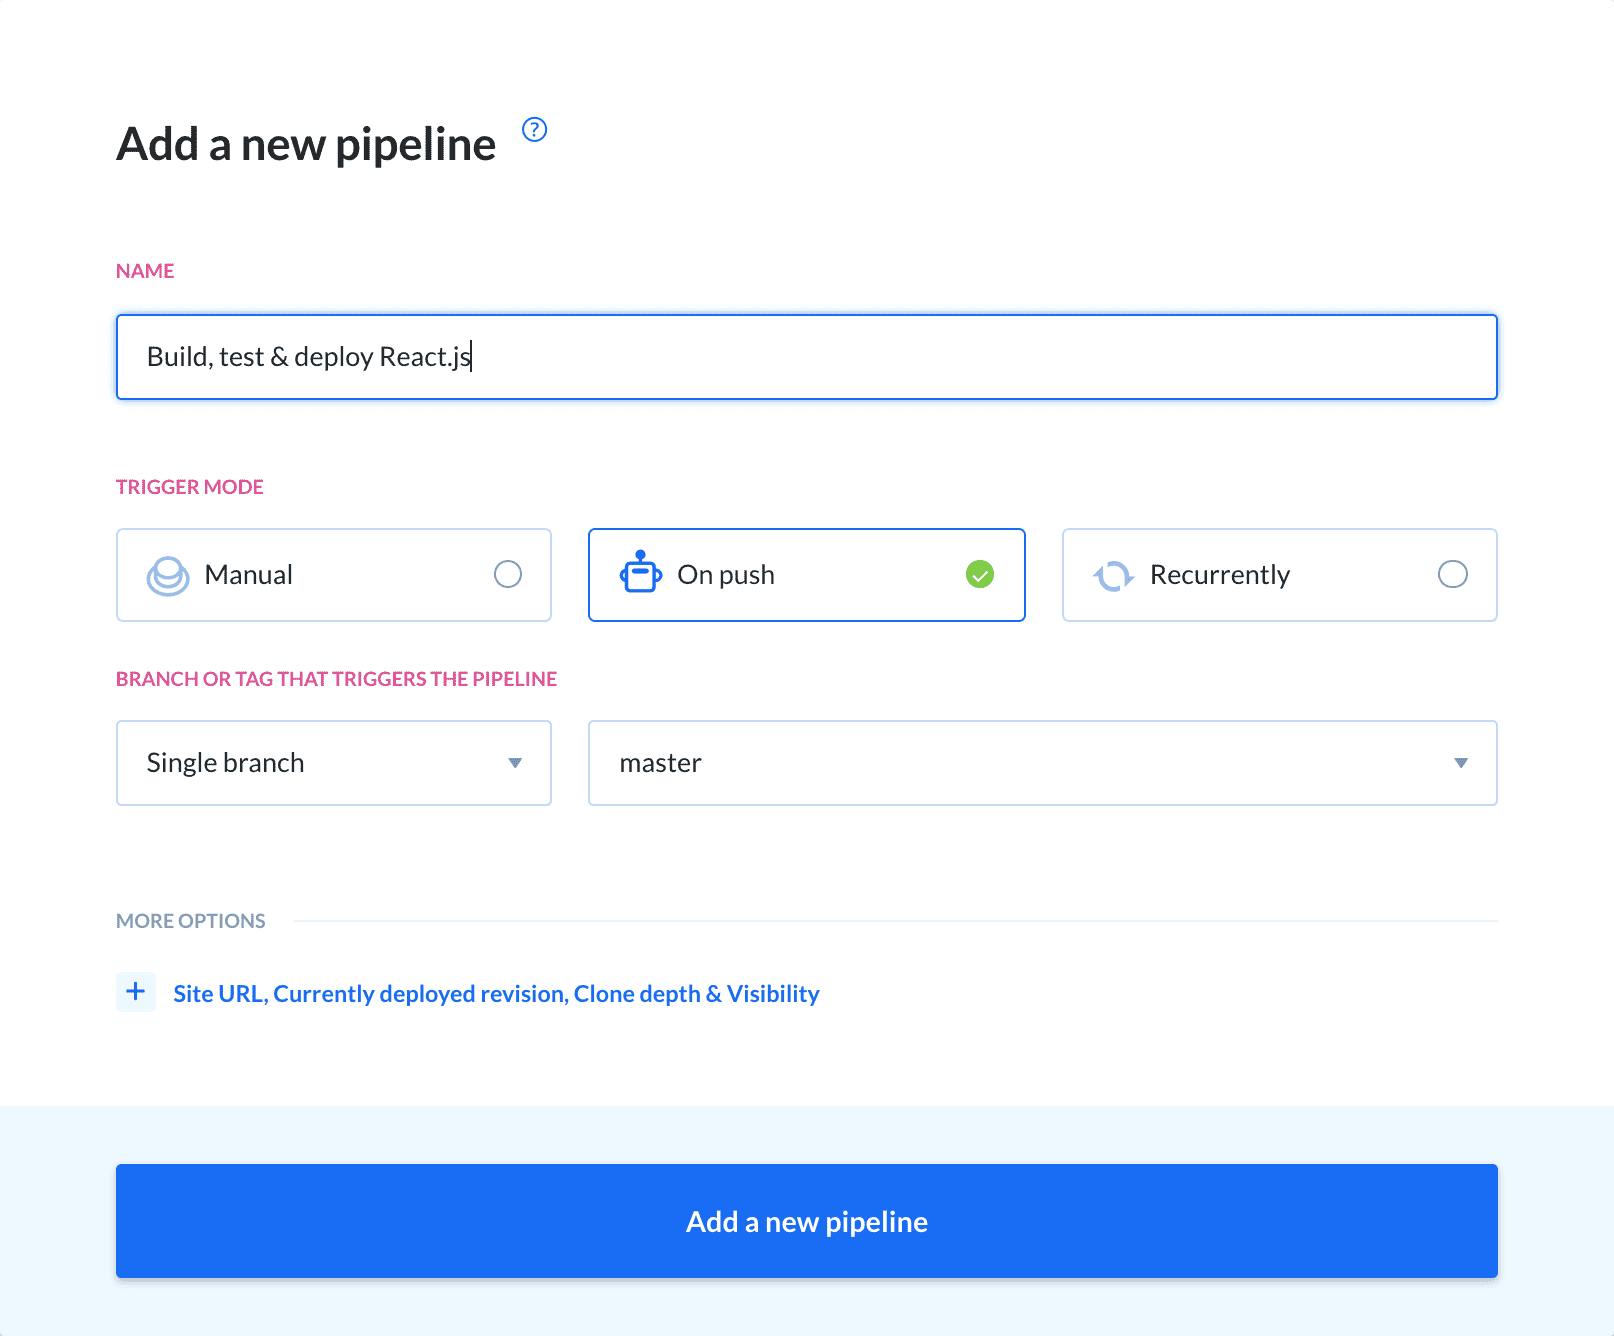
Here we set the trigger conditions and the branch from which we’ll deploy. Since we’re going full auto, set the trigger mode to On push. The project we are using has only one branch (master), so leave it as it is:
Build configuration
Now, Buddy will ask you to add actions to the pipeline. Basing on the contents of the repository, it will suggest a couple of corresponding actions at the top. Select Node.js — we will use it as a template for our build:

Buddy uses isolated containers with preconfigured environments as templates for builds.
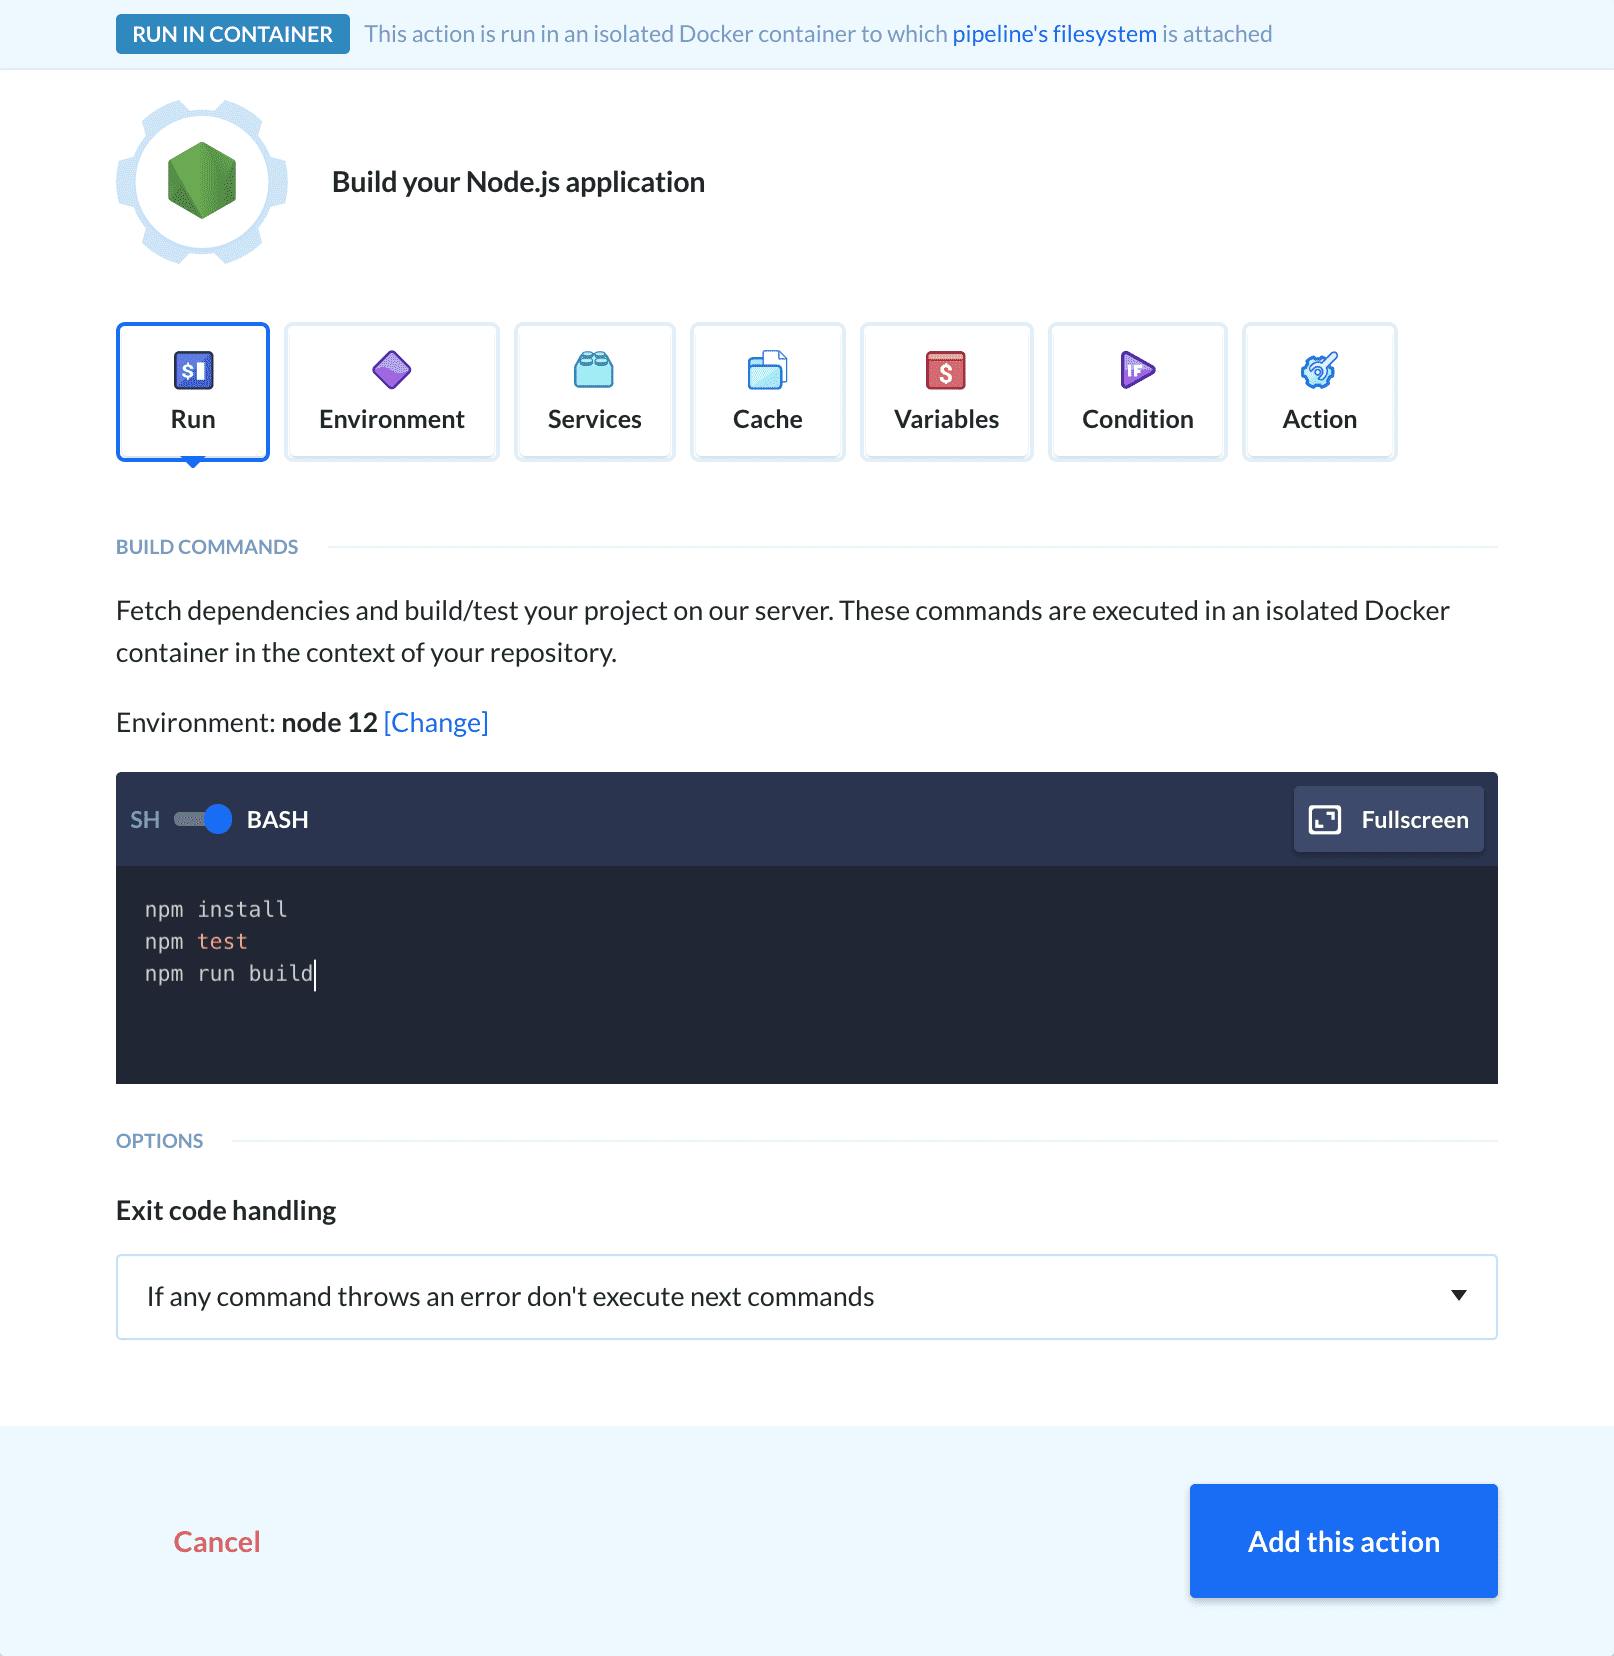
Here you can configure build details, such as the version of Node used and commands that will be run in the container. You can leave the commands as they are — just add npm run build at the end:
npm install
npm test
npm run build
Testing build
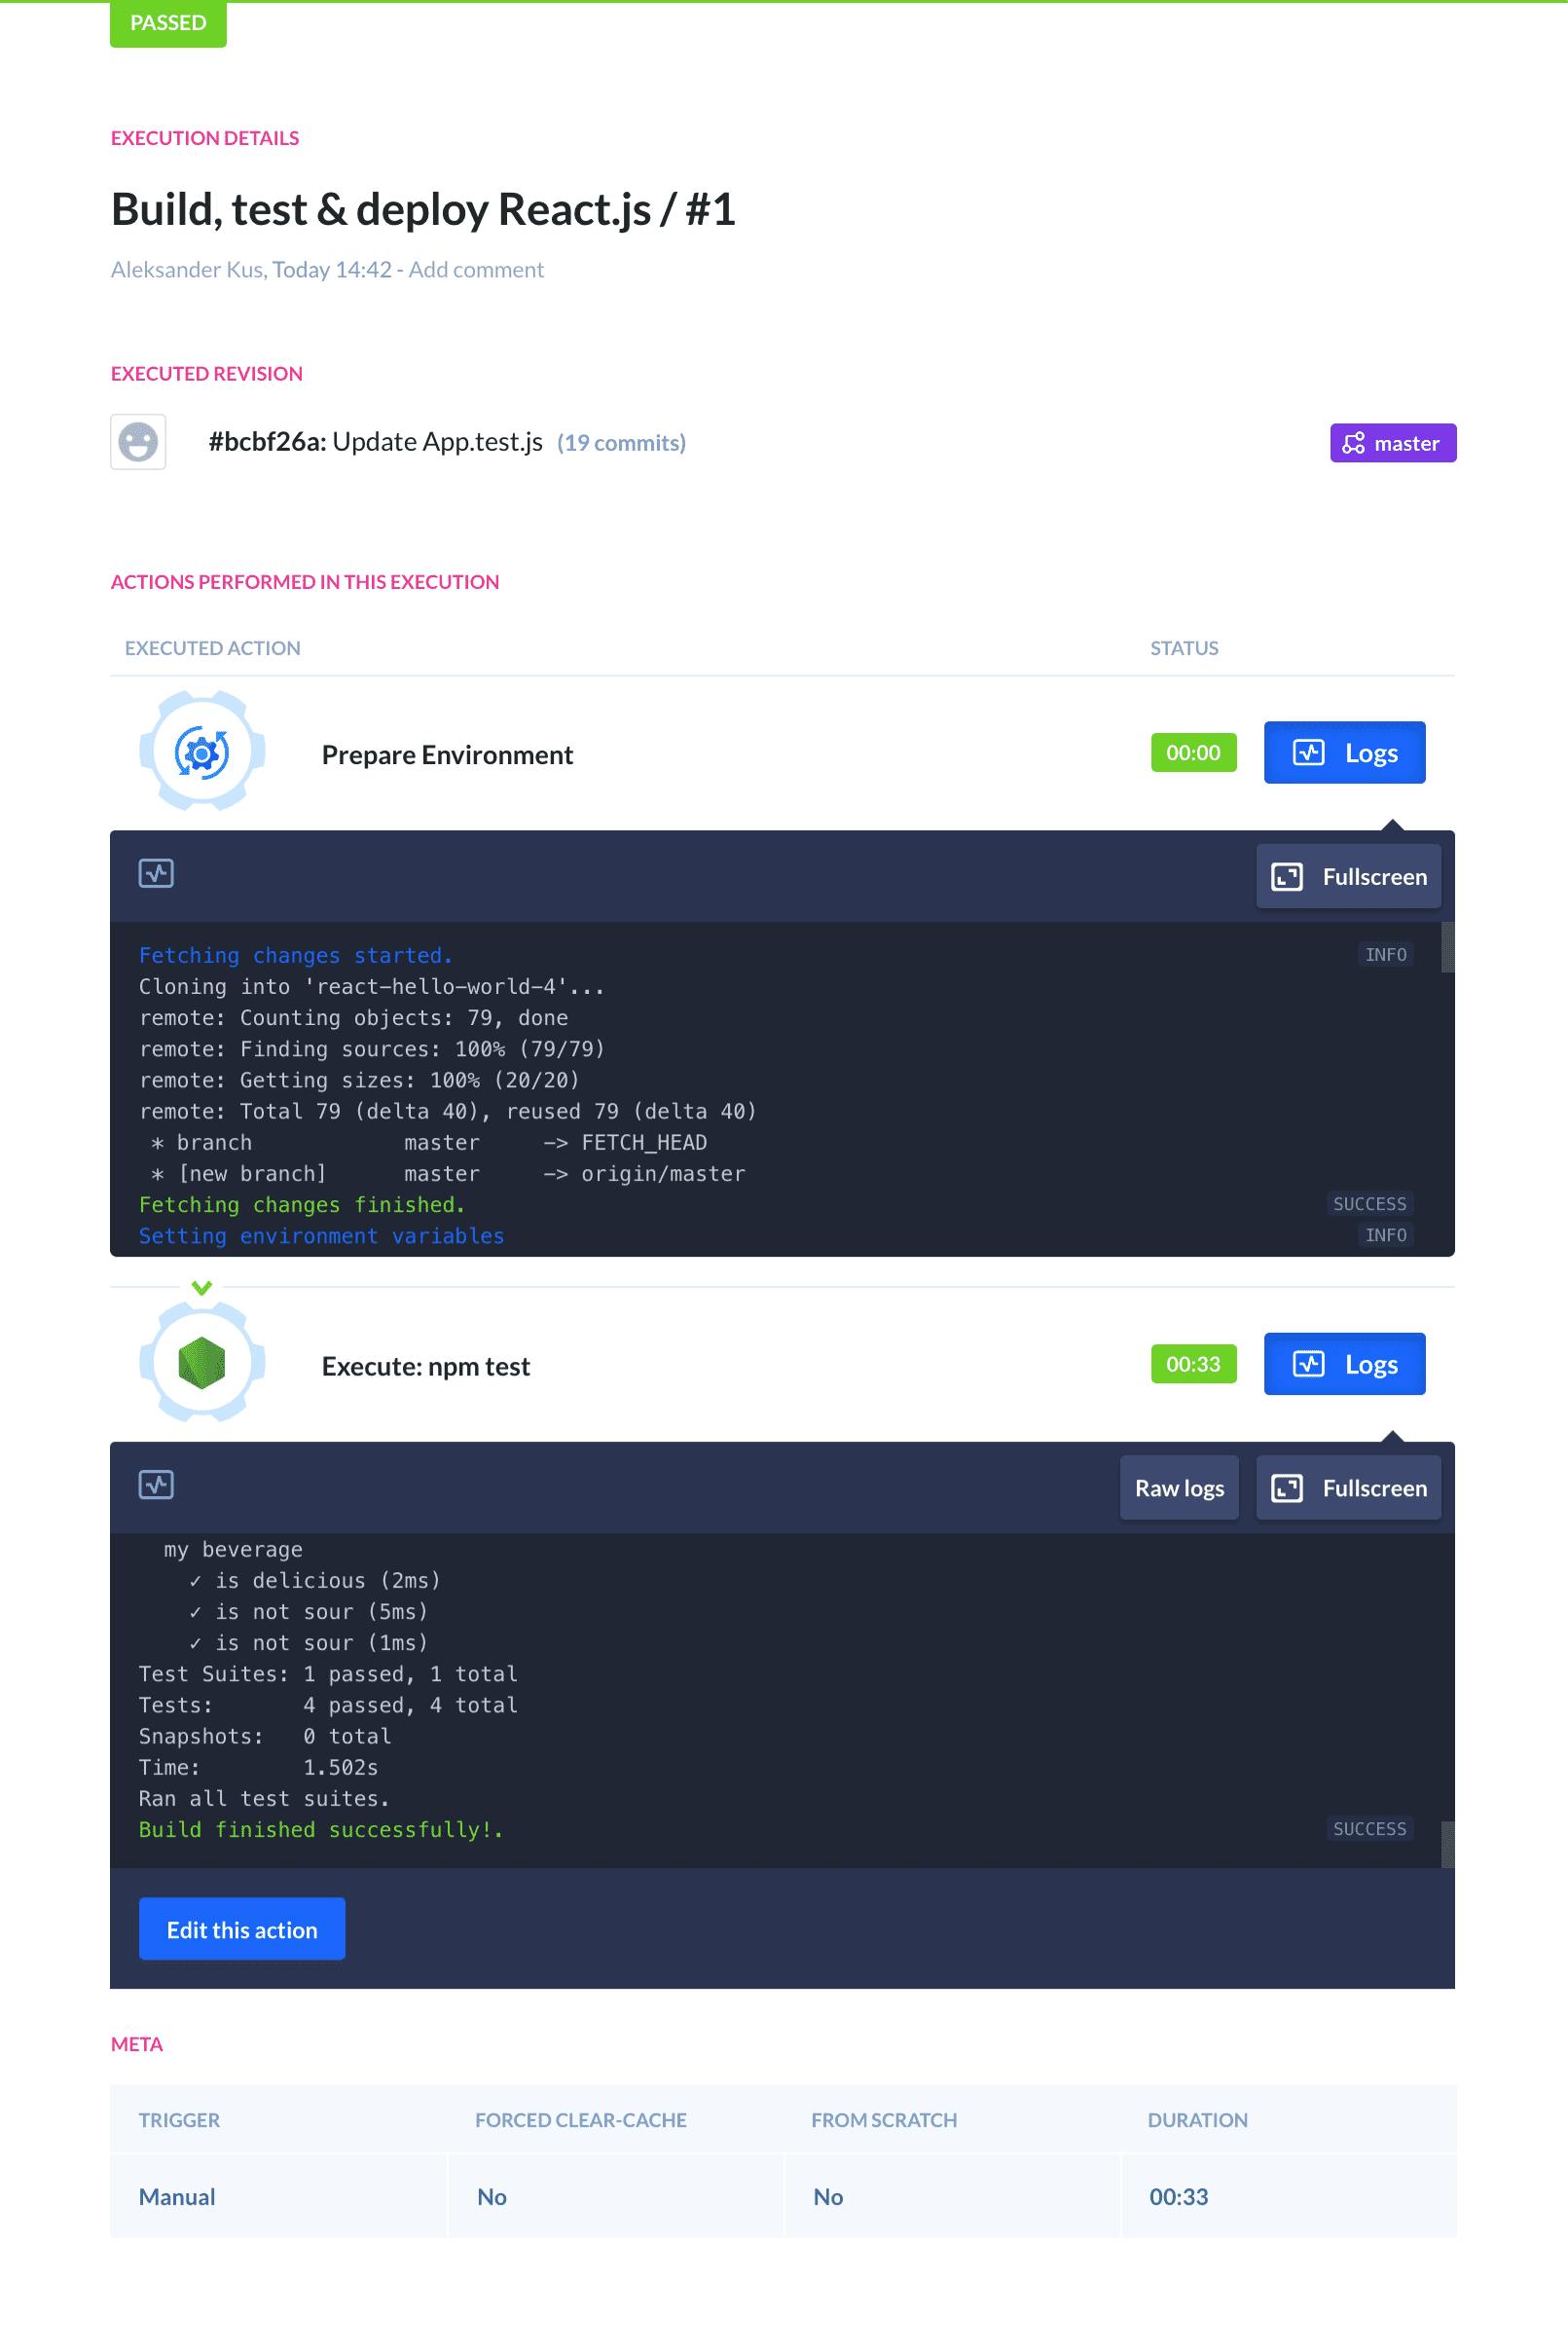
Run the pipeline to see if everything works. In the first step, Buddy will fetch the latest changes from your repository and set up environment variables. In the second step, Buddy will download the required dependencies and cache them in the container — they will remain there for future executions so that you don’t have to download them again. You can click the running execution and expand the logs in the actions for details:
Filesystem
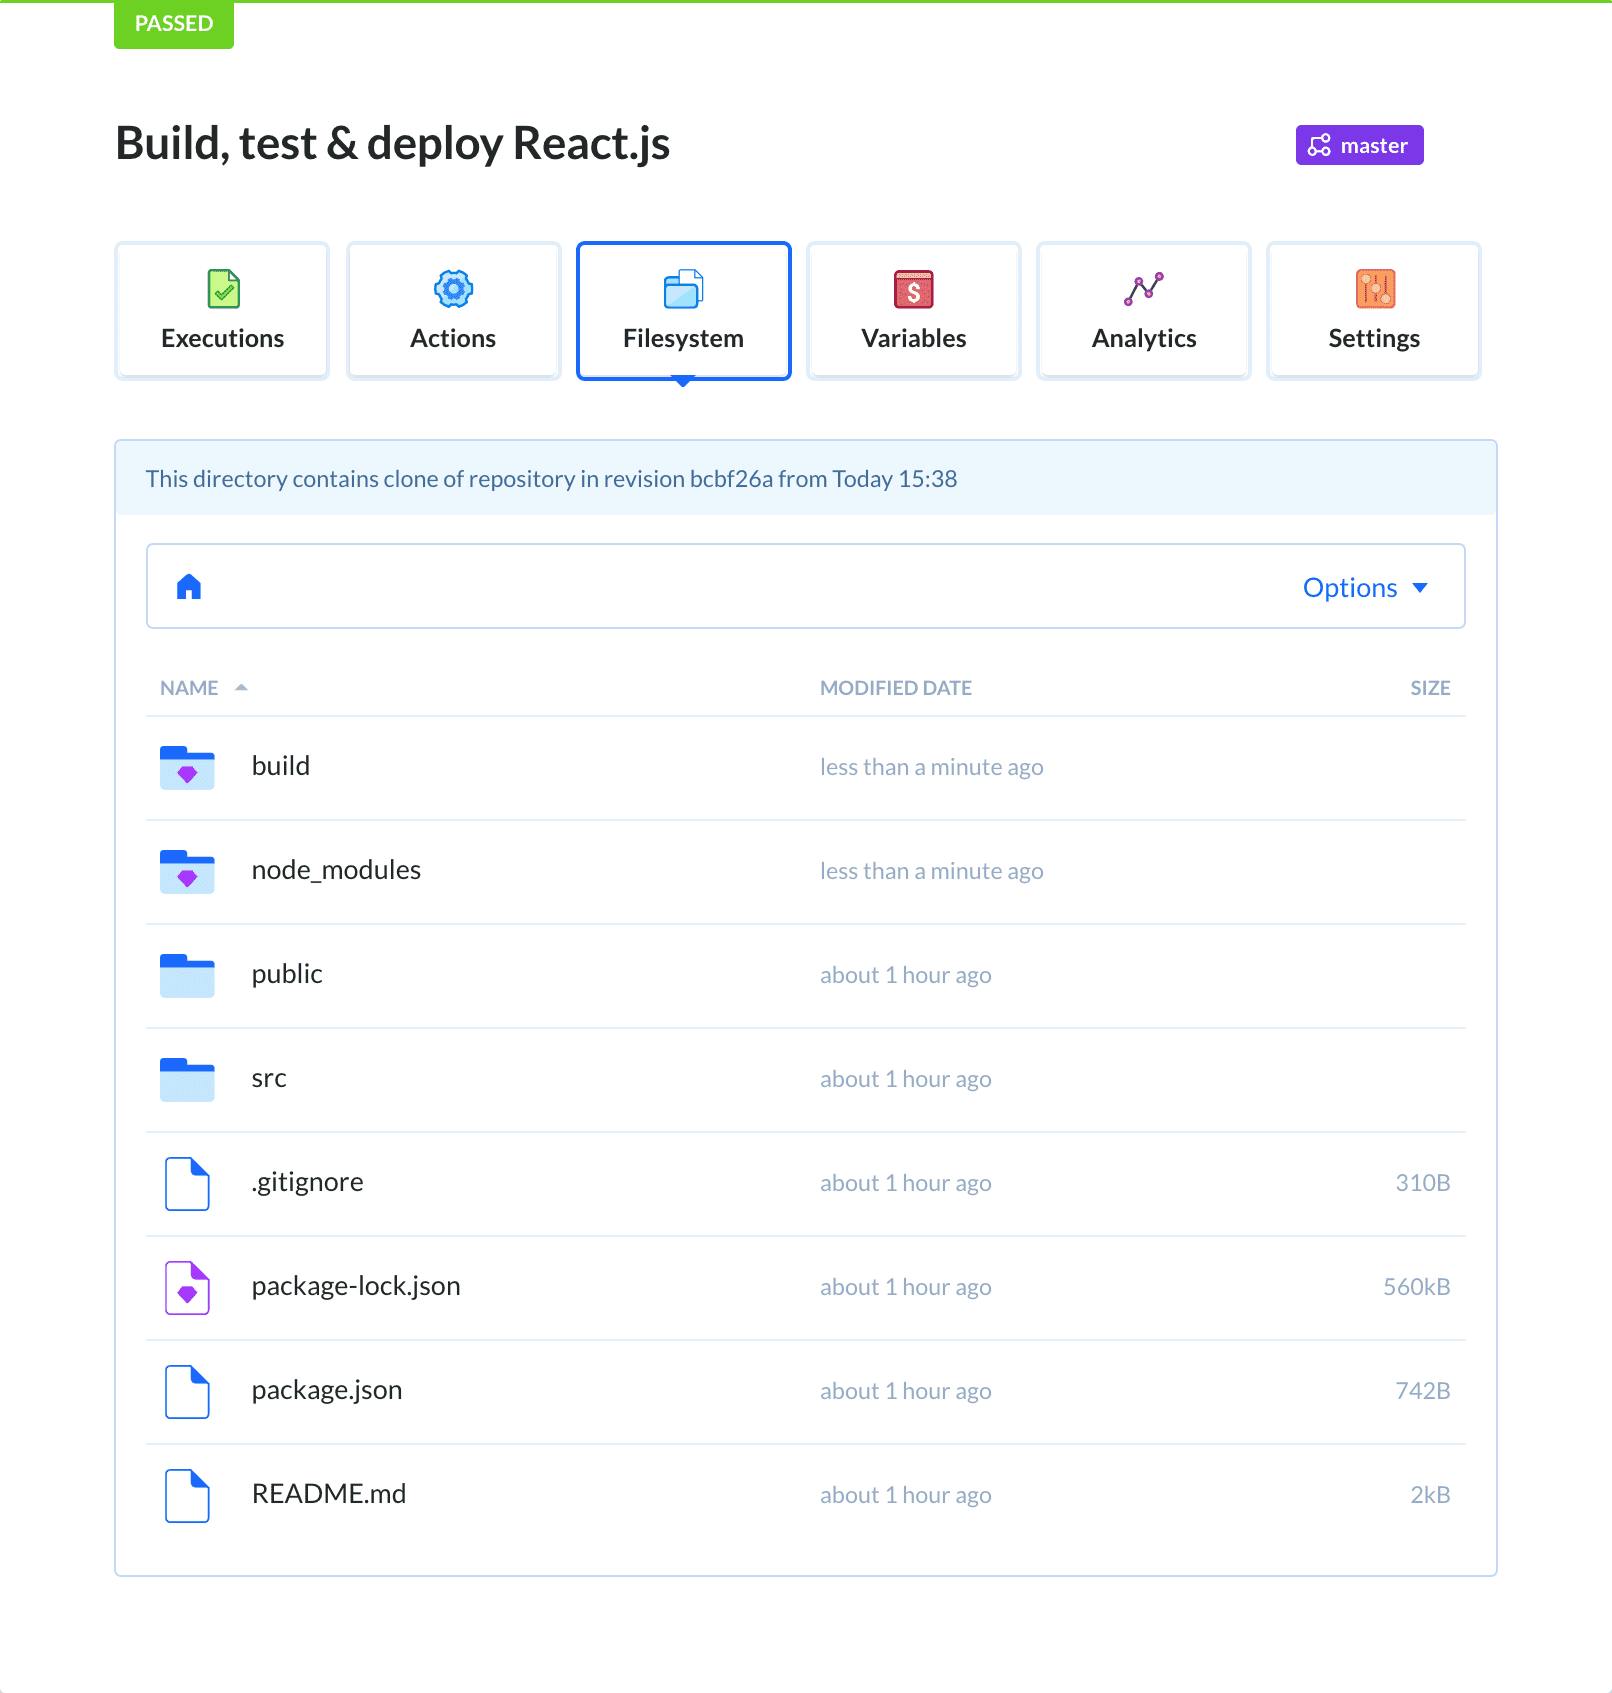
Once the execution has finished, it will produce the build to the pipeline filesystem. The filesystem contains a clone of your repository in the last executed revision, artifacts generated by build actions, and static files uploaded manually (e.g. config files). You will notice that the artifacts are marked with a small gem icon:
Deployment configuration
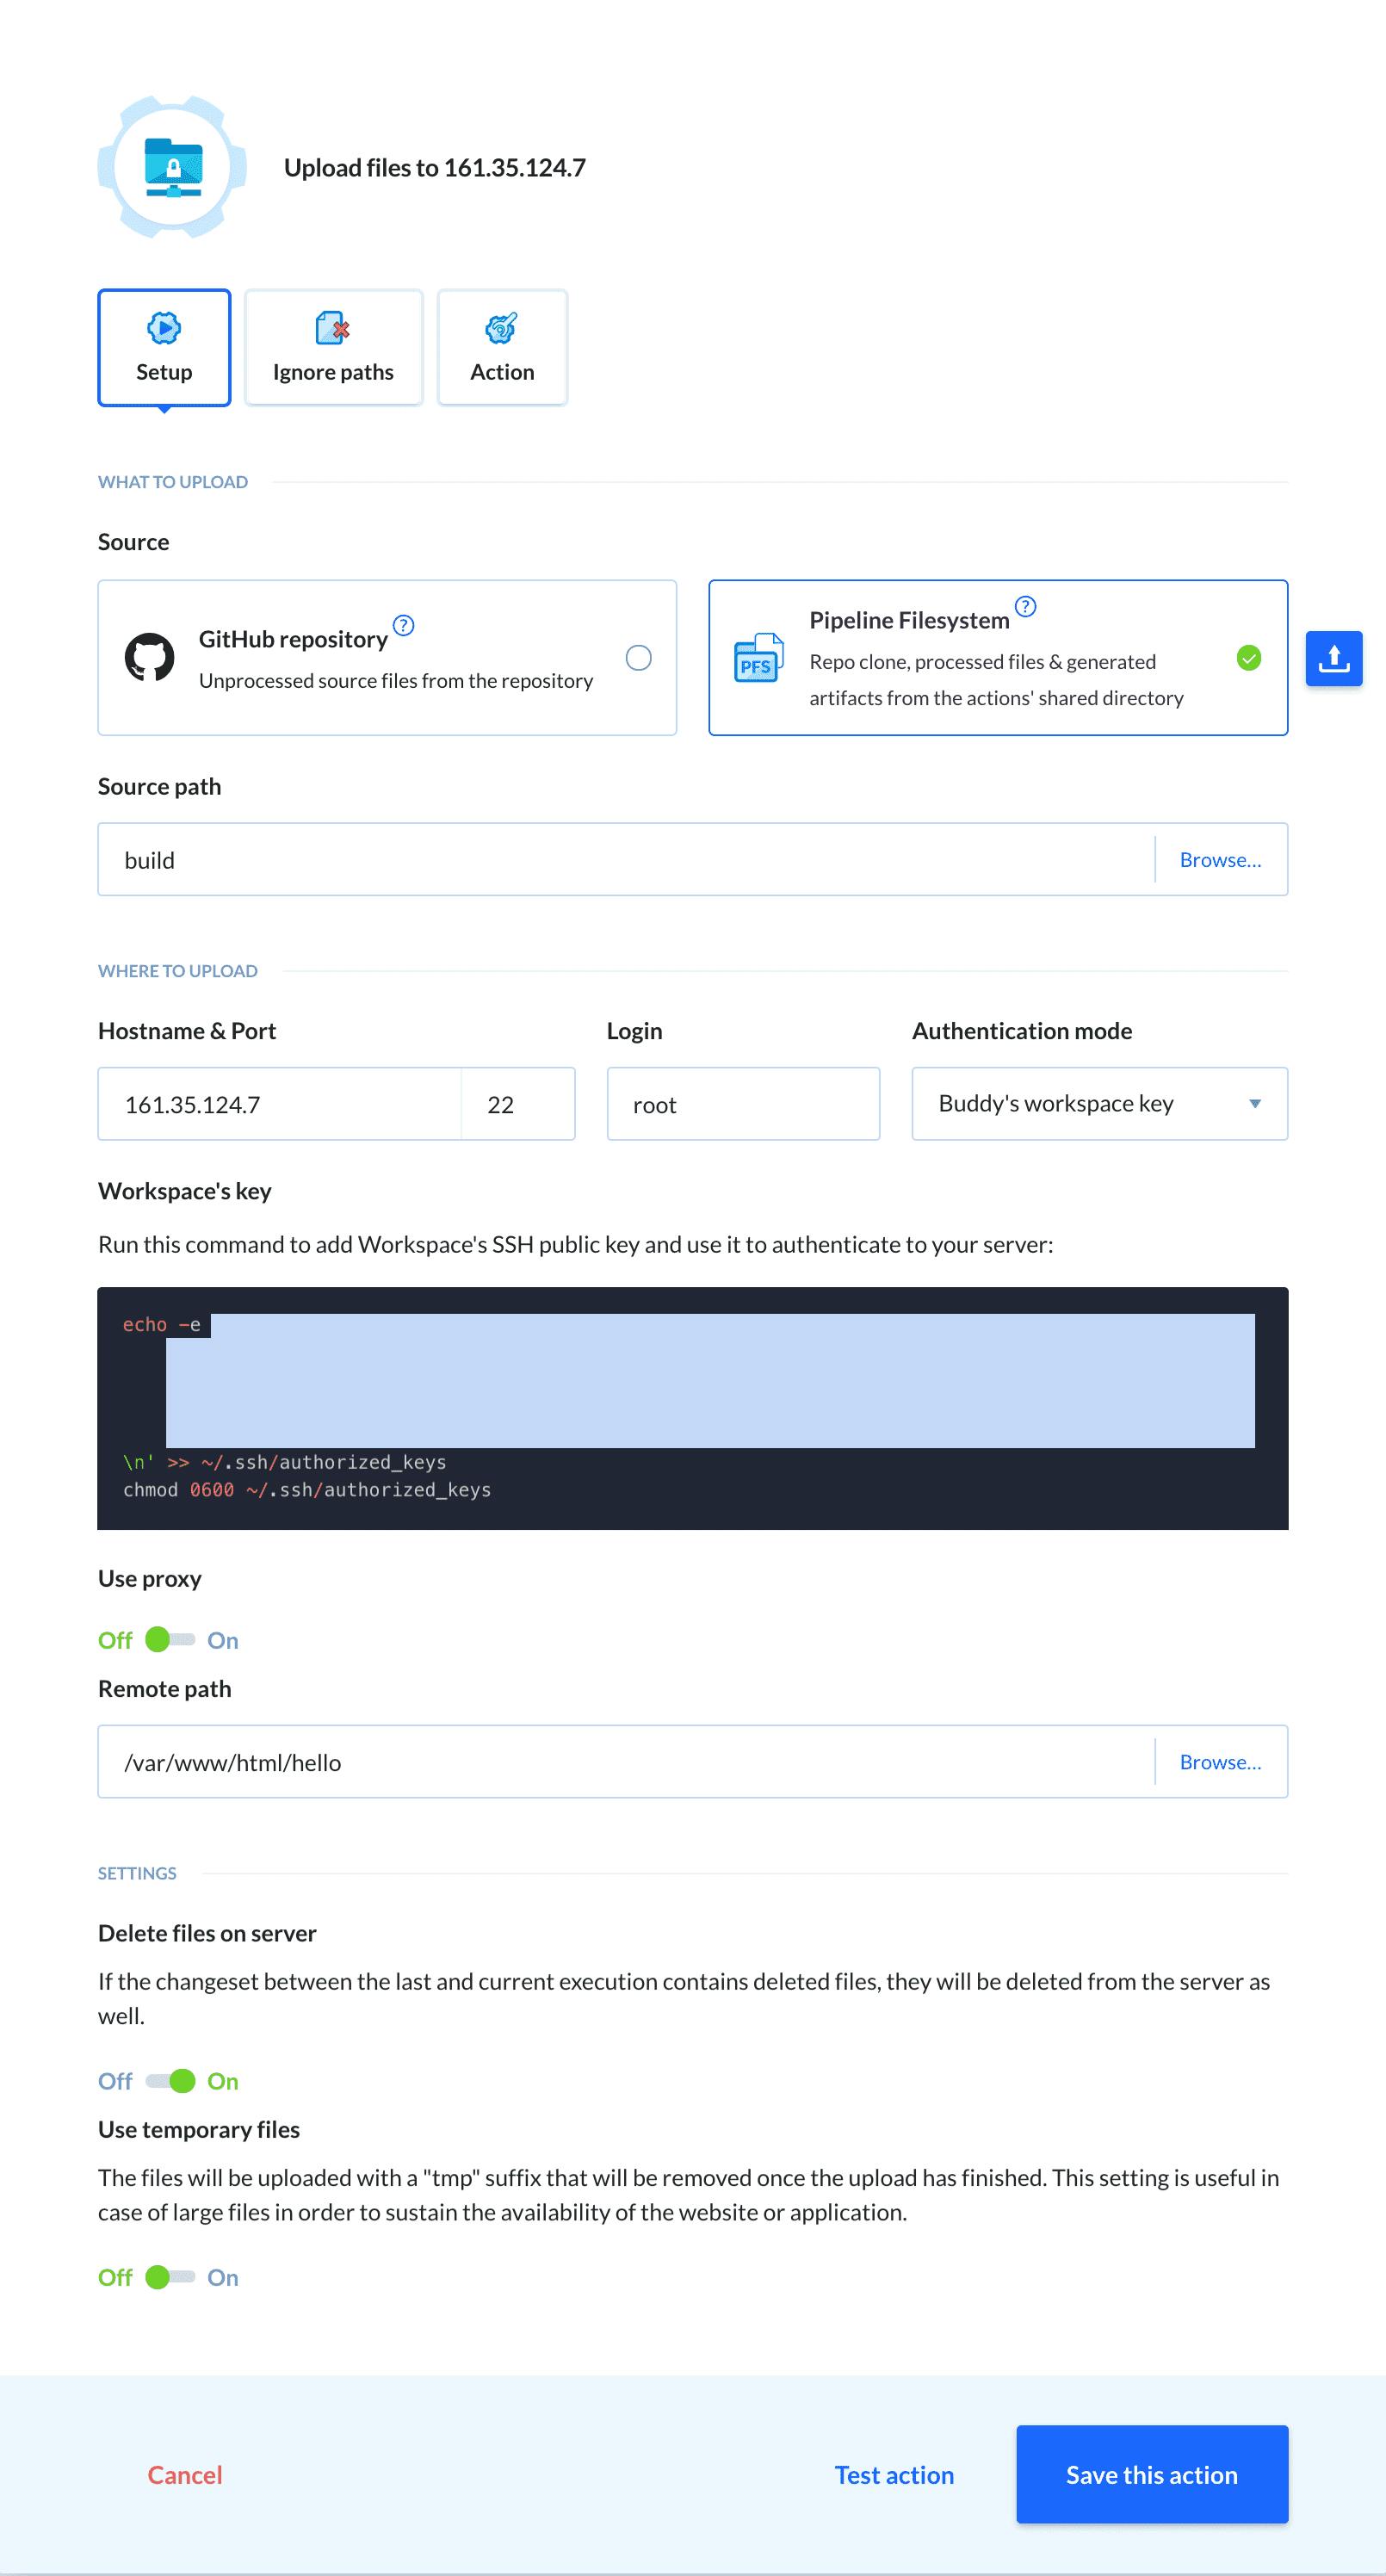
The next step is adding an action that will upload our build to the server. In this case, we are deploying to a DigitalOcean droplet over SSH. We should use SFTP:
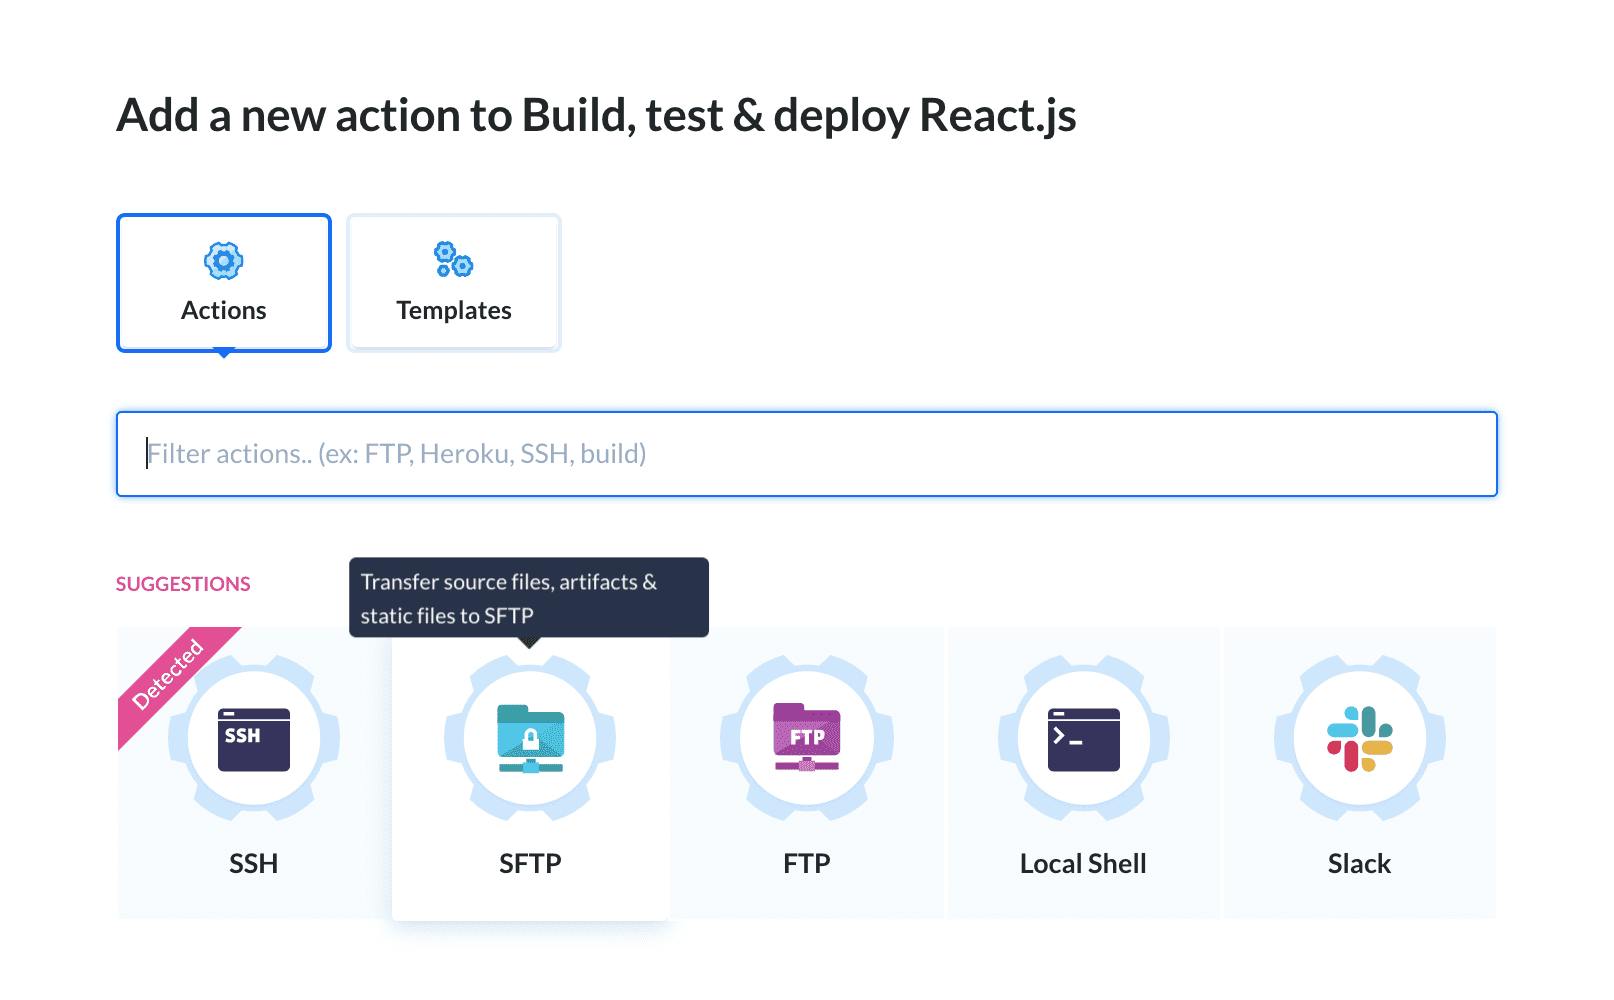
Although we are using SFTP, Buddy has a dedicated integration with DigitalOcean that you can use, too.
The action screen lets you configure deployment details: credentials to the server, the path from which Buddy will upload the files, and the target path on the server. You can choose from several authentication methods — we always recommend Buddy’s workspace key as the most secure.
In our case the website will be deployed from the build directory in the repository (source path) to /var/www/html/hello on the server (remote path):
Testing deployment
Click the Test button to check if you configured everything properly. Buddy will connect to the server, upload a test file, and delete it afterward. When done, click the Run pipeline button or push something to the repository to trigger the pipeline and upload the website to the server:
In case of connection problems, make sure to whitelist the IP’s used by Buddy for deployments.
Zero-downtime deployment
📺 Video Timestamp: 15:01
The pipeline is now fully operational: whenever a push is made, Buddy will fetch the changes, run unit tests, prepare the build, and upload it to the server. Now it’s time to upgrade the process to ensure the application doesn’t suffer any downtime during the deployment.
We’ll apply a simple trick: upload the application to a newly created folder first, and, once the deployment has finished, switch the serving process to the new location.
Editing deployment folder
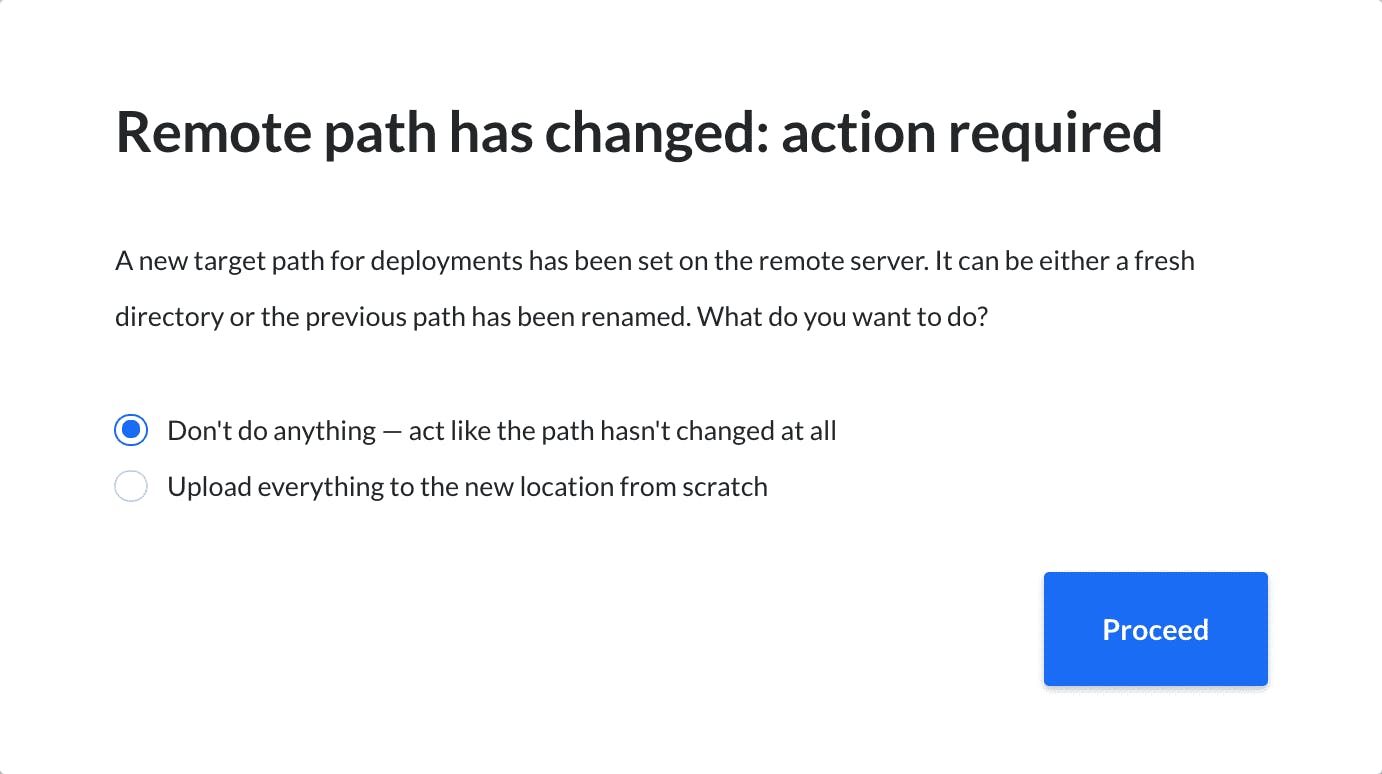
Click the deployment action to edit its details and change the folder to which you deploy (remote path) to $BUDDY_EXECUTION_REVISION/. This will automatically create a new folder named after the currently deployed revision on every execution. If you are using our project on GitHub, the full path will look like this:
/var/www/html/$BUDDY_EXECUTION_REVISION

Buddy will detect the remote path has changed and will ask you to take action. Leave it as it is and click Proceed — we need to add some commands on the server first:
Adding server commands
Now, we’ll add an action that will connect to our server and run commands that will switch the serving process to a new location after the deployment. Look up SSH in the action roster:

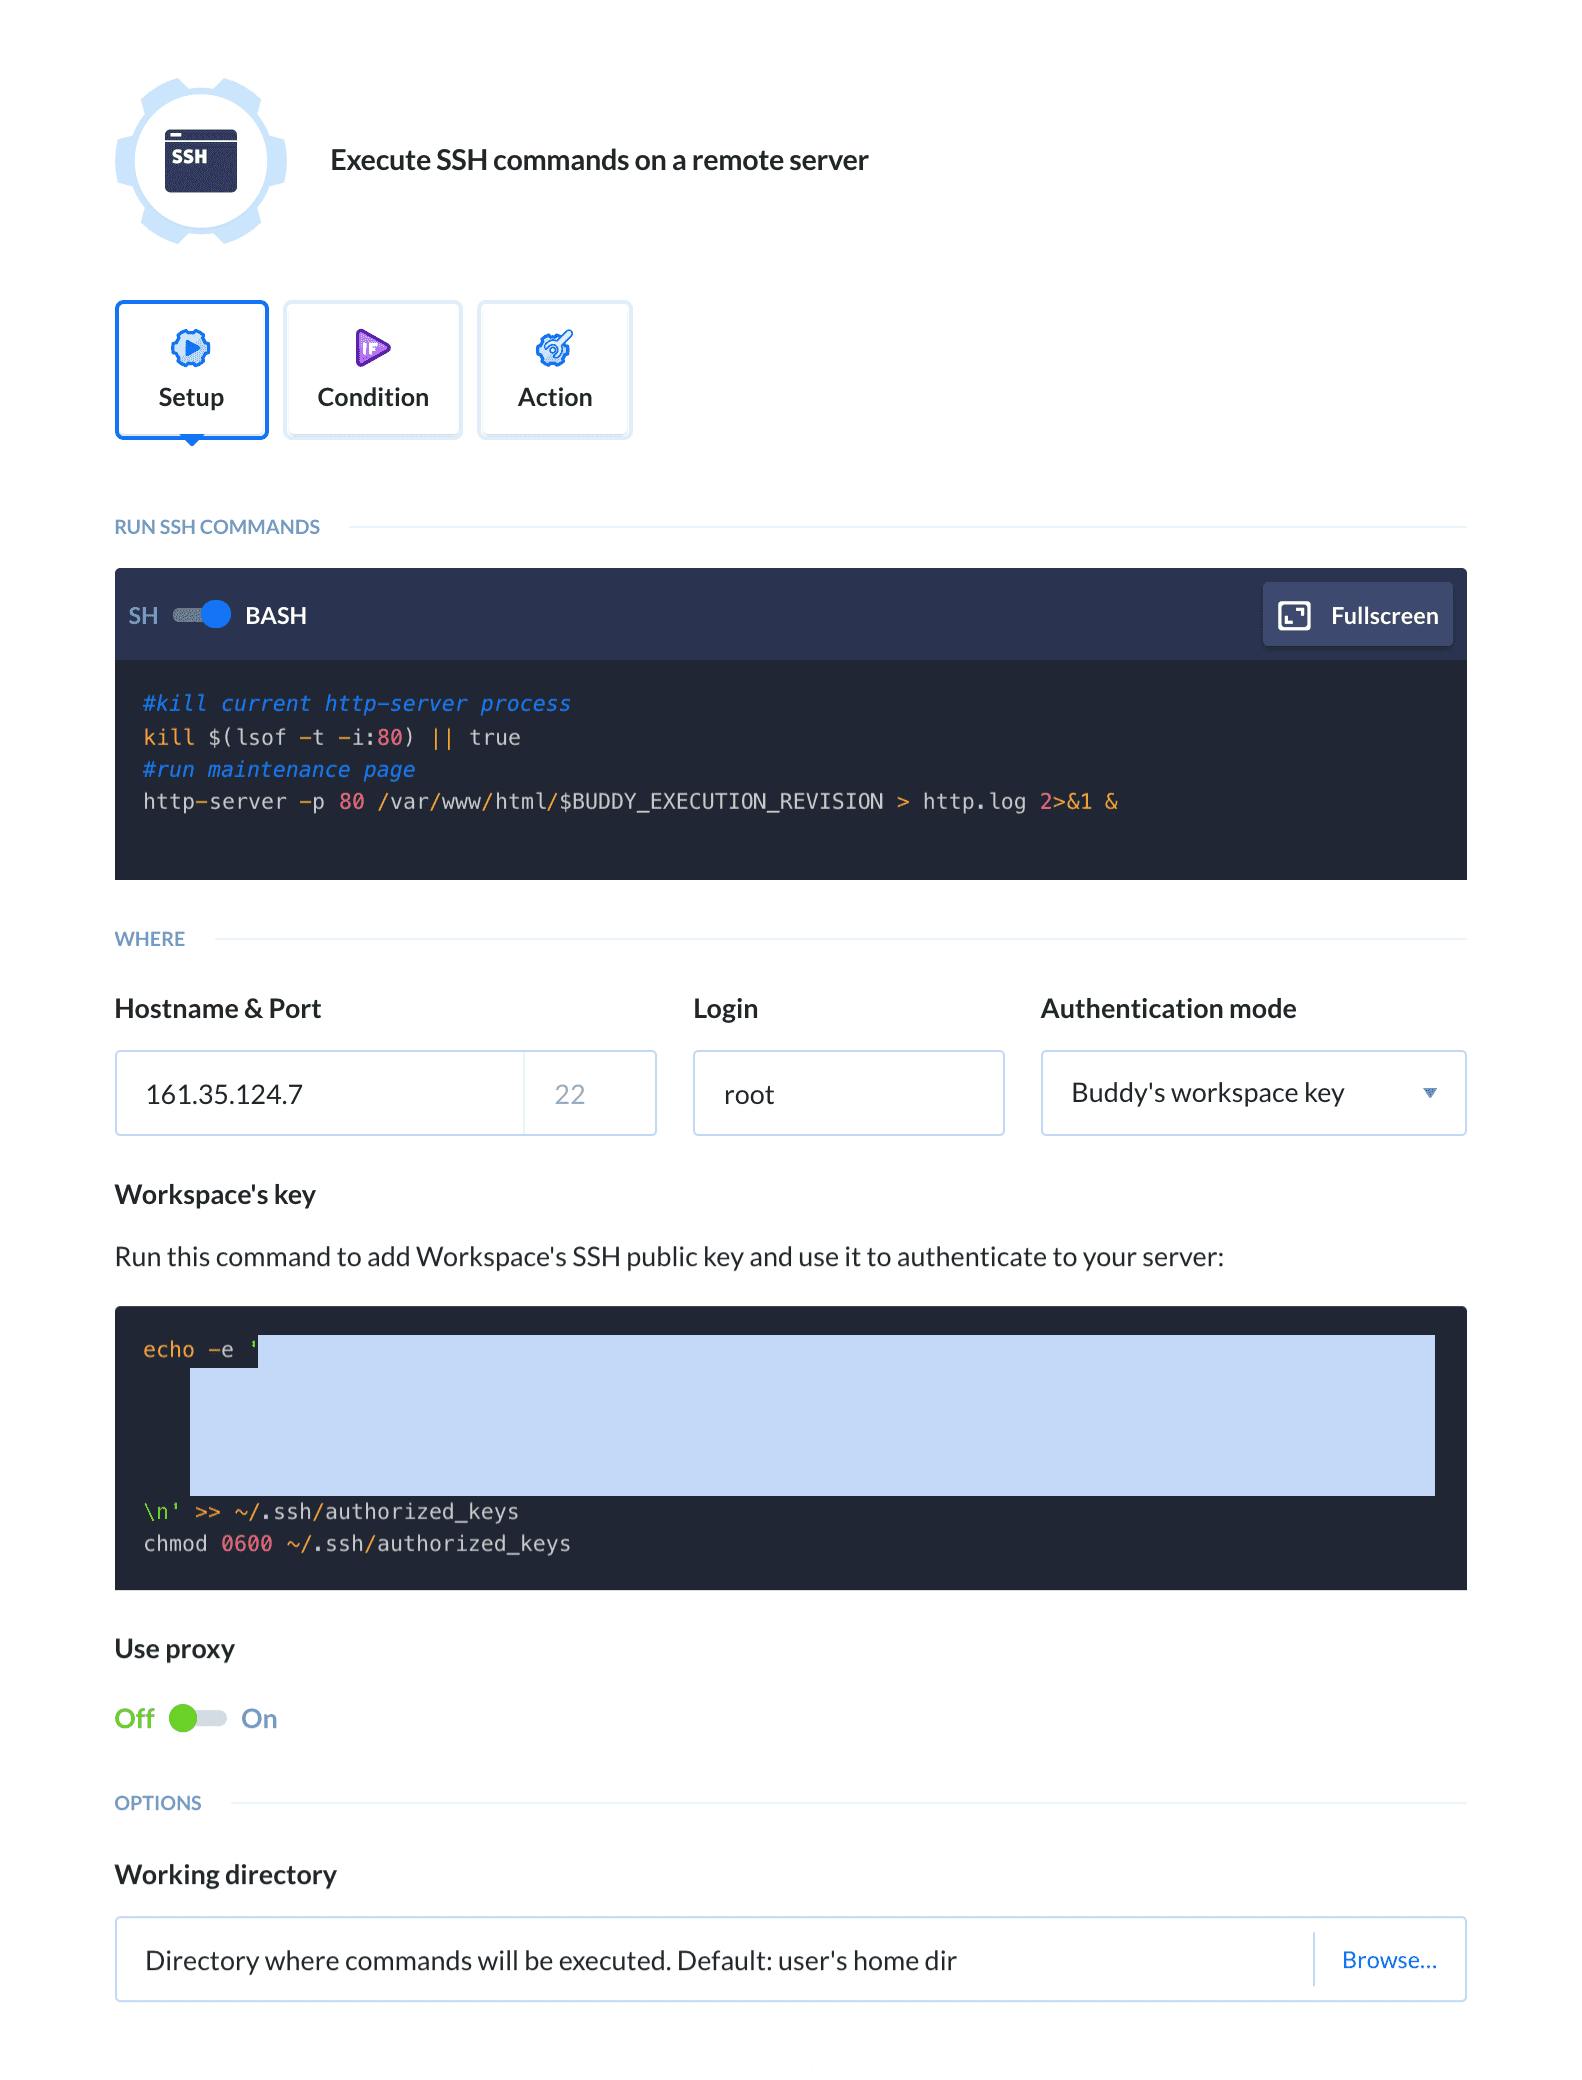
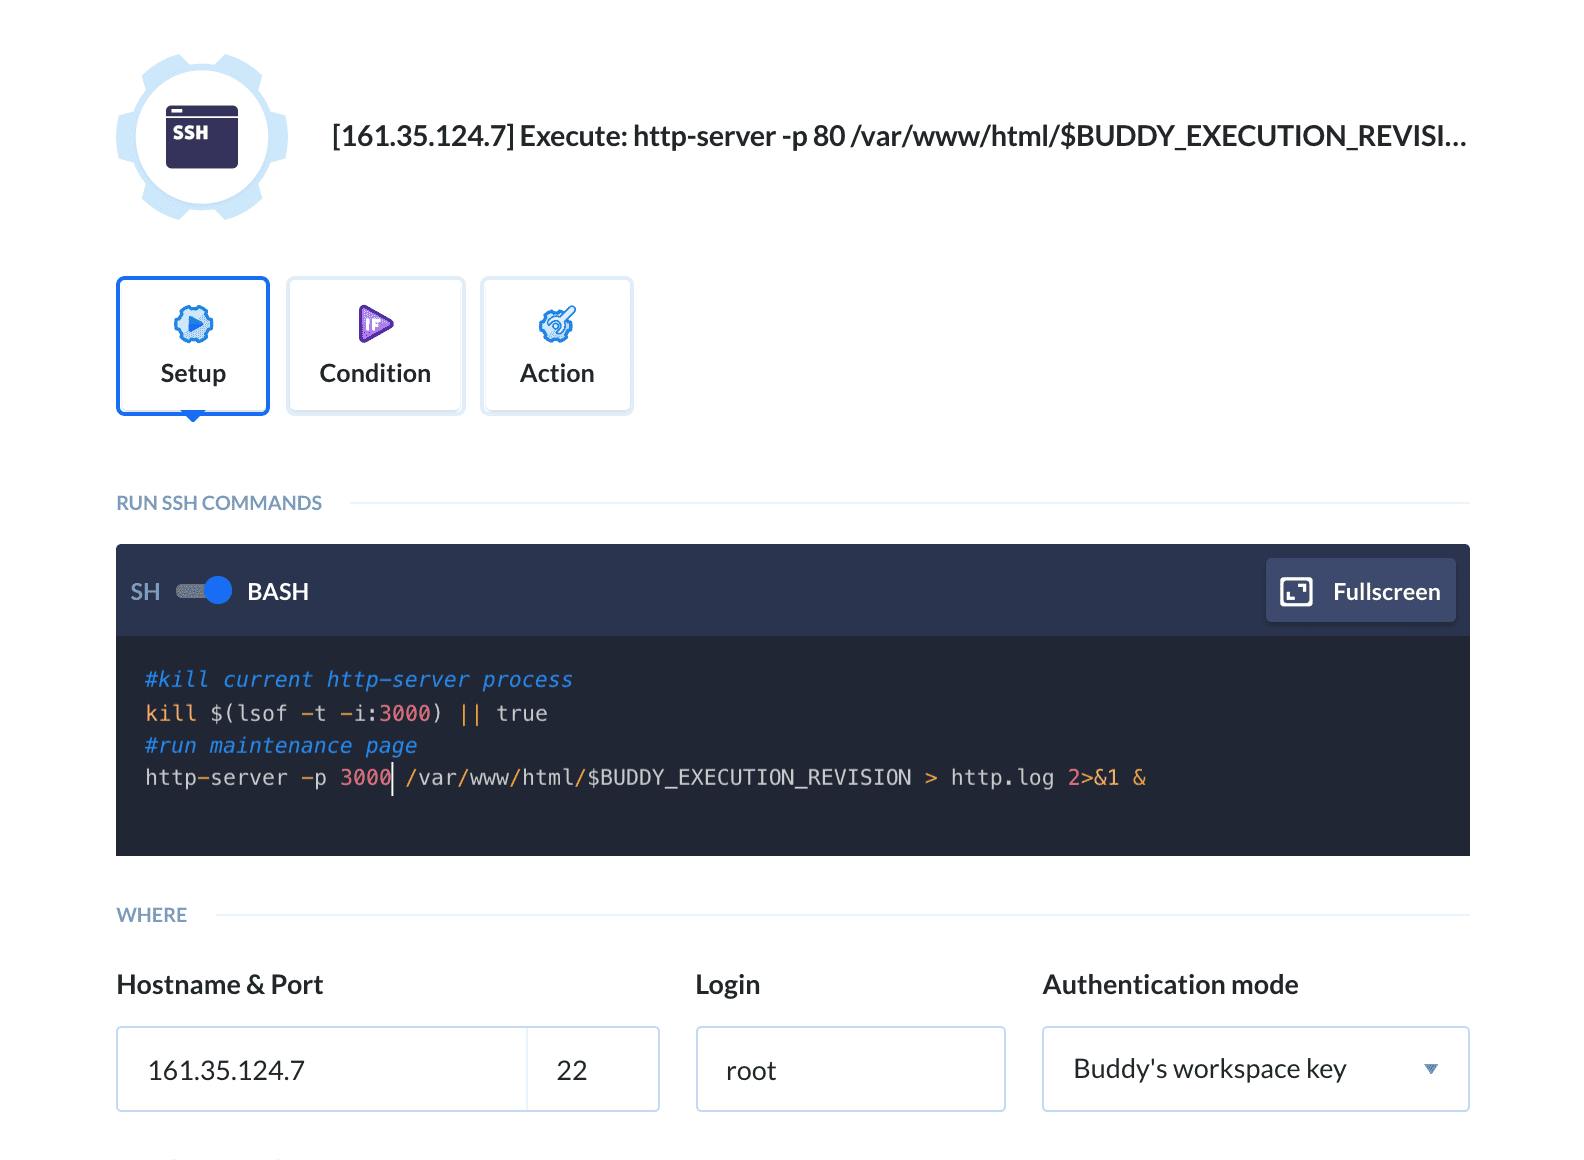
The action is defined in an exact way as the deployment: you need to provide the authentication method, server credentials, and the directory in which the commands will be executed (leave this one as default). Of course, we need proper commands, too. Fill the server details and paste the following to the command window:
#kill current http-server process
kill $(lsof -t -i:80) || true
#run maintenance page
http-server -p 80 /var/www/html/$BUDDY_EXECUTION_REVISION > http.log 2>&1 &
The first command will kill the current serving process. The second one will run it from the new location created by the deployment action.
The action should look like this:
Testing zero-downtime deployment
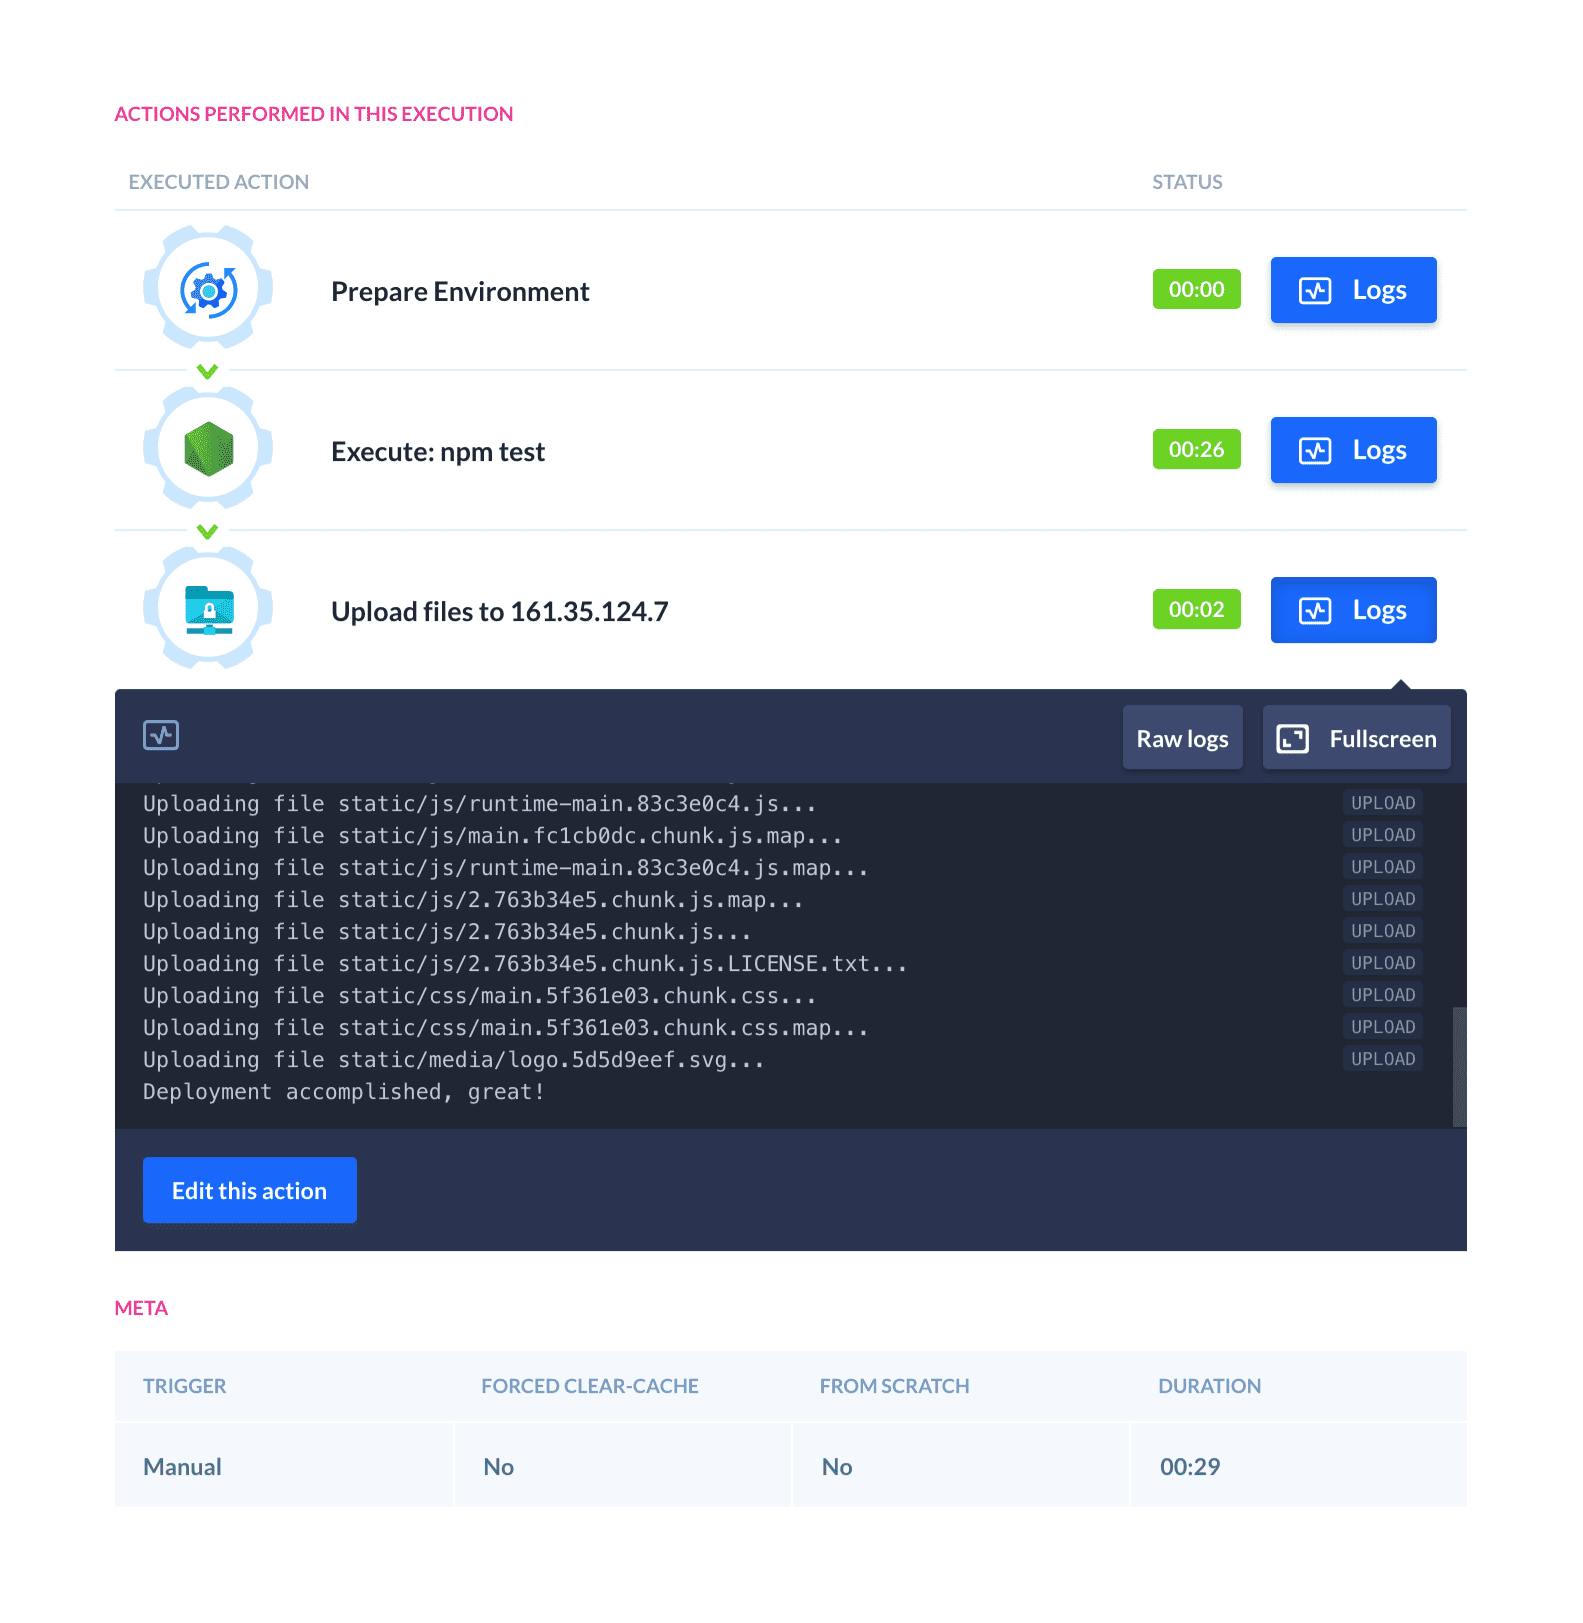
Make a push to the repository to trigger the pipeline and check the execution logs if everything’s passed properly:
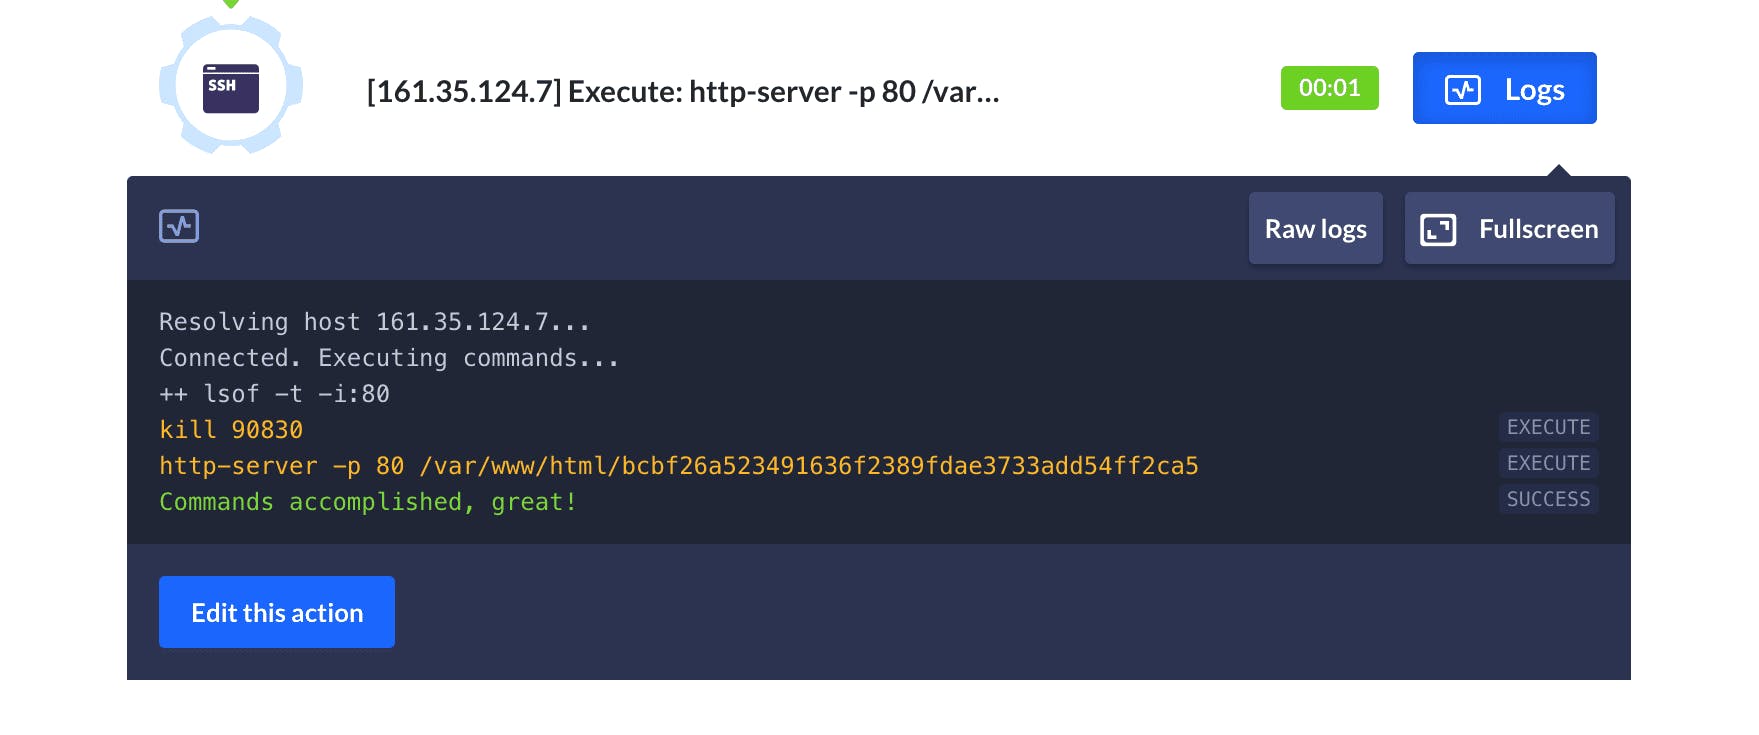
Congratulations — you have successfully introduced zero-downtime deployment to your delivery process! 🎉
Please mind that the application in this example can be deployed in a couple of seconds and doesn’t require absolute 100% uptime. It is best used for complex websites that can take minutes (or even hours) for the upload to finish.
Staging Environment configuration
Before deploying the website to the production server, it’s a good practice to preview the changes — and perhaps run some end-to-end tests — on a staging server. In this part of the tutorial, we’ll reconfigure the pipeline to serve the website from port 3000 and run the deploy to production – but only once the changes have been manually confirmed.
📺 Video Timestamp: 19:08
Creating Staging server
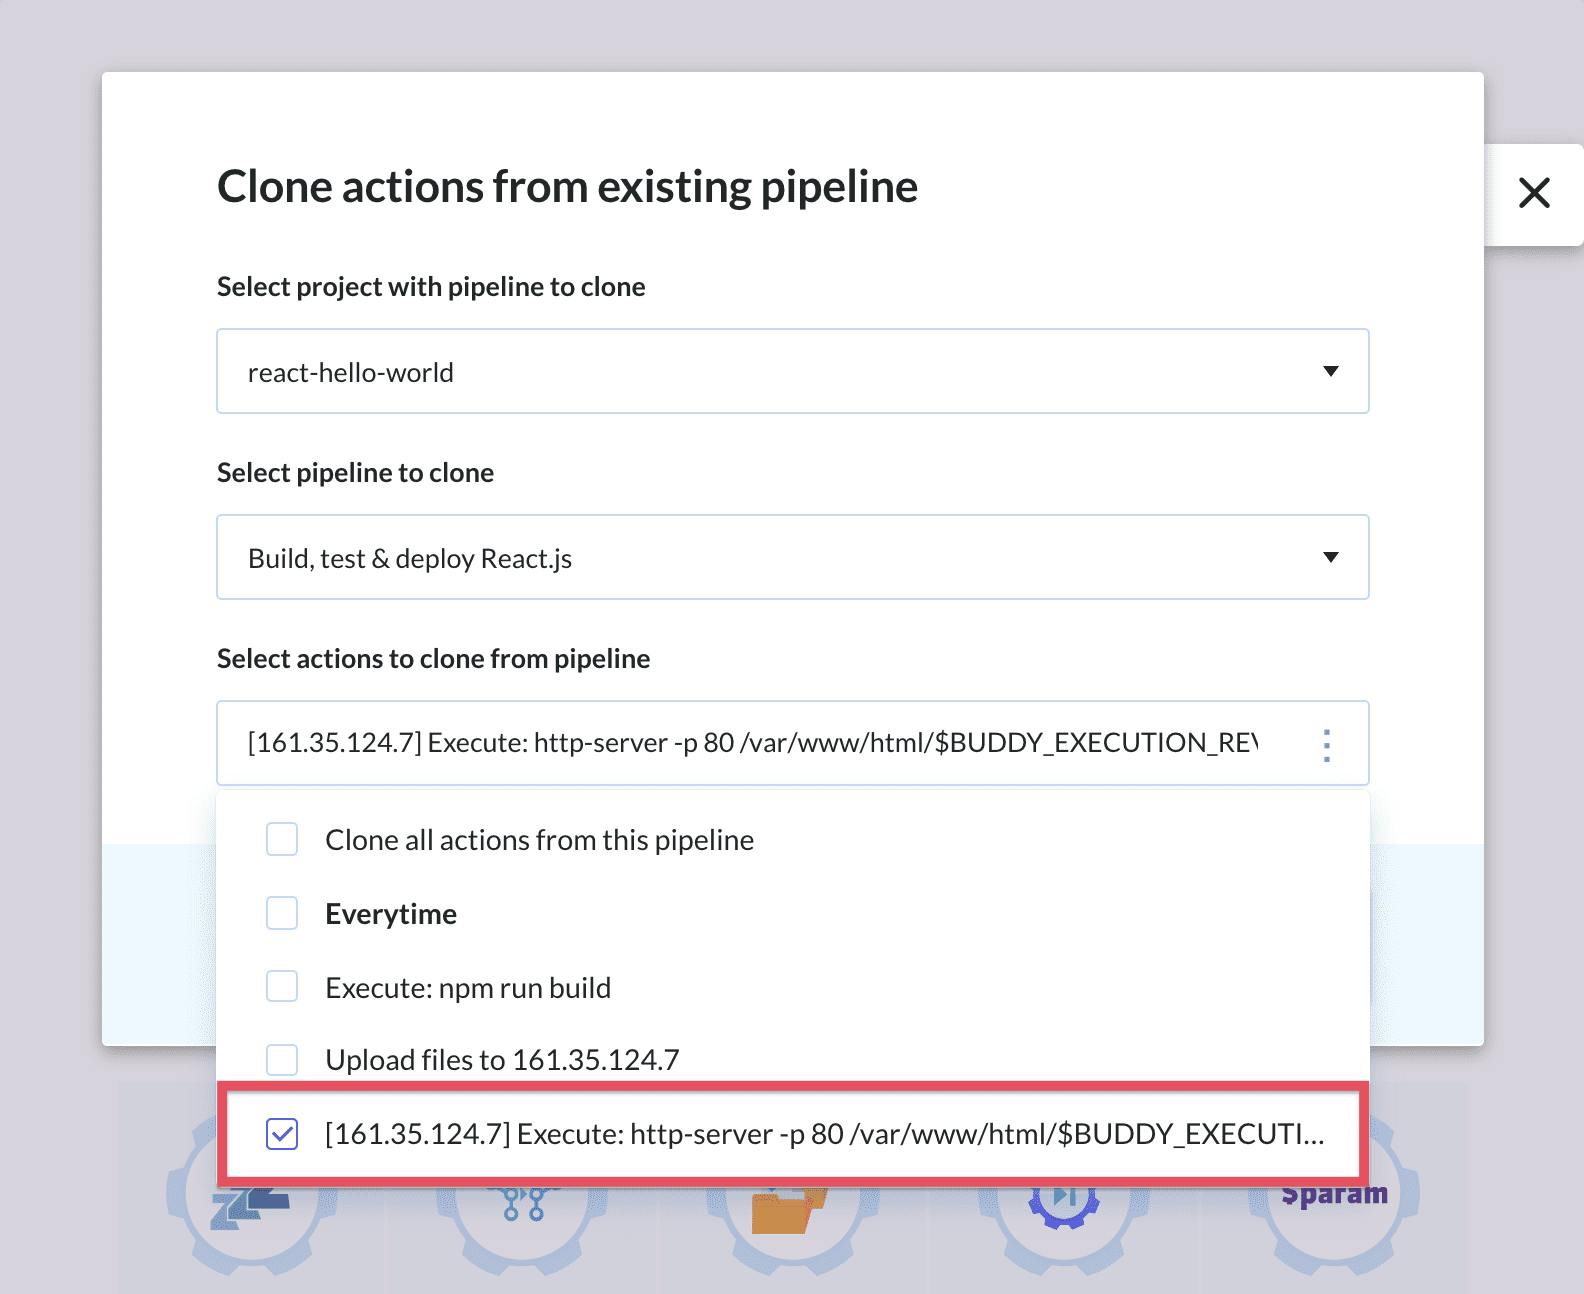
The first step is adding yet another SSH action that will create a new serving process on the server. Instead of configuring everything from scratch, you can use the Clone option on the action adding screen:

When cloning, leave the project and the pipeline as default, but instead of cloning all actions, select the SSH action only:

You should have two the same SSH actions in the pipeline. Click the first one to edit its details and change the port from 80 to 3000:
#kill current http-server process
kill $(lsof -t -i:3000) || true
#run maintenance page
http-server -p 3000 /var/www/html/$BUDDY_EXECUTION_REVISION > http.log 2>&1 &
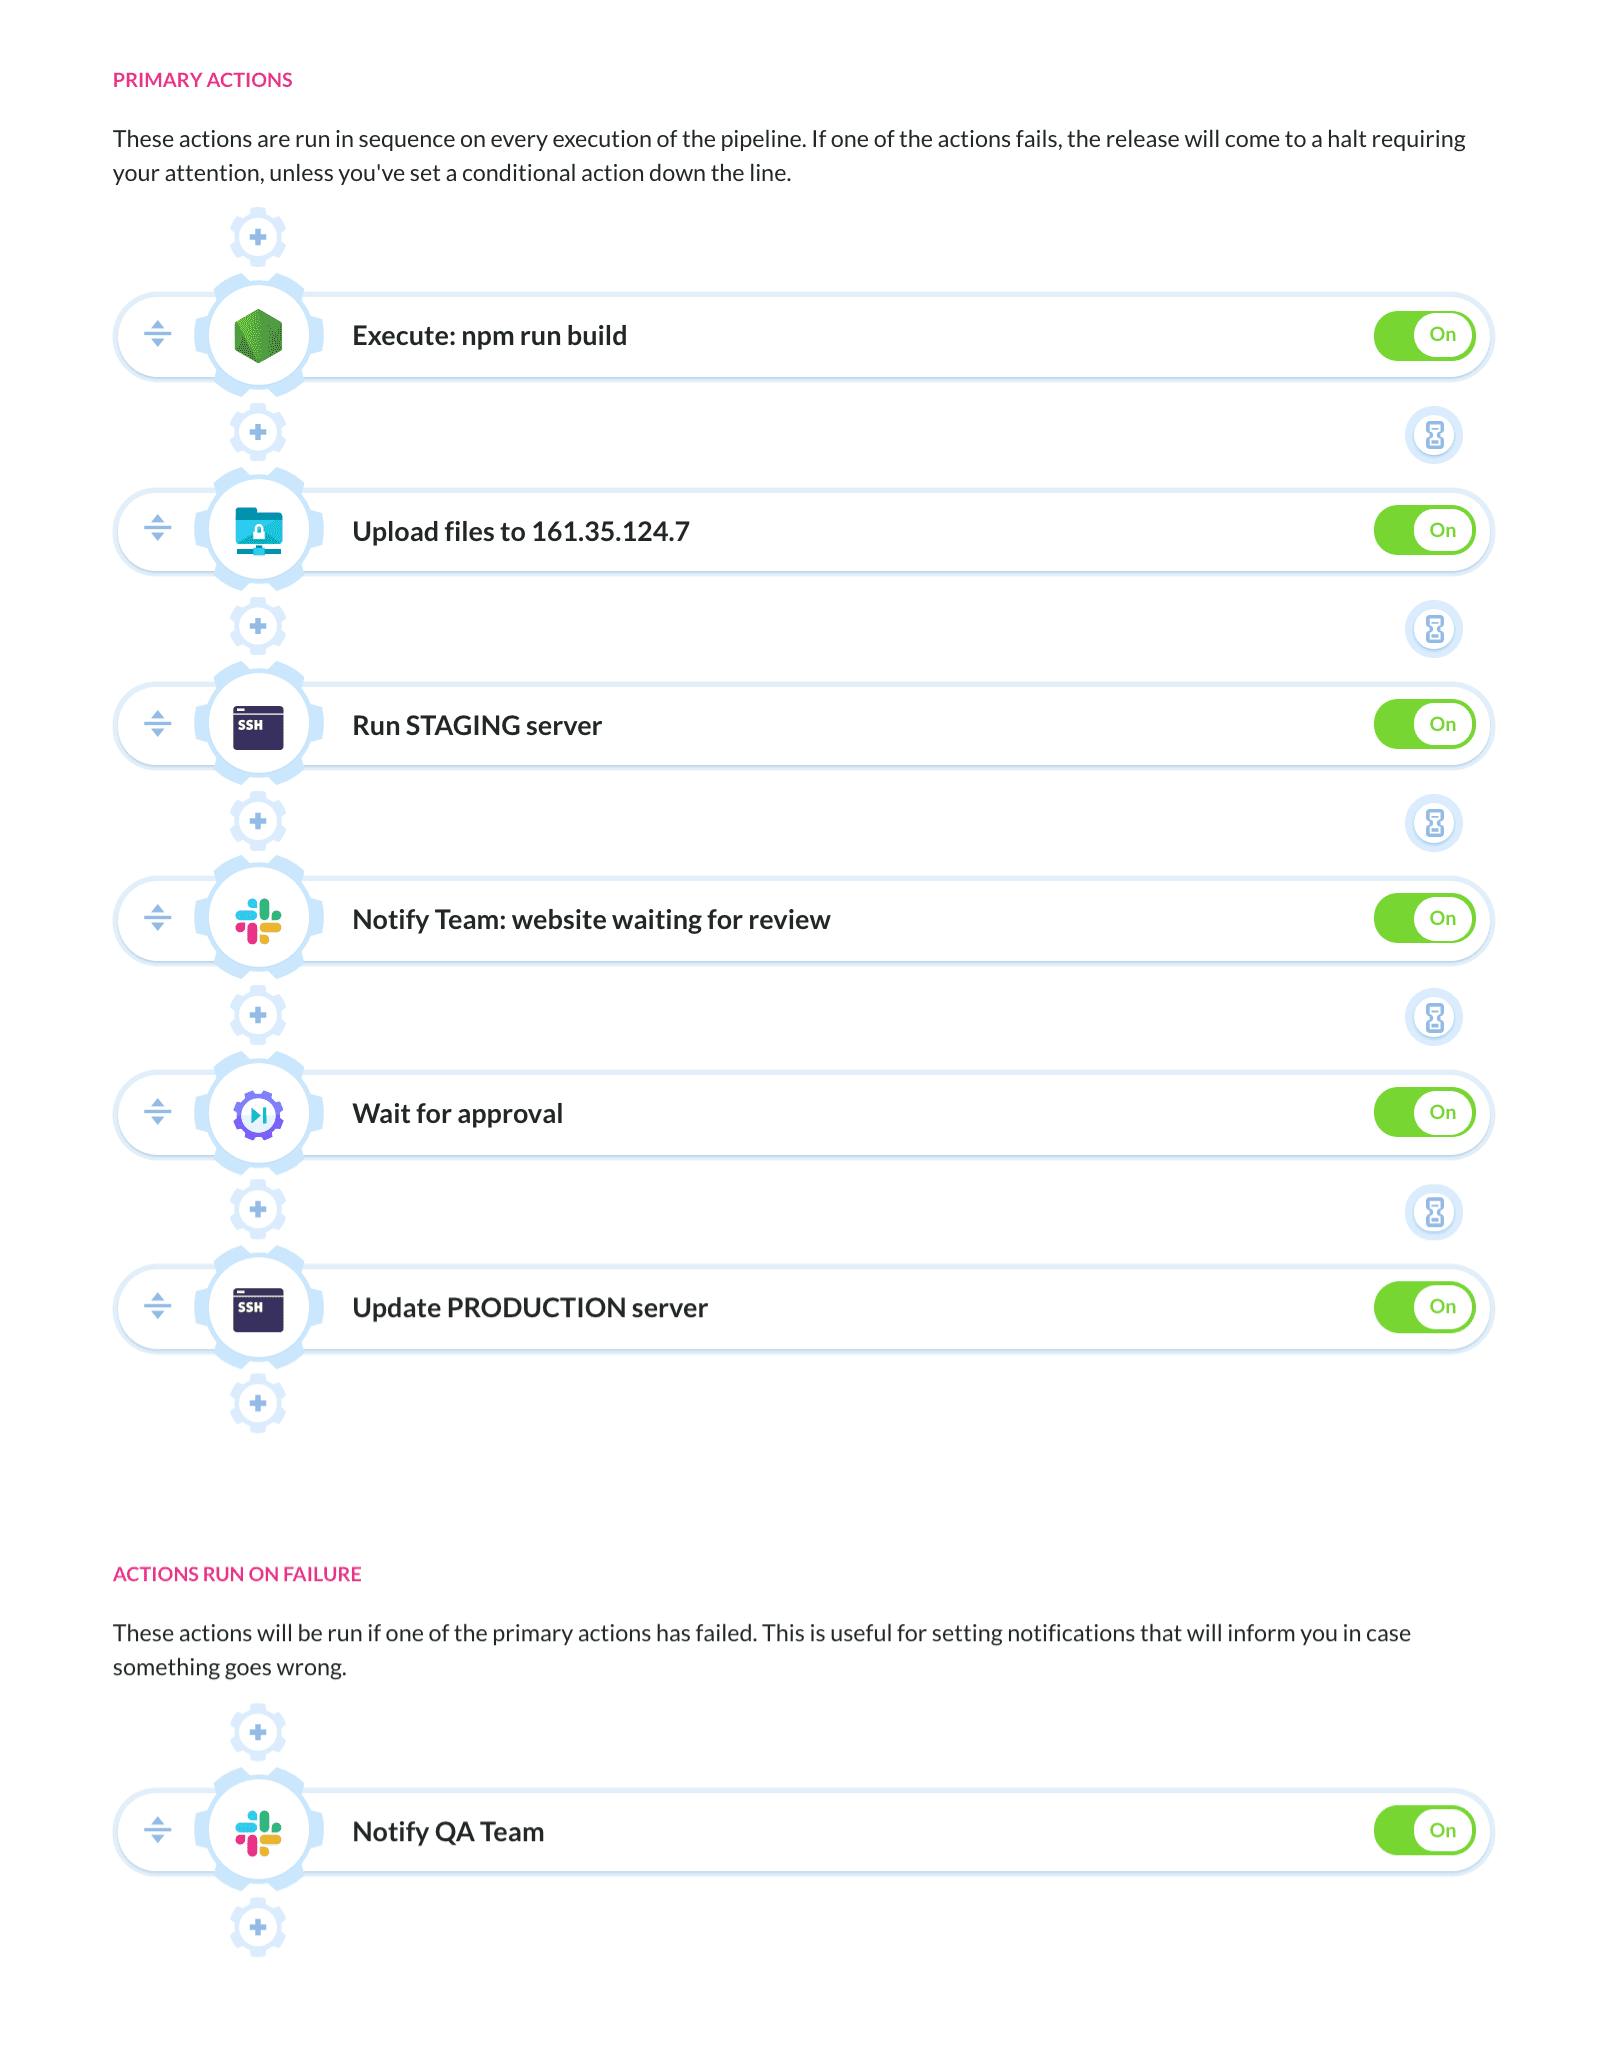
The complete pipeline should look like this, with the first SSH action set to port 3000, and the second one to port 80:

To avoid confusion, it is best to rename the default names of both SSH actions to something both telling, e.g.
Run STAGING serverandUpdate PRODUCTION server. You can do that in the Action tab.
Adding manual confirmation
Deploying websites to production on every push without checking the changes is a risky business. Unless you have the process fully covered with tests and released through multiple environments, it is strongly recommended to either switch the pipeline’s trigger mode to manual, or add a manual confirmation step before the deployment to production — the last one is what we’re going to do now.
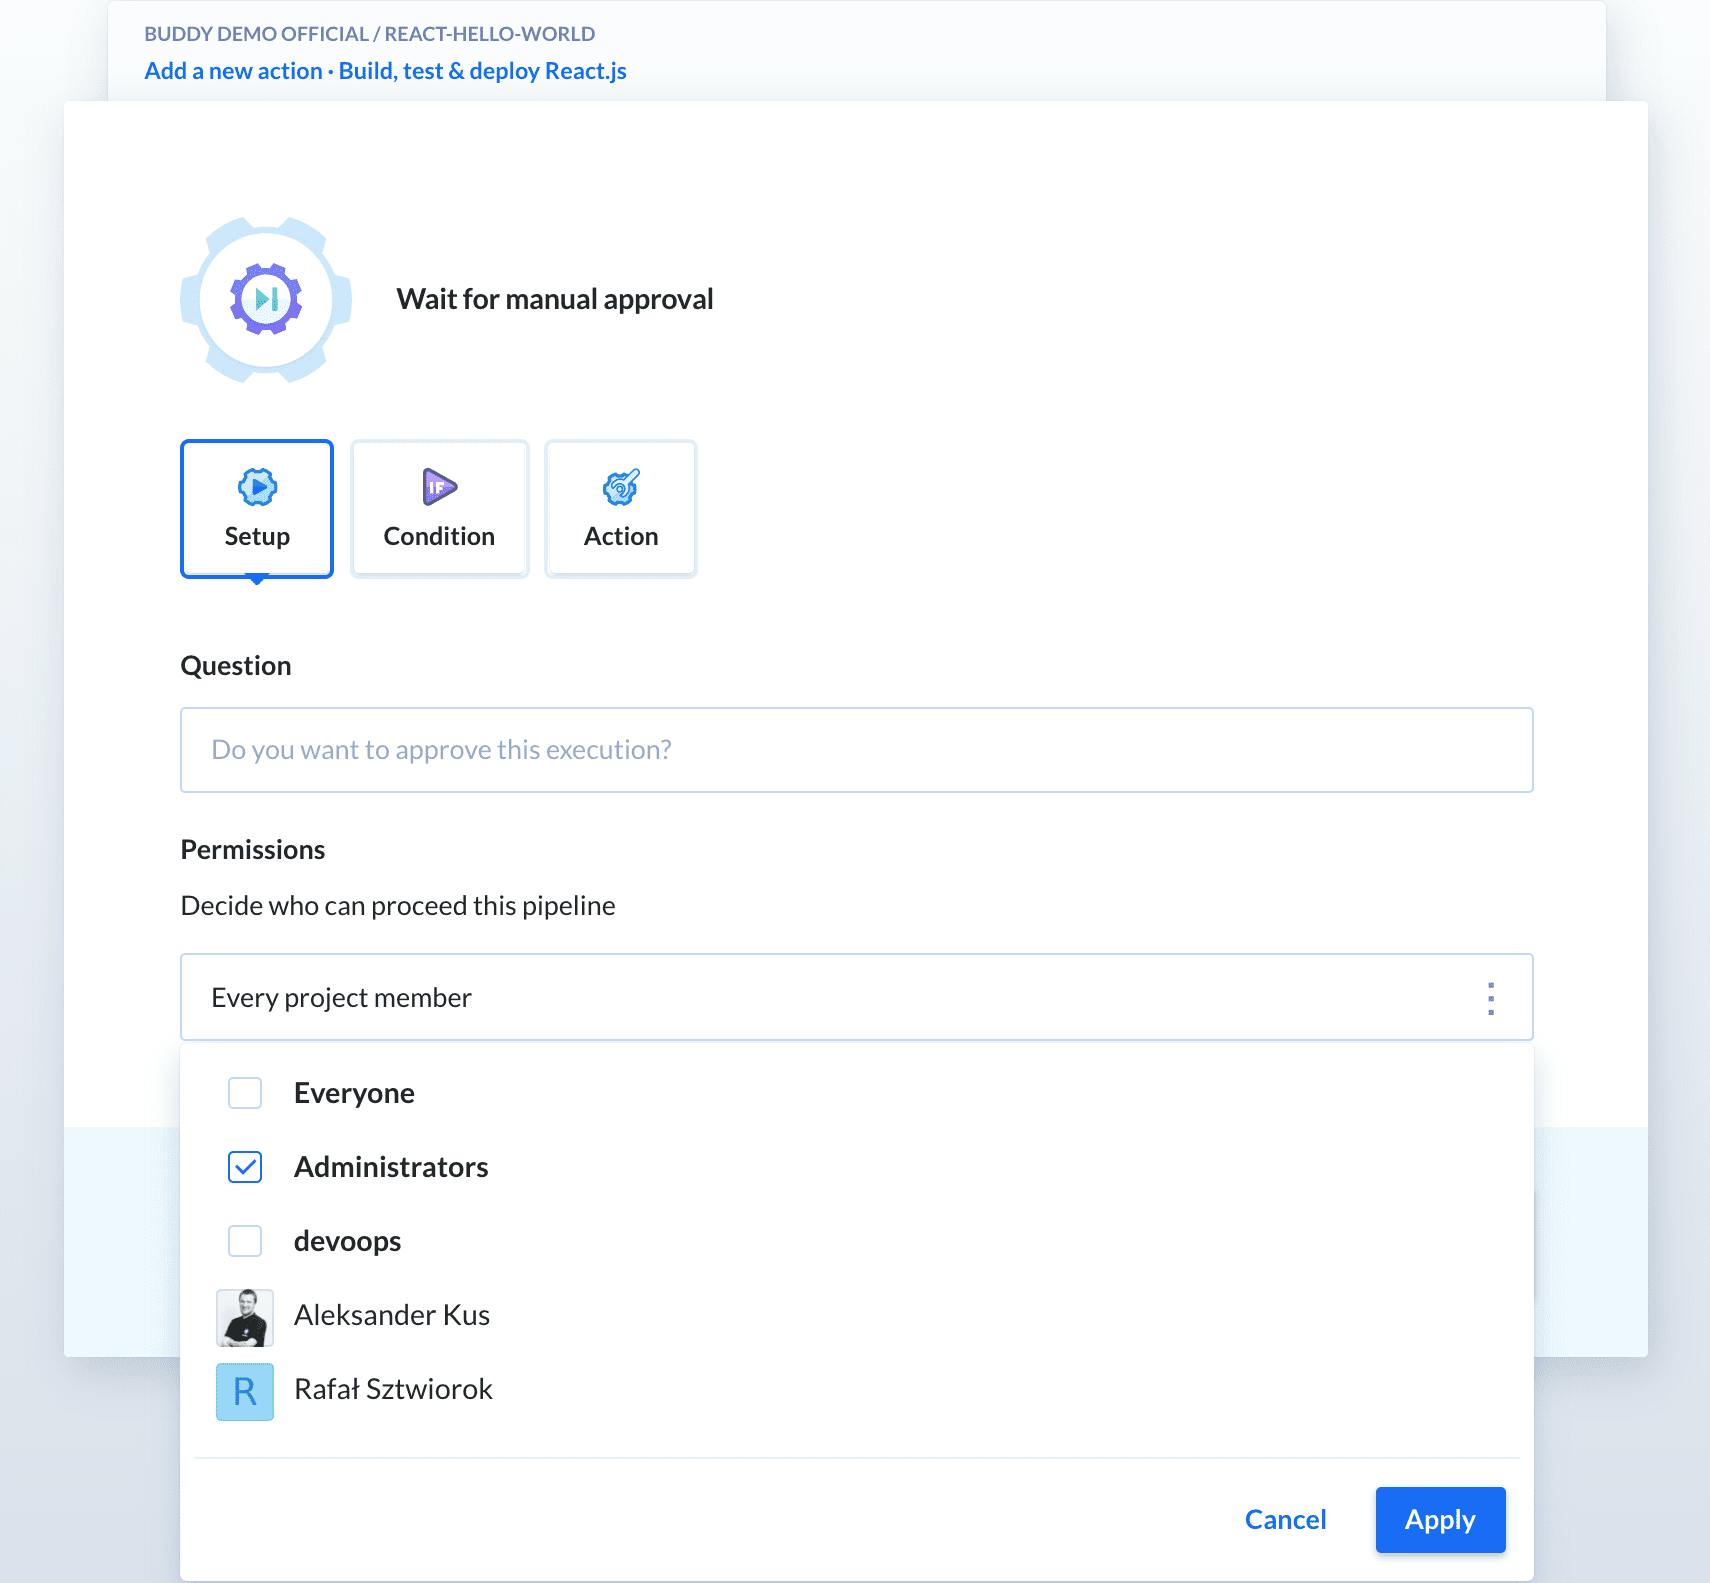
Click the + button before the final release step and look up Wait for approval on the action list:

Here you can define the question and restrict approval permissions to a selected group of users:
Now, once you run the pipeline, it will automatically stop and will not proceed until the changes have been confirmed. But how will people know there’s a website waiting for their approval?
We need to notify them.
Notifying users of deployment
Click the + button once again – this time before the approval action. Jump to Notifications in the right column, and select your preferred service:
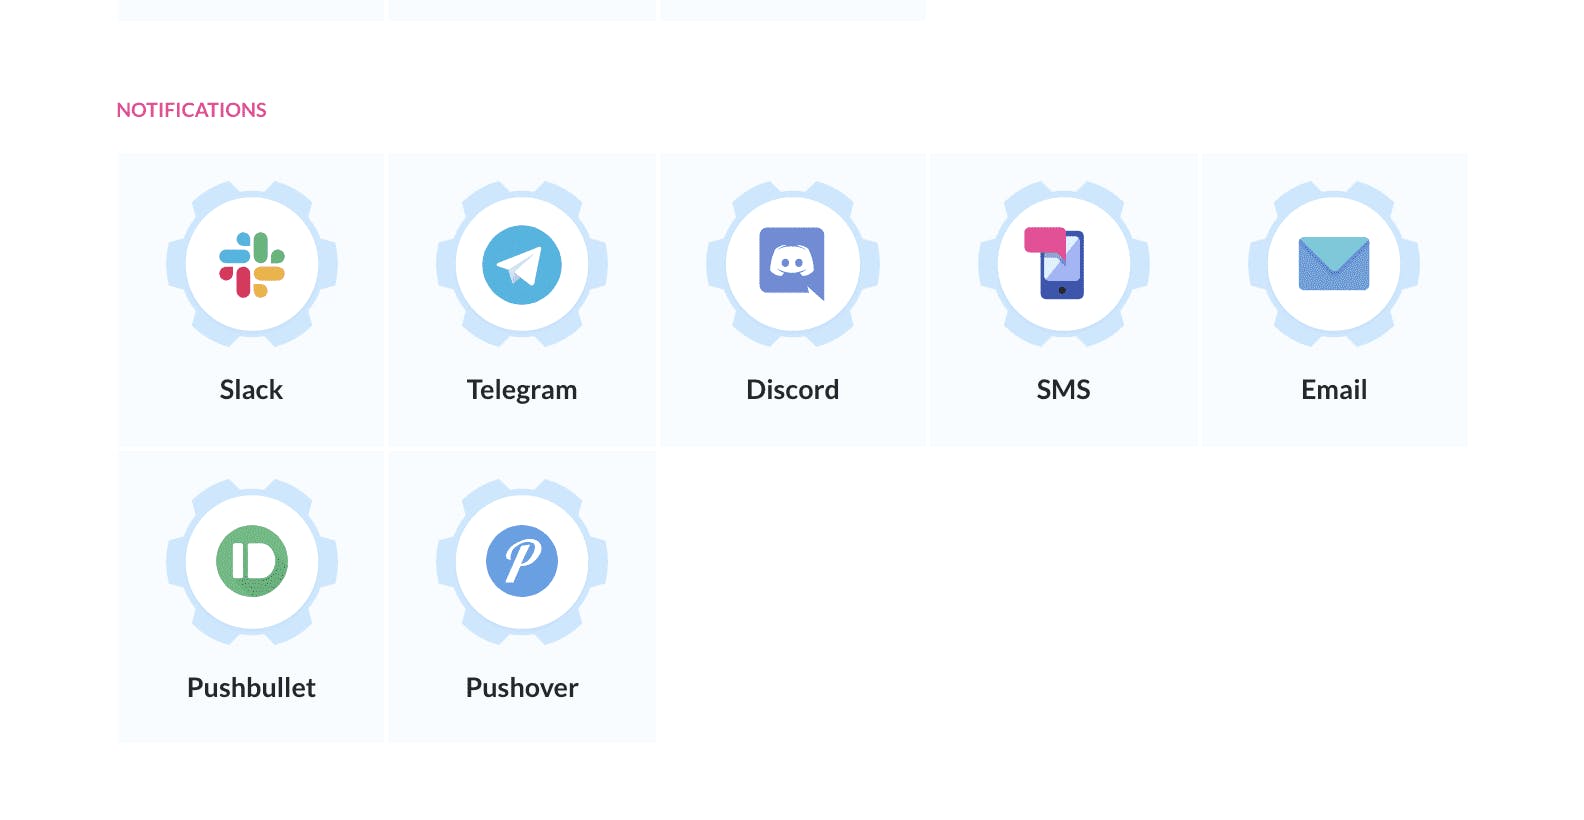
In this example, we’re going to use Slack as it’s the most popular notification service among our users.
Whenever you add an action that integrates with a third-party service for the first time, Buddy will ask you to configure the integration details. Here you can define the scope of the integration, i.e. who can modify its details and add pipeline actions that require it:
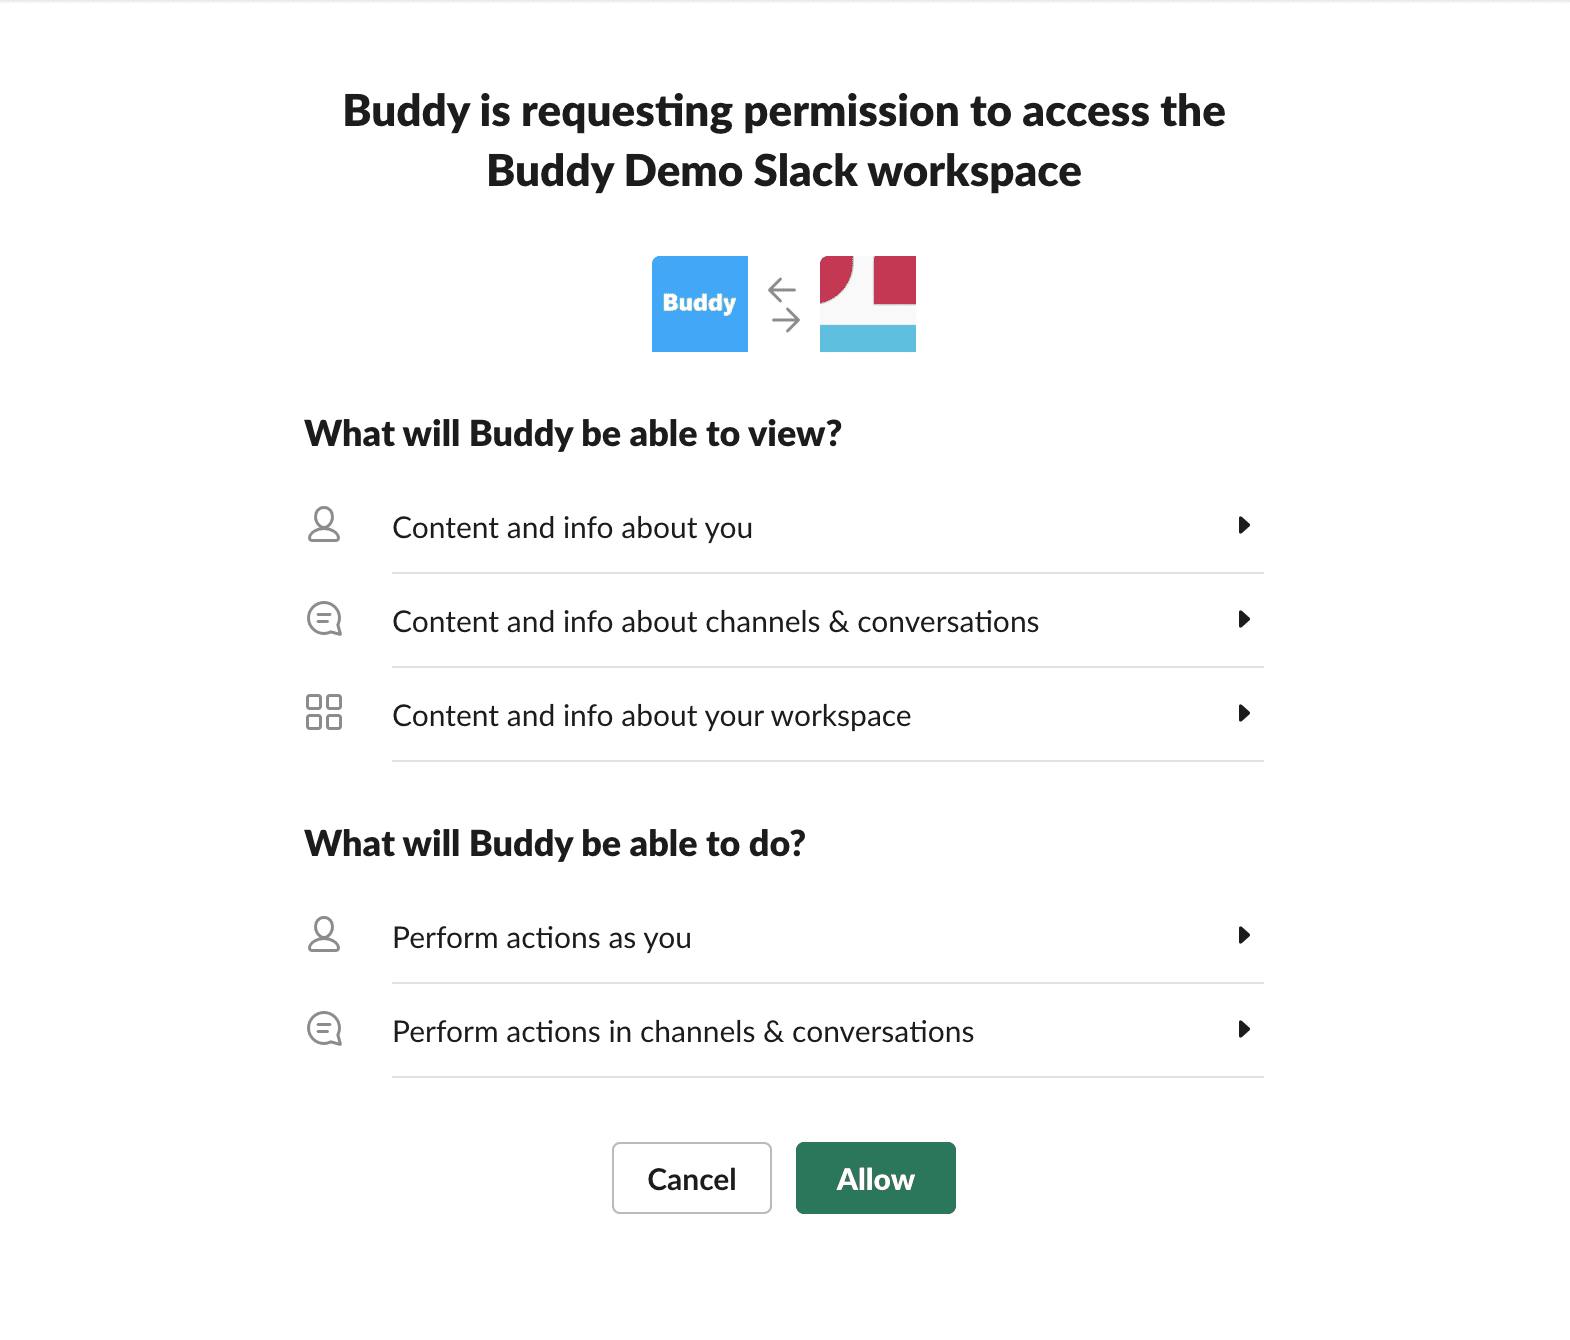
The last step is accepting the OAuth permissions of the chosen application:
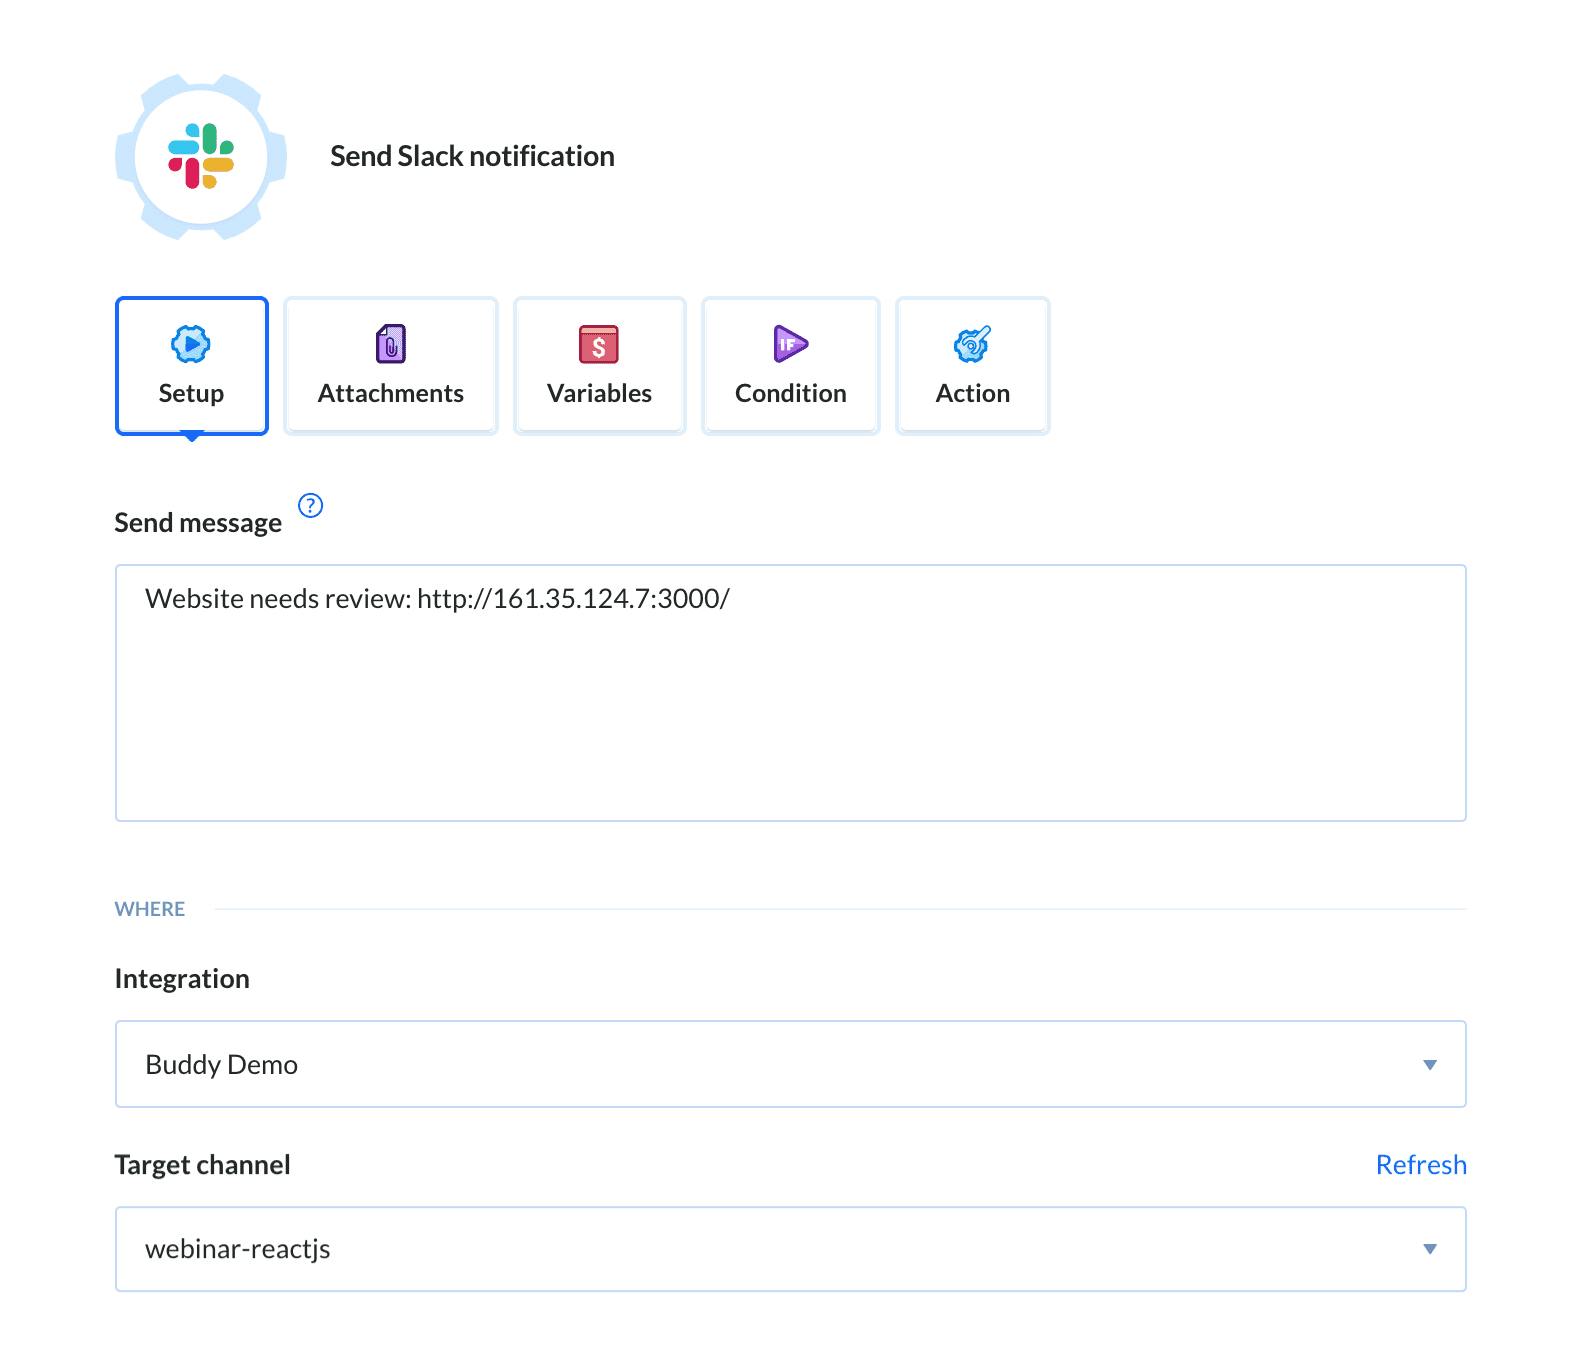
With the integration configured, you can specify the message. A good idea is to paste the URL to the staged website so that your teammates can quickly access it:
Testing Staging-to-Production deployment
Make some changes to the website and run the pipeline. The execution should stop right before the release to production:
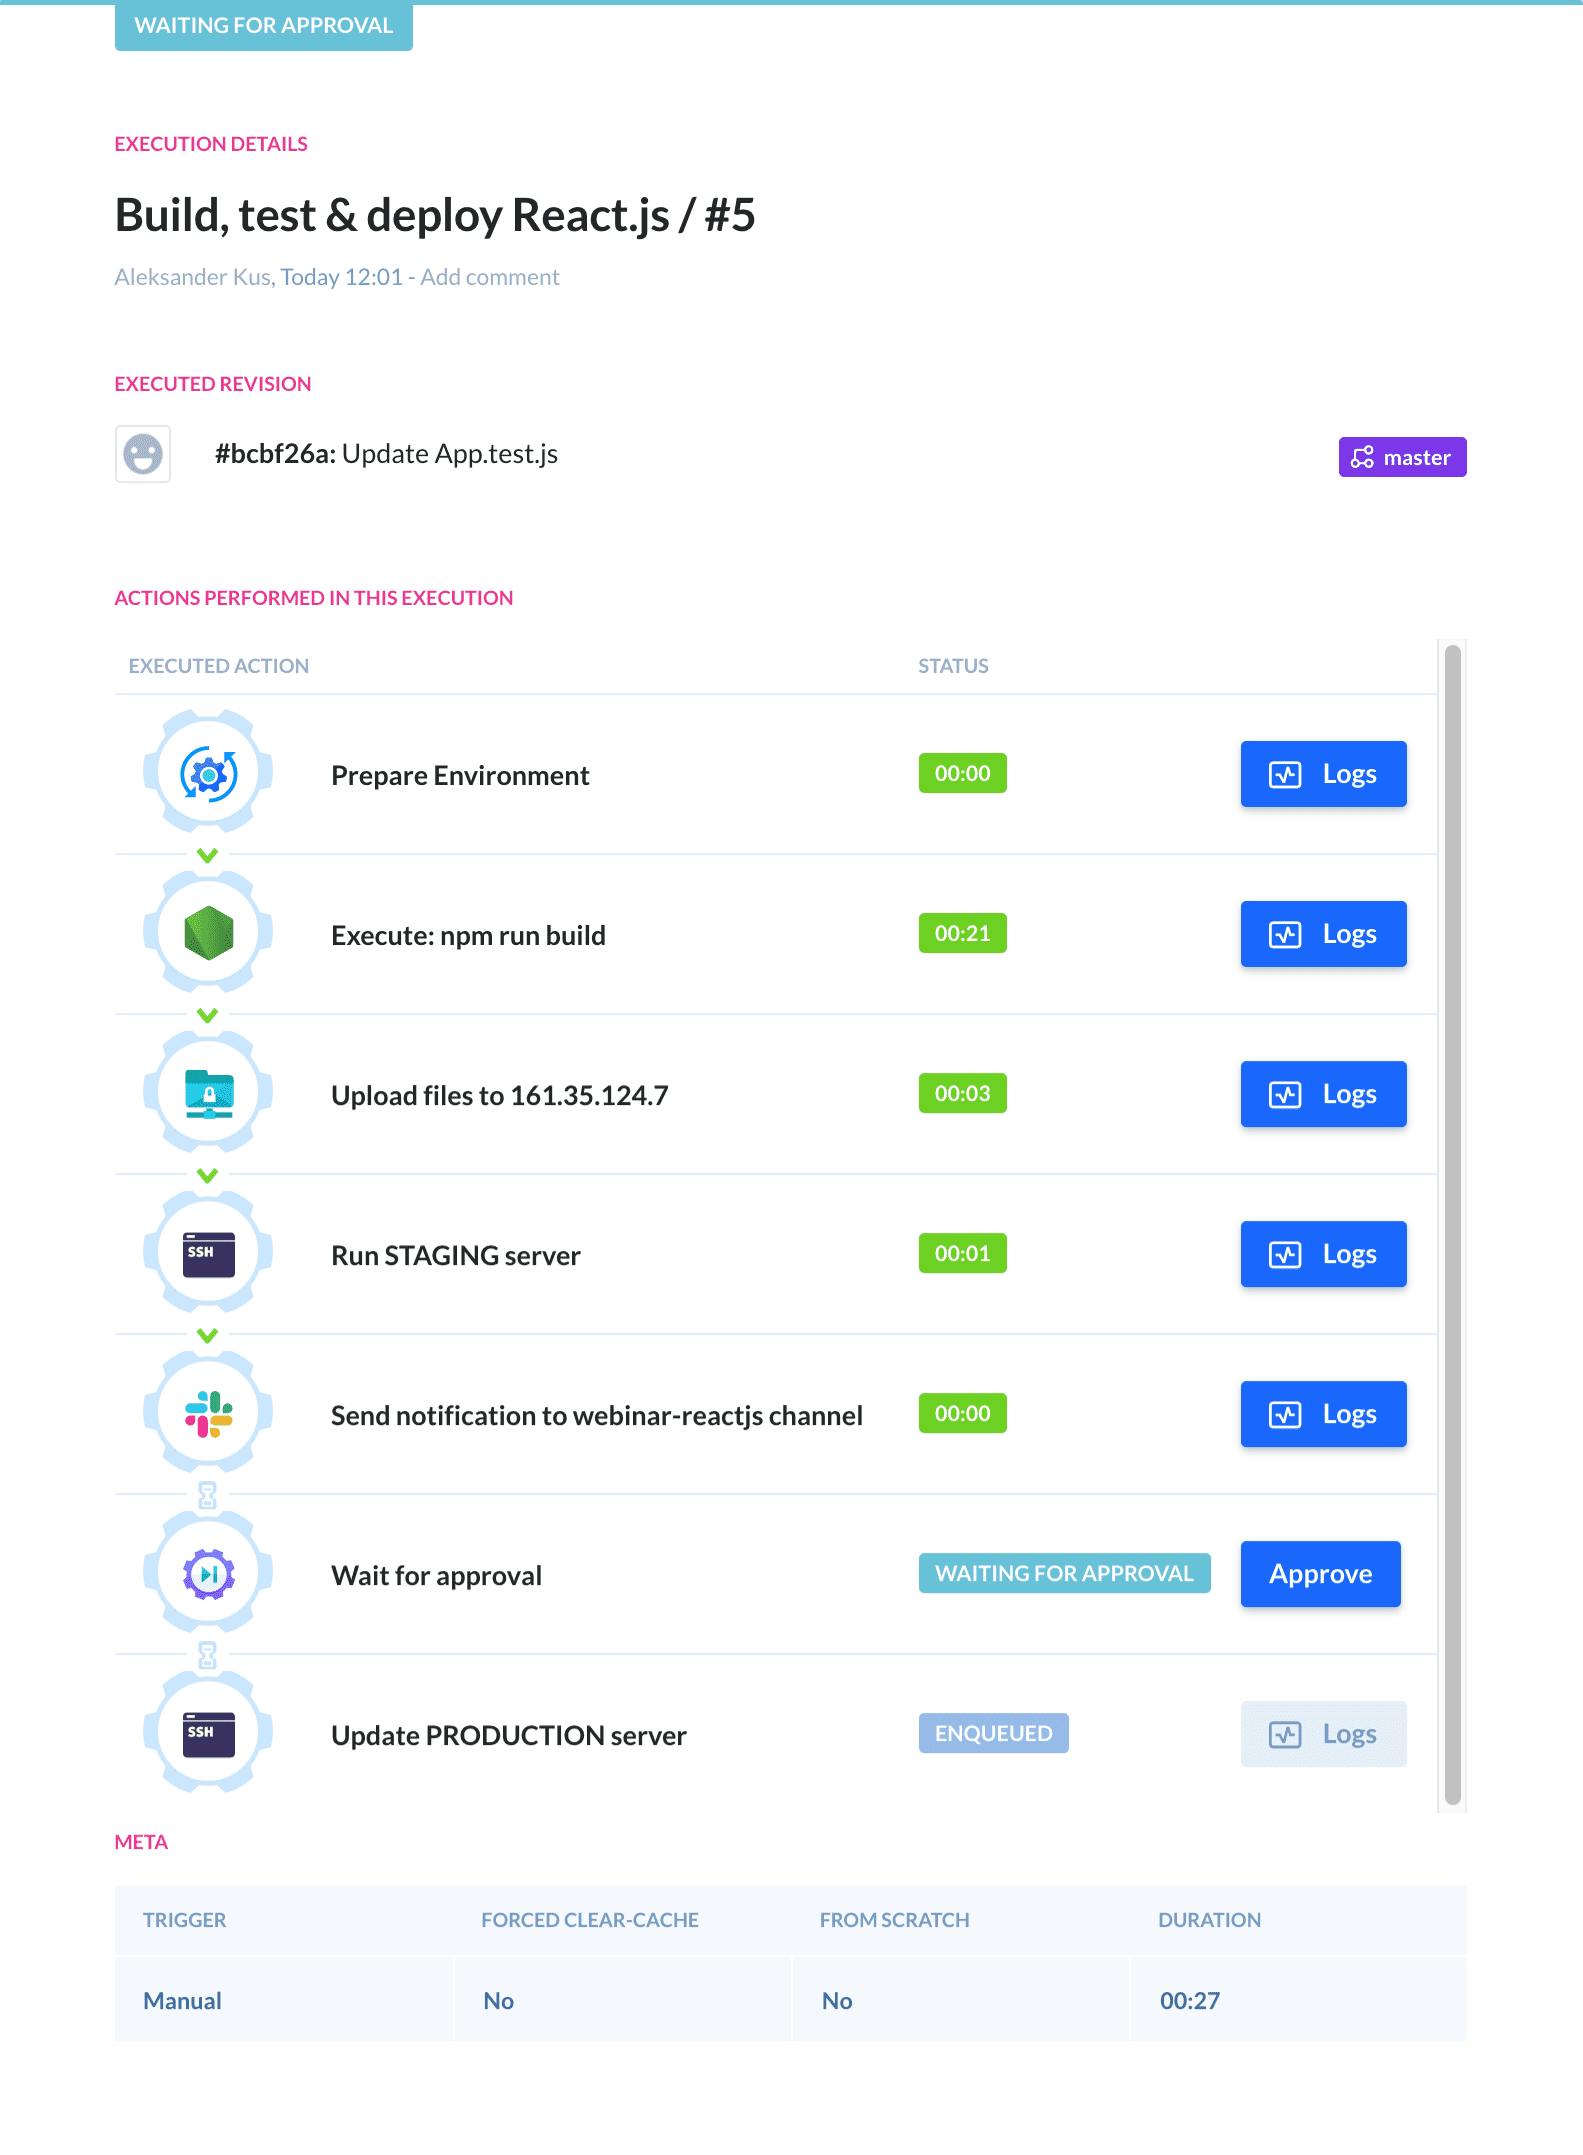
You should also receive a notification in the selected service:

Click the Approve button to proceed with the remaining action and release the website live.
Congratulations — you have successfully created a complete Stage/Production delivery pipeline for your website! 🎉
Extra: Conditional notifications
📺 Video Timestamp: 28:39
The pipeline is now fully functional. It delivers the application with no downtime, uploads the website to a staging server, informs the team there’s a new version waiting for review, and, once the changes have been approved, releases it to production.
But what if something goes wrong during the process? For example, what if the tests fail? Well, the first thing to do is to inform the right people. We already have a notification action about the new release targeted at capable developers. However, in this case, we need to inform the QA — yet only if the pipeline breaks.
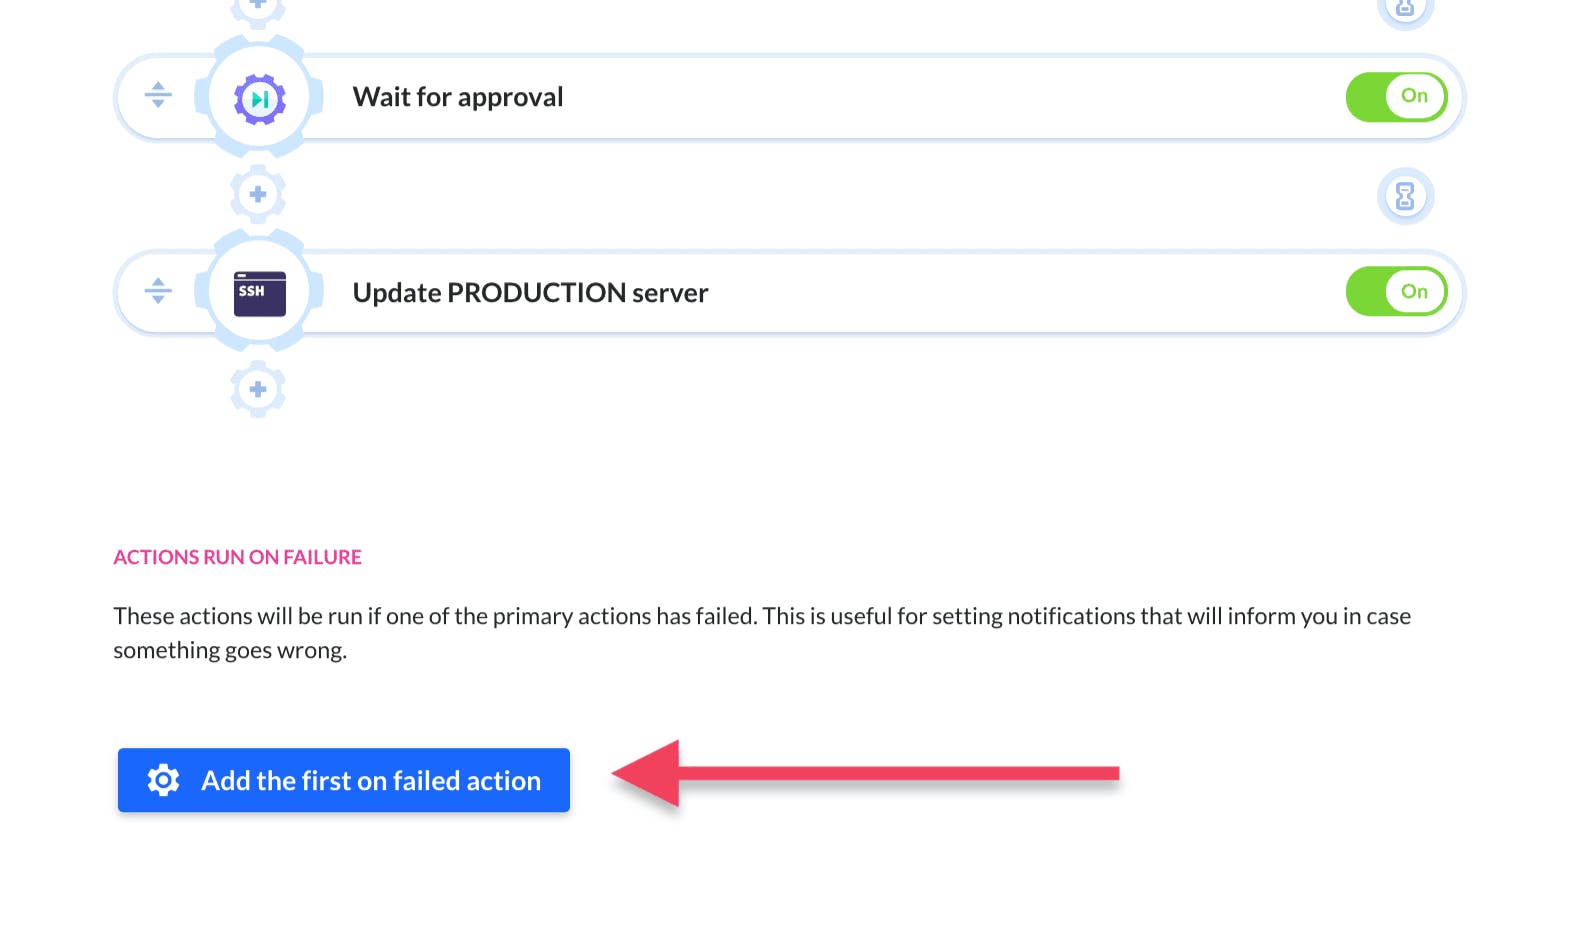
Go to your pipeline’s overview and click the button in the Actions run on failure section:
Add another notification of your choice. Edit the message and select the proper channel/recipient:
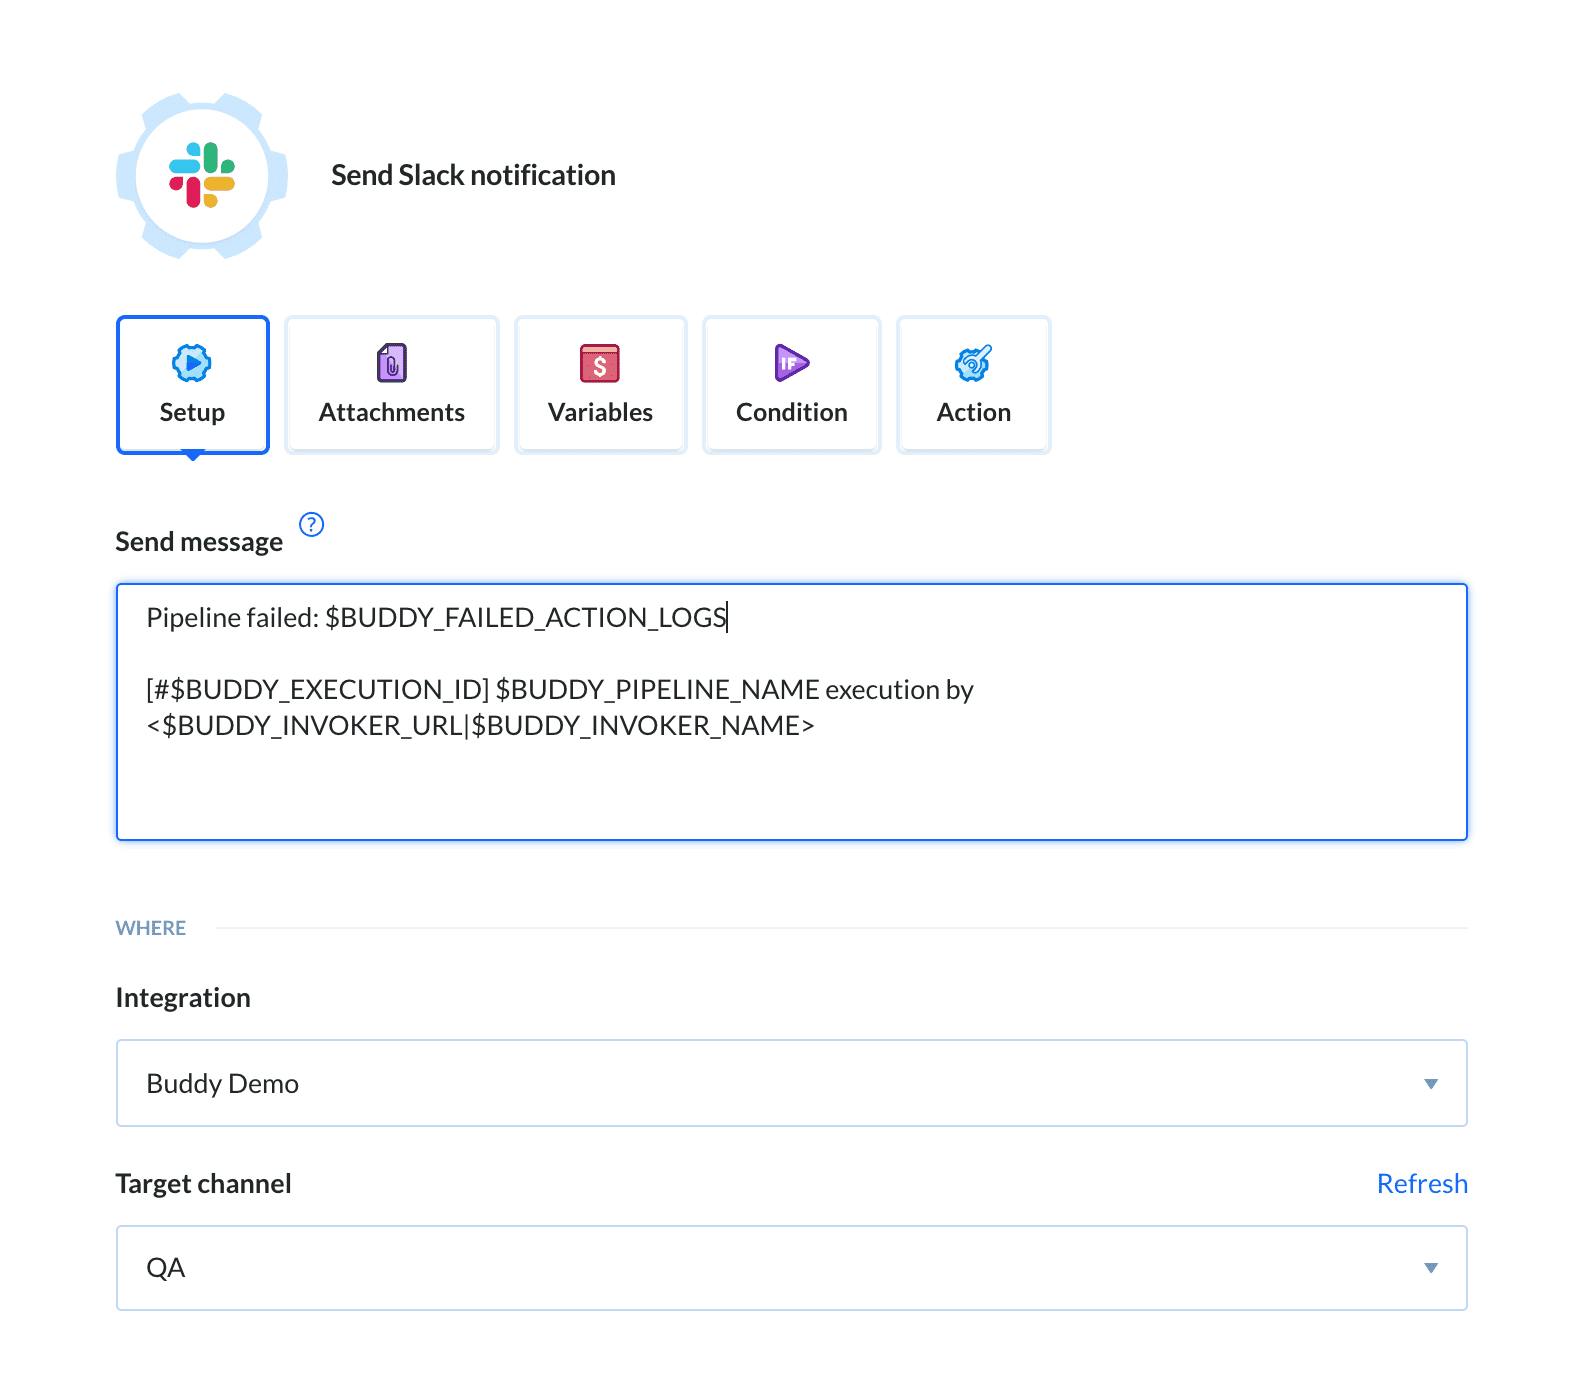
You can use
BUDDY_FAILED_ACTION_LOGSenvironment variable to attach the logs from the failed action.
Testing conditional notifications
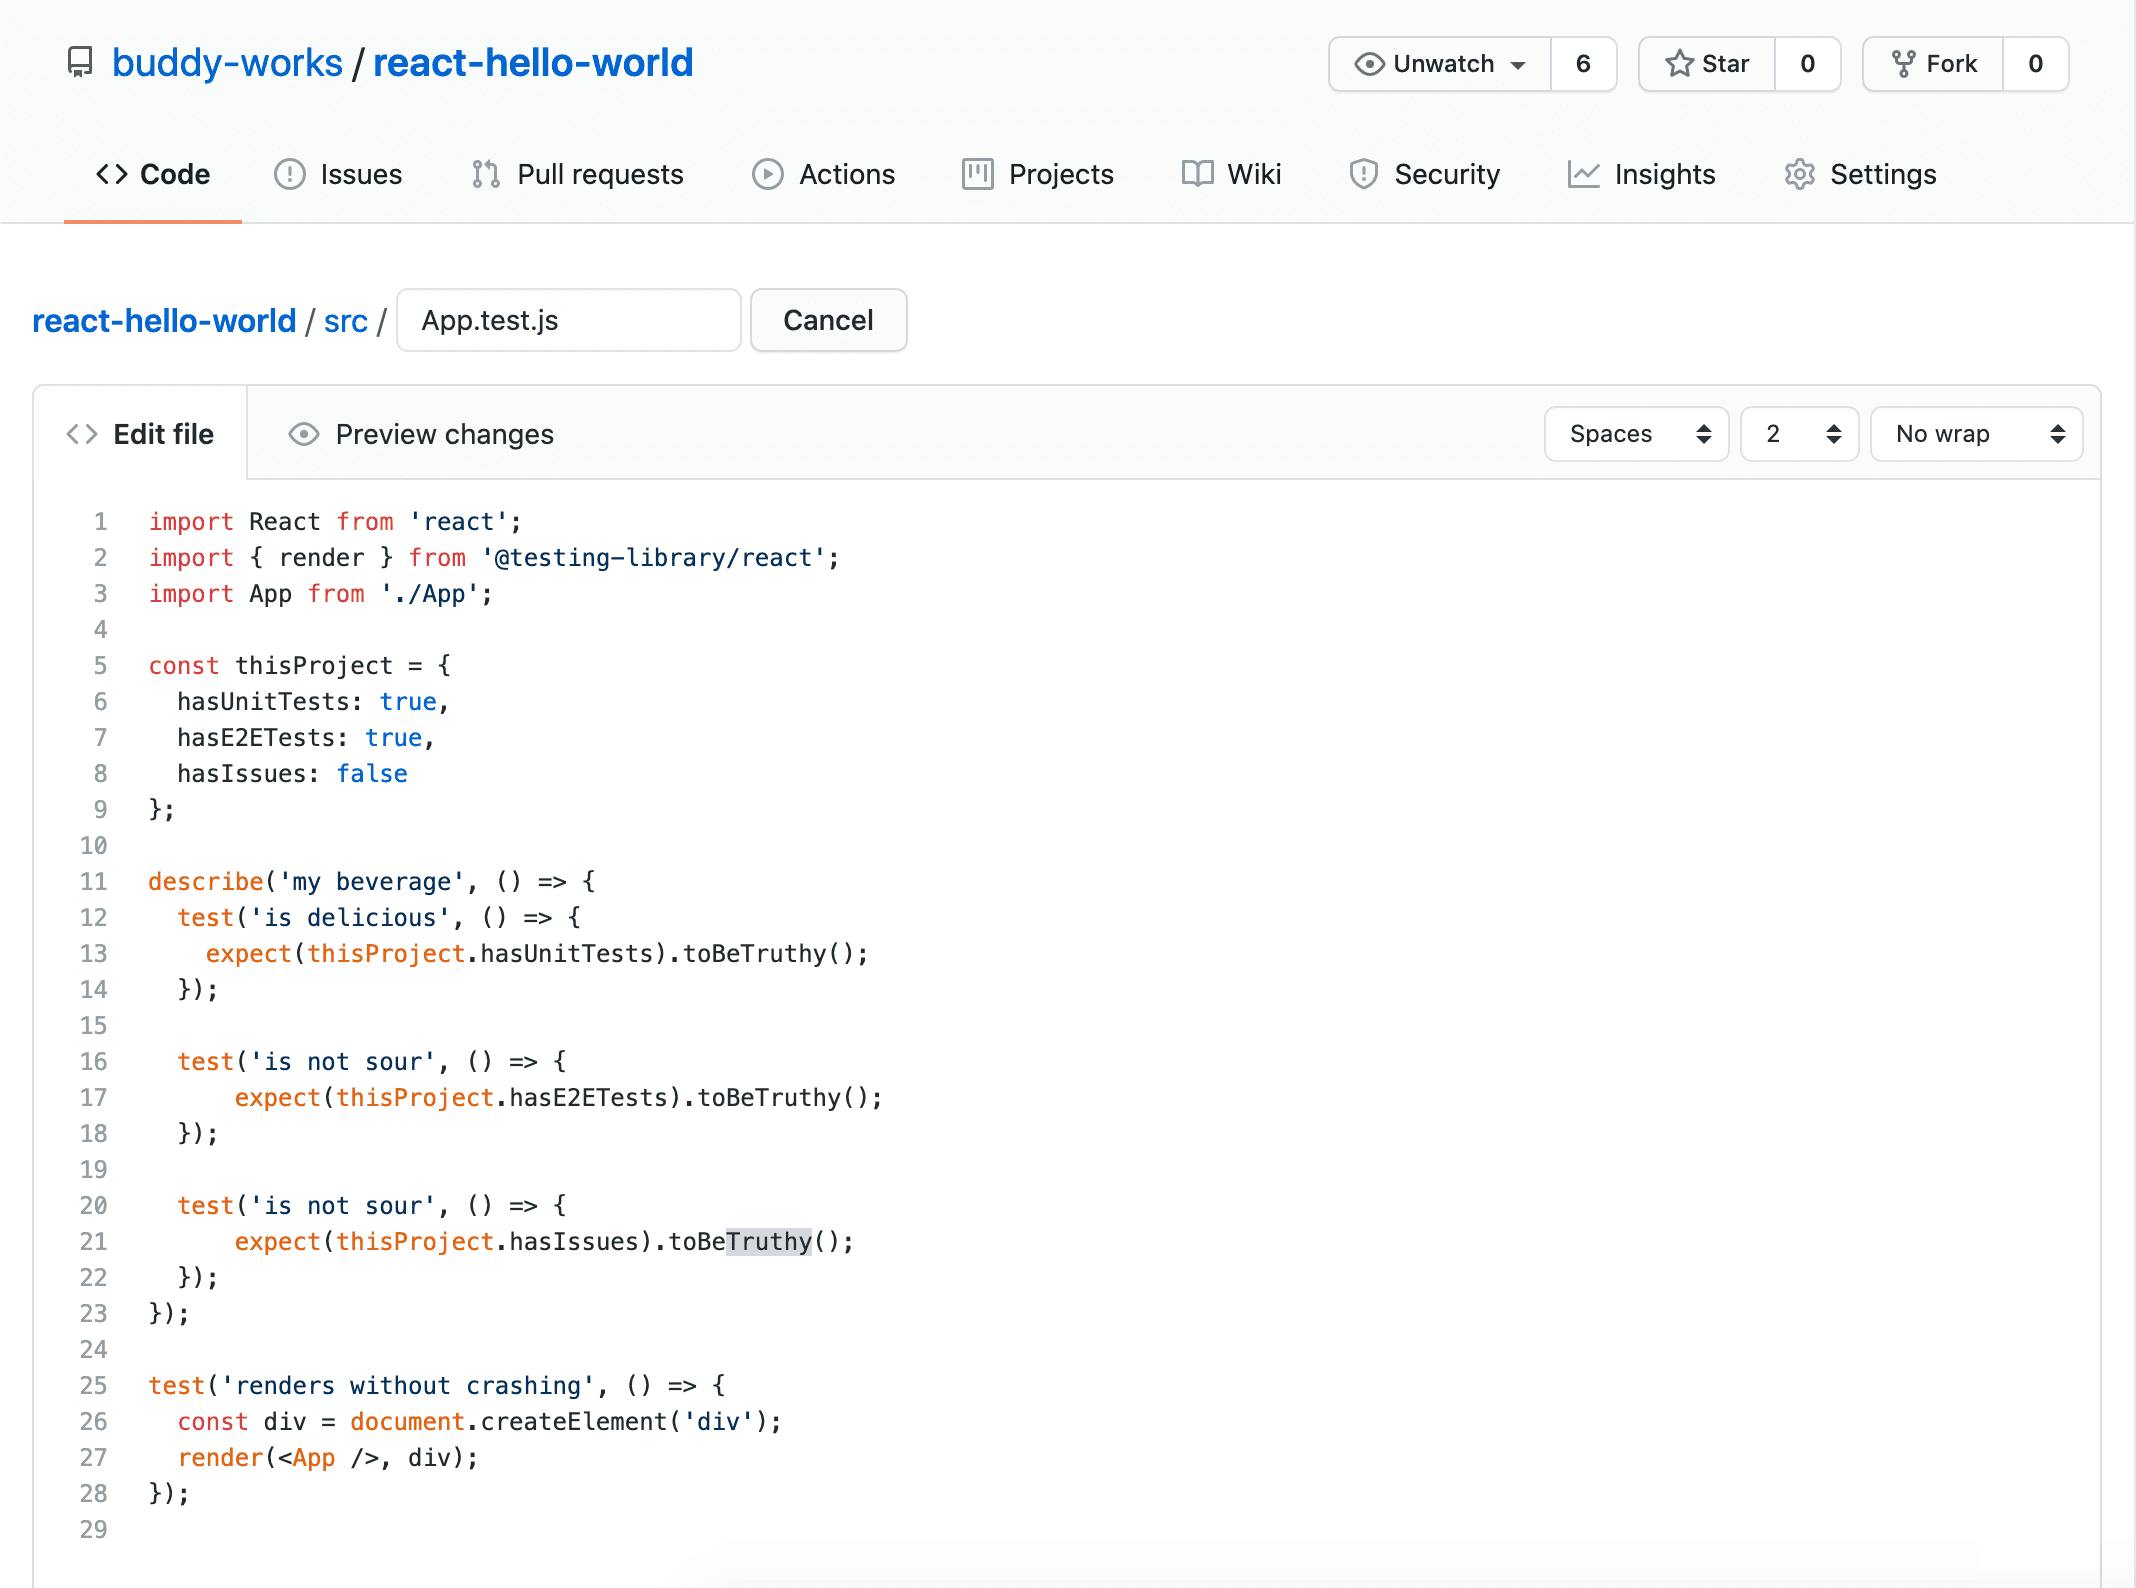
Time for the fun part — go ahead and mess up something with your website. For instance, let’s break an assert in /src/App.test.js:
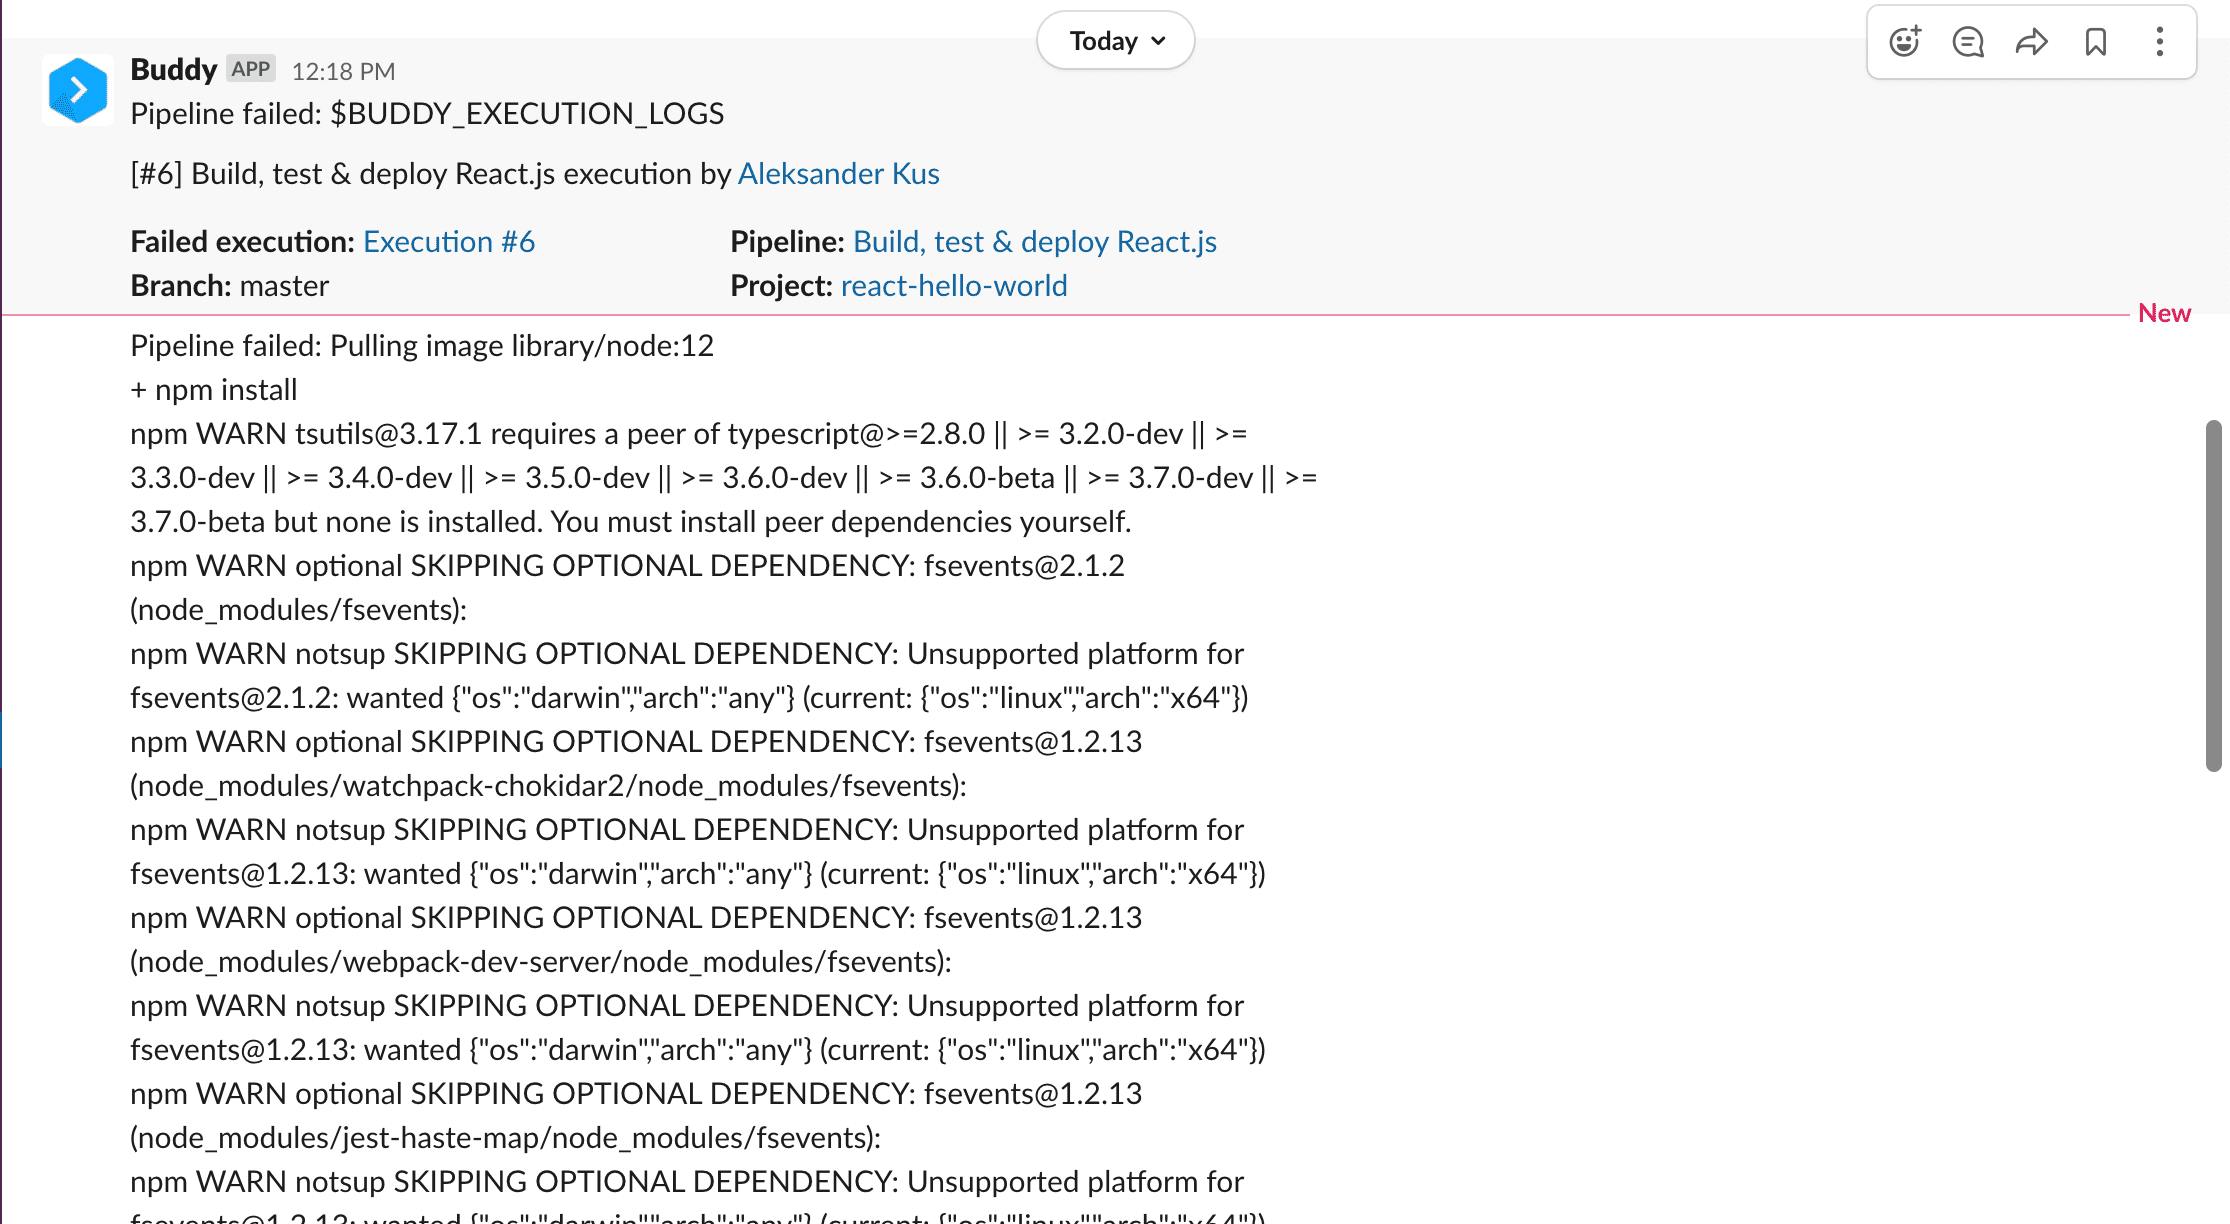
Push the changes to trigger the pipeline. The execution will fail on the step with the tests. No further actions will be performed — except the notification at the very end:
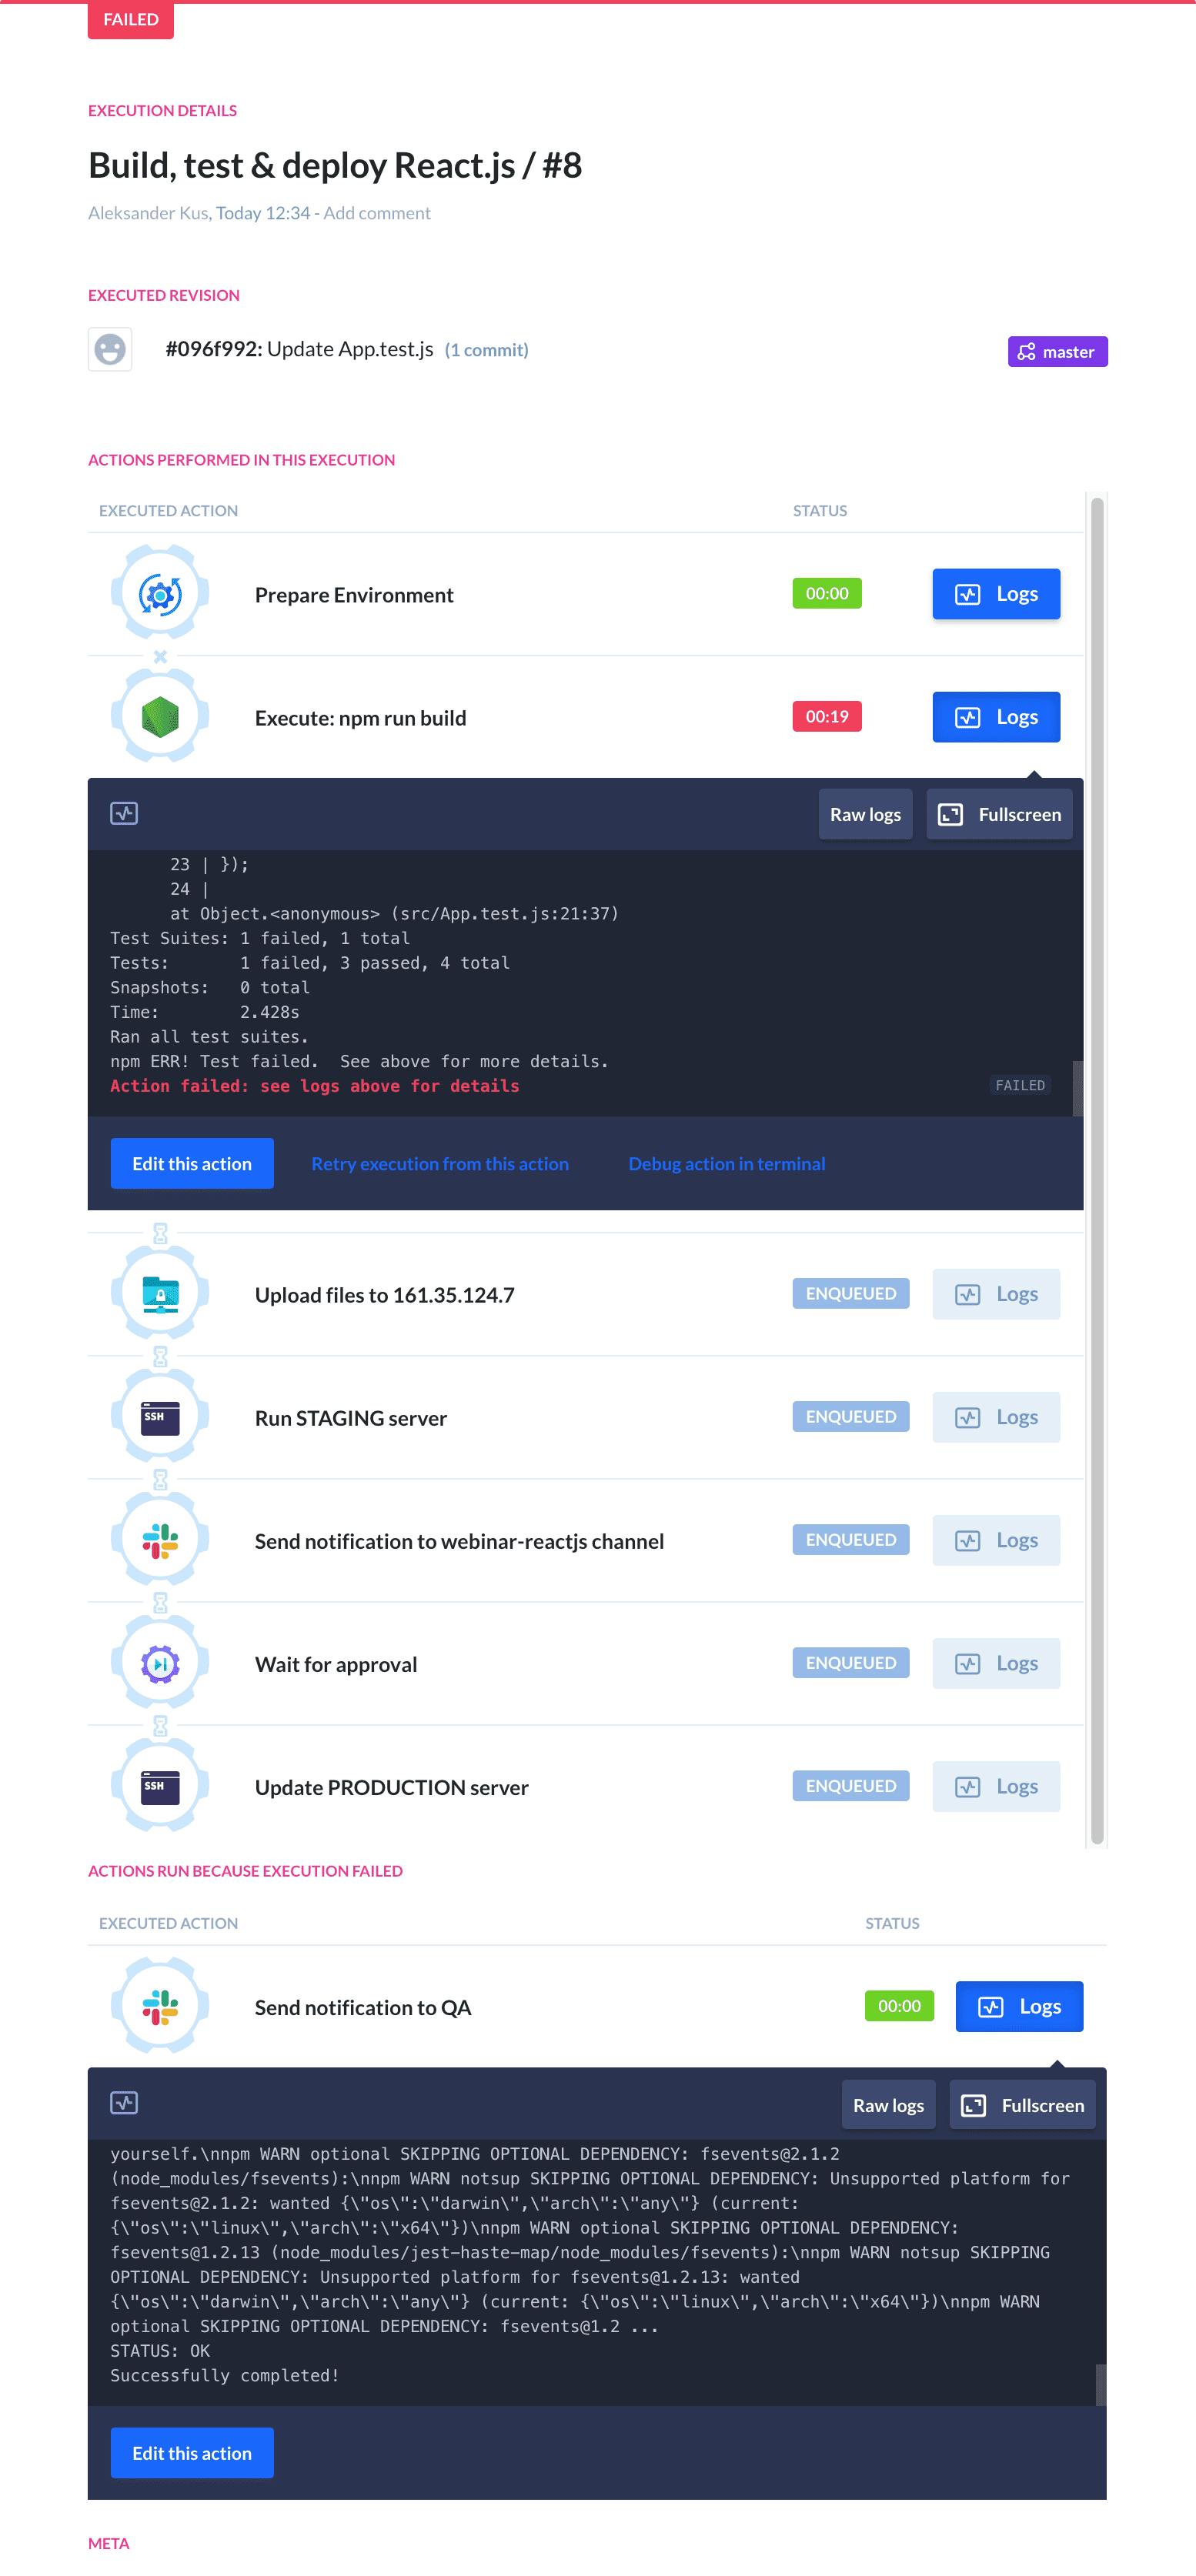
If you added BUDDY_FAILED_ACTION_LOGS variable to the notification, Buddy will attach the logs to help your team streamline debugging:
Extra: Debugging in terminal
📺 Video Timestamp: 30:52
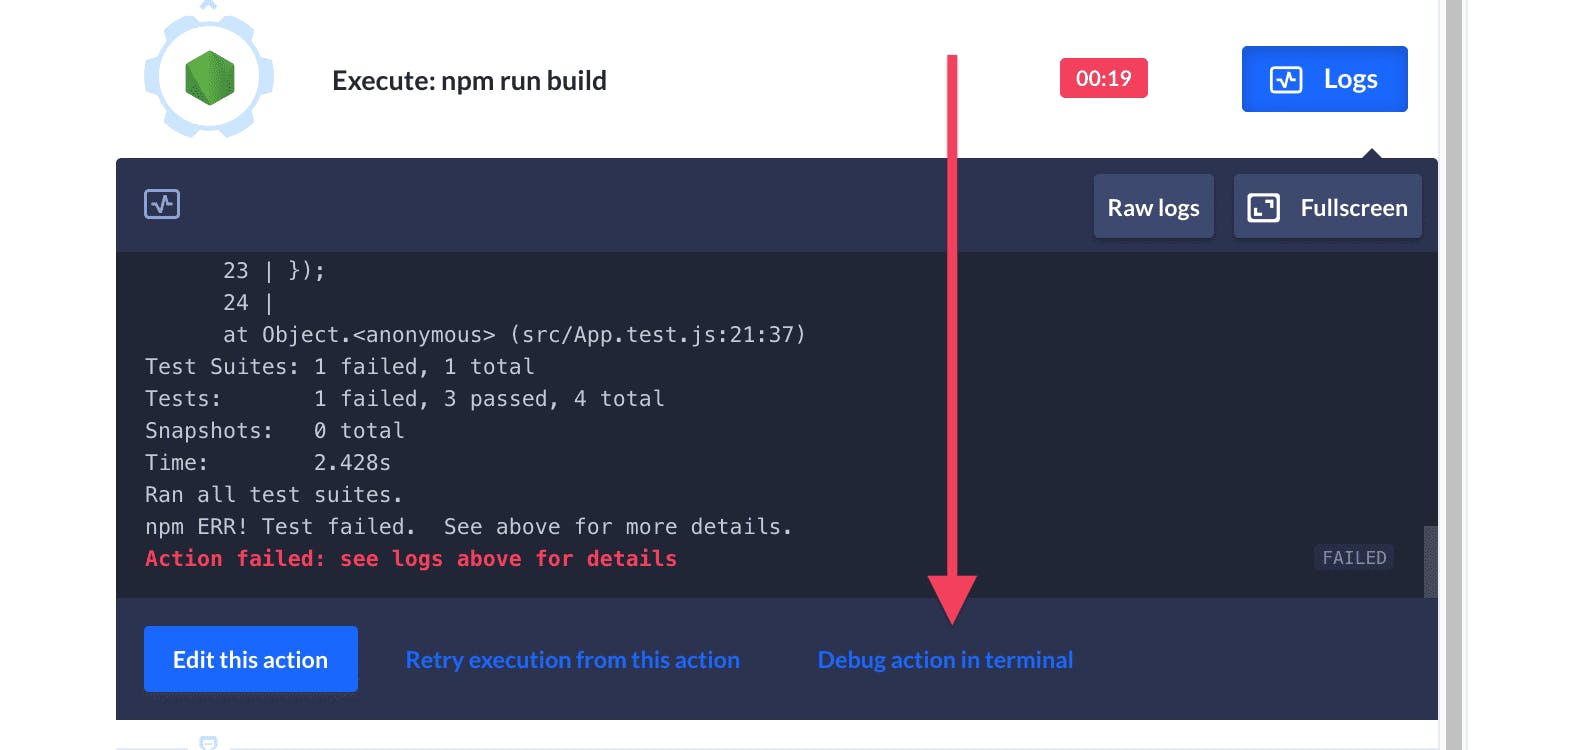
Buddy has a cool feature that lets you debug errors directly from the terminal. To access it, go to the desired execution and click Debug action in terminal on the failed action:
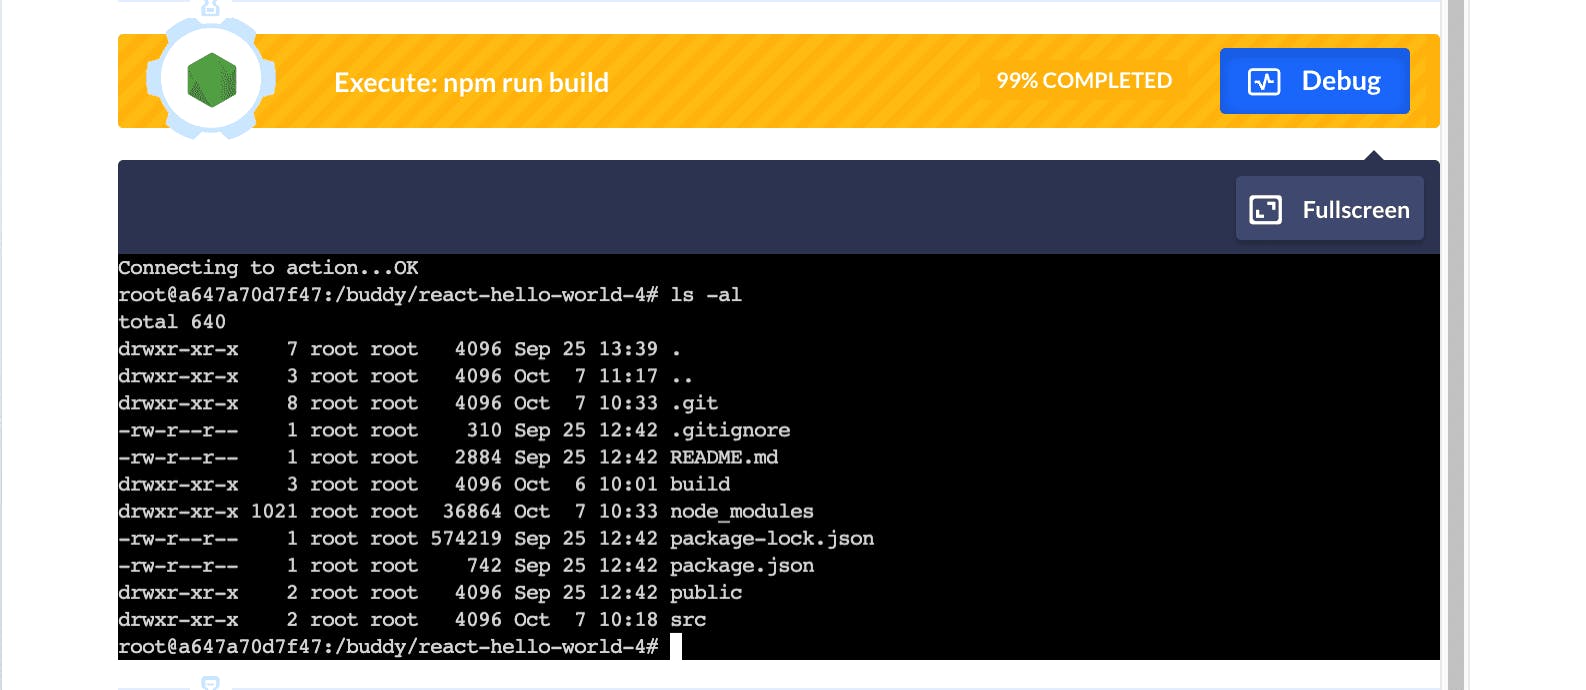
Buddy will fire the container back up allowing you to run commands and debug the problem in interactive mode:
Please mind that terminal debugging is treated like a normal execution. Unless you have parallelism active in your workspace, any subsequent execution will be queued.
Summary
The practices presented in this guide cover the basics of Continuous Integration and Deployment with Buddy. Applying deployment automation alone is a game-changer on its own in terms of frequency at which the software is released, providing a massive boost to efficiency and work comfort. The flexible nature of pipelines and visualized interface allows you to add and remove actions on-the-fly without referring to documentation, while Docker containers ensure one consistent environment across the whole team.
All in all, Buddy is more like a playground in which you can create automation workflows just like you build a house of bricks: pick an element that you need, adjust where necessary, and see how it fits in. Do not be deceived by the looks, though, as Buddy is as much powerful as any other CI/CD tool that you might’ve used so far — it just lowers the entry threshold to the obscure arcana of DevOps magic.
Originally published at https://buddy.works/ on October 8, 2020.